click clock cube manual

Welcome to the Click Clock Cube Manual․ Discover how to maximize your experience with this sleek, minimalist alarm clock․ Explore its features, setup, and advanced functions․

Overview of the Click Clock Cube

The Click Clock Cube is a sleek, minimalist alarm clock featuring a sound-activated LED display․ It shows time, date, and temperature through a hidden LED matrix․ Designed for simplicity and functionality, it combines touch control with a modern aesthetic, making it a practical addition to any space․ This manual guides users through setup, features, and troubleshooting, ensuring optimal use of the device․ Learn how to configure and customize your Click Clock Cube for a seamless experience․

Importance of the Manual for Users

This manual is essential for unlocking the full potential of the Click Clock Cube․ It provides clear instructions for setup, customization, and troubleshooting, ensuring users can navigate all features effortlessly․ By following the guidelines, users can optimize their experience, customize alarms, and maintain the device properly․ The manual also offers insights into advanced functions, helping users make the most of their Click Clock Cube․ Refer to this guide to troubleshoot common issues and enhance your overall satisfaction with the product․

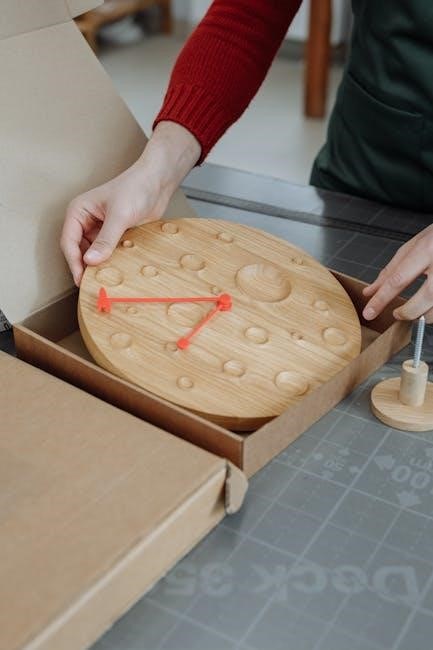
Unboxing and Initial Setup

Begin by carefully unboxing the Click Clock Cube and its accessories․ Follow the step-by-step guide to set up your device, ensuring proper configuration for optimal performance․

What’s Included in the Package

Your Click Clock Cube package contains the clock itself, a USB-C charging cable, a power adapter, and a detailed user manual․ Additionally, you may find a cleaning cloth and a quick-start guide․ The minimalist design ensures a clutter-free unboxing experience, with eco-friendly packaging․ Everything you need to get started is included, focusing on essential items for functionality and ease of use․ No unnecessary accessories—just the basics to enjoy your Click Clock Cube right away․

First-Time Configuration Steps

Begin by charging the Click Clock Cube using the provided USB-C cable․ Once charged, press and hold the power button to turn it on․ Use the touch-sensitive interface to set the time, date, and alarm․ Navigate through the menu by tapping or swiping on the LED display․ Adjust brightness and sound levels to your preference․ Pair with your smartphone via Bluetooth for additional features․ Refer to the manual for detailed instructions on syncing and customizing settings․ Ensure the device is fully updated before first use for optimal performance․

Design and Features

The Click Clock Cube combines a minimalist design with cutting-edge technology․ Its sleek, sound-activated LED display shows time, date, and temperature․ Touch controls offer intuitive navigation․

Key Components of the Click Clock Cube

The Click Clock Cube features a sound-activated LED display that shows time, date, and temperature․ It includes touch controls for intuitive navigation and a minimalist design for a sleek appearance․ The device also has an alarm system with customizable settings and a temperature display function for added convenience․ These components work together to provide a user-friendly experience, blending functionality with modern aesthetics․

LED Display and Touch Control Functions

The Click Clock Cube features a sound-activated LED display that remains hidden until triggered by noise․ This innovative design provides a sleek, minimalist appearance while maintaining functionality․ The touch control interface allows users to navigate modes, adjust settings, and set alarms with a simple touch․ The LED display showcases time, date, and temperature in a clear, modern format․ These functions combine to offer a seamless and intuitive user experience, making the Click Clock Cube both practical and visually appealing for daily use․

Sound-Activated and Minimalist Design

The Click Clock Cube boasts a sound-activated LED display that remains hidden until triggered by noise, offering a sleek, minimalist aesthetic․ This design ensures the clock blends seamlessly into any room while maintaining functionality․ The display shows time, date, and temperature through a hidden LED interface, enhancing its modern appeal․ The minimalist design focuses on simplicity and usability, providing an unobtrusive yet practical solution for daily timekeeping․ This feature-rich yet understated approach makes the Click Clock Cube a stylish addition to any space․

Technical Specifications

The Click Clock Cube features an LED display with adjustable brightness, USB-C charging, up to 6-month battery life, Bluetooth 5․0 connectivity, and iOS/Android compatibility․

Power and Charging Requirements

The Click Clock Cube is powered by a rechargeable lithium-ion battery, offering up to 6 months of use on a single charge․ It charges via USB-C, ensuring quick and efficient power replenishment․ The device features low power consumption, making it energy-efficient․ An LED indicator signals when charging is required or completed․ To maintain optimal performance, avoid overcharging and store the device in a cool, dry place when not in use․ Follow the included charging cable for reliable power management․

Display Resolution and Brightness Settings

The Click Clock Cube features a high-resolution LED display, ensuring crisp and clear visuals․ Brightness can be adjusted manually or set to auto-dim based on ambient light․ This adaptive feature optimizes visibility while conserving battery life․ The display resolution is designed to provide sharp text and numbers, enhancing readability․ Users can customize brightness levels to suit their preferences, ensuring the clock remains functional yet unobtrusive in any setting․ This versatility makes the Click Clock Cube both practical and visually appealing for daily use․

Connectivity Options and Compatibility

The Click Clock Cube offers seamless connectivity through Bluetooth and Wi-Fi, enabling easy integration with smart devices․ Compatible with both iOS and Android systems, it supports voice commands via popular virtual assistants․ The clock can sync with mobile apps for enhanced functionality, ensuring updates and customizations are readily accessible․ Its universal compatibility makes it a versatile addition to any smart home setup, providing a smooth and intuitive user experience across various platforms and devices․

Using the Click Clock Cube

Learn to operate the Click Clock Cube effortlessly․ Set time, date, and alarms using touch controls․ Adjust brightness and sound levels for a personalized experience․

Setting the Time, Date, and Alarm

To set the time and date on your Click Clock Cube, tap the touch-sensitive surface to access the menu․ Swipe left or right to navigate through options․ Select the time and date settings by tapping firmly․ Use the same method to set alarms, choosing from predefined tones or custom sounds․ Ensure the LED display confirms your selections․ Save your settings by holding the touch area for two seconds․ Customize alarms for different days or one-time use for flexibility․ This feature ensures you stay on schedule with ease and precision․

Navigating Through Modes and Options

Navigate effortlessly through the Click Clock Cube’s modes using its intuitive touch controls․ Swipe left or right to cycle through time, date, and alarm modes․ Tap gently to select an option or hold to access additional settings․ The LED display will illuminate to confirm your selections․ Use the touch-sensitive surface to adjust values or toggle features․ Press and hold to save changes or exit the menu․ This seamless interface ensures a user-friendly experience, allowing you to customize your clock with ease and precision․

Adjusting Brightness and Sound Levels

Adjust the Click Clock Cube’s brightness by sliding your finger up or down on the touch-sensitive surface․ For sound levels, tap the button once to enter audio mode, then swipe left or right to increase or decrease volume․ The LED display will show the current level․ To mute, press and hold the button until the display confirms․ Use these intuitive controls to customize your experience, ensuring the clock suits your environment perfectly day or night․

Advanced Features

Explore the Click Clock Cube’s advanced features, including customizable alarms, temperature display, and LED control options, to enhance your user experience and device functionality․

Customizing Alarms and Notifications

The Click Clock Cube allows users to set multiple alarms with customizable tones and volumes․ Notifications can be enabled for specific events, ensuring you stay informed․ Use the touch control interface to adjust alarm settings and notification preferences effortlessly․ The LED display brightness can also be tailored to your liking, providing a seamless experience․ With these features, you can personalize your device to meet your unique needs and preferences, enhancing both functionality and convenience in your daily routine․

Using the Temperature Display Function

The Click Clock Cube features an integrated temperature display, providing real-time ambient temperature readings․ To enable this function, navigate to the settings menu using the touch control interface․ Select the temperature option to view current readings on the LED display․ The device supports both Celsius and Fahrenheit formats, which can be toggled in the settings․ Ensure your device is updated to the latest firmware for accurate temperature readings․ This feature enhances the clock’s functionality, making it a versatile tool for monitoring your environment effortlessly․

Enabling and Disabling LED Display

To customize your experience, the Click Clock Cube allows you to enable or disable the LED display․ Press and hold the touch-sensitive surface for three seconds to toggle the display on or off․ This feature is handy for reducing light disturbance in dark environments․ When disabled, the clock retains all functionalities but operates in a stealth mode, preserving its minimalist aesthetic․ Use this option to balance visibility and ambiance according to your preferences․ The LED display can be reactivated anytime using the same method, ensuring flexibility for varying situations․ This feature enhances the device’s versatility and user-friendly design․ Use it wisely to suit your lifestyle needs․

Troubleshooting Common Issues

Encounter problems? This section helps resolve common issues like connectivity loss or display malfunctions․ Restart the device, check settings, or refer to advanced solutions for quick fixes․

Resolving Connectivity Problems

If your Click Clock Cube experiences connectivity issues, start by restarting the device and your Wi-Fi router․ Ensure the cube is connected to the correct network and check for any network congestion․ If issues persist, reset the device to factory settings or update its firmware․ Consult the user manual for detailed step-by-step instructions to restore stable connectivity and optimal performance․ Regular firmware updates can also prevent recurring connection problems․

Fixing Display Malfunctions

If the LED display on your Click Clock Cube is malfunctioning, such as flickering or not lighting up, start by ensuring it is properly powered and charged․ Check the brightness settings and adjust them if necessary․ Clean the display surface to remove any obstructions․ If the issue persists, restart the device or reset it to factory settings․ Ensure the LED display feature is enabled in the settings․ For severe cases, update the firmware or contact customer support for further assistance to restore normal functionality․

Addressing Battery Life Concerns

If you’re experiencing issues with the Click Clock Cube’s battery life, ensure the device is charged correctly using the provided cable․ Reduce screen brightness and disable unnecessary features like sound activation or LED display when not in use․ Avoid overcharging, as this can degrade battery health․ If the battery drains quickly, check for firmware updates, as newer versions may optimize power consumption․ Clean the charging port to ensure proper connectivity․ If issues persist, contact customer support for assistance or consider replacing the battery if applicable․

Maintenance and Care

Regularly clean the LED display with a soft cloth to maintain clarity․ Update firmware for optimal performance․ Store the device in a dry, cool place when not in use․

Cleaning the LED Display

To maintain the clarity and functionality of the Click Clock Cube’s LED display, clean it regularly with a soft, dry cloth․ Avoid using harsh chemicals, liquids, or abrasive materials, as they may damage the screen․ Gently wipe away dust or fingerprints, ensuring no moisture comes into contact with the display․ For stubborn smudges, lightly dampen the cloth with distilled water, but avoid direct spraying․ Regular cleaning ensures optimal visibility and performance of the LED display, preserving its sleek, minimalist appearance․ Proper care extends the lifespan of your device․

Updating Firmware and Software

To keep your Click Clock Cube functioning optimally, regular firmware and software updates are essential․ Connect the device to your computer using the provided USB cable and launch the STM32CubeIDE․ Follow the on-screen instructions to check for and install the latest updates․ Additionally, you can check for updates through the official Gingko website or the companion mobile app․ Updates often include new features, bug fixes, and performance improvements․ Ensure your device is fully charged before proceeding․ Always follow the manufacturer’s instructions to avoid any potential issues during the update process․

Storing the Device Properly

For long-term storage, place the Click Clock Cube in a cool, dry environment․ Avoid direct sunlight and moisture to prevent damage․ Store the device in its original packaging or a protective case to prevent scratches․ Disconnect any cables or accessories to avoid wear and tear․ Ensure the device is clean and free of dust before storage․ Do not store in extreme temperatures or humid conditions․ Proper storage will maintain the device’s functionality and extend its lifespan․ Always follow the manufacturer’s guidelines for storage to preserve your Click Clock Cube’s performance and appearance․

Integration with Smart Systems

The Click Clock Cube seamlessly integrates with smart home devices, enhancing its functionality․ Compatible with popular smart systems, it offers voice control and mobile app syncing capabilities․

Connecting to Smart Home Devices

The Click Clock Cube can be effortlessly integrated with your smart home ecosystem․ Using its advanced connectivity features, you can pair it with devices like Amazon Alexa or Google Home․ Simply follow the pairing process through the companion app to enable seamless voice control and synchronized functionality․ This integration allows you to manage multiple smart devices from a single interface, enhancing convenience and streamlining your daily routine․ Ensure your Click Clock Cube is updated to the latest firmware for optimal compatibility with your smart home system․

Using Voice Commands for Control

Experience hands-free convenience with the Click Clock Cube by using voice commands․ Compatible with Amazon Alexa and Google Assistant, you can set alarms, adjust brightness, or toggle the LED display․ Simply enable the Click Clock Cube skill or action in your preferred voice assistant app․ Ensure your device is connected to the internet for seamless voice integration․ This feature enhances your user experience, allowing you to control your clock effortlessly․ Refer to the app for detailed setup instructions and explore more voice-command capabilities to personalize your interactions with the Click Clock Cube․

Syncing with Mobile Applications

To enhance your Click Clock Cube experience, sync it with the dedicated mobile app․ Download and install the app, then enable Bluetooth on your device․ Open the app and follow the pairing instructions to connect your clock․ Once synced, you can adjust settings, set alarms, and monitor notifications directly from your smartphone․ This integration allows for seamless control and customization, ensuring your Click Clock Cube stays perfectly tailored to your preferences․ Regular app updates may add new features, so keep your software up to date for optimal performance․

User Reviews and Feedback

Users praise the Click Clock Cube for its sleek, minimalist design and user-friendly manual․ The sound-activated LED display and seamless app integration are particularly favored features․

Common Praise for the Click Clock Cube

The Click Clock Cube has received widespread acclaim for its elegant, minimalist design and intuitive functionality․ Users highlight its seamless integration with smart home systems, voice command compatibility, and customizable alarms․ The sound-activated LED display is particularly praised for its convenience and modern aesthetic․ Many appreciate the device’s portability and long battery life, making it a practical addition to daily routines․ Overall, the Click Clock Cube is celebrated for blending innovation with simplicity, offering a user-friendly experience that enhances productivity and convenience․

Identifying Areas for Improvement

While the Click Clock Cube has been well-received, some users have noted areas for enhancement․ A few have mentioned limited customization options for alarms and occasional connectivity issues with smart home systems․ Additionally, the LED display’s brightness settings could be more granular, and the touch controls might benefit from increased sensitivity․ Addressing these minor drawbacks could further elevate the device’s functionality and user satisfaction, ensuring it continues to meet the evolving needs of its audience while maintaining its sleek, minimalist appeal․

Learning Resources

Explore official guides, online tutorials, and community forums to enhance your Click Clock Cube experience․ These resources offer detailed insights and troubleshooting tips for optimal use․

Official Documentation and Guides

The official Click Clock Cube manual provides comprehensive guidance for users․ Available on the manufacturer’s website, it includes detailed setup instructions, feature explanations, and troubleshooting tips․ The manual covers initial configuration, LED display settings, and advanced functions like alarm customization․ It also offers maintenance advice to ensure longevity․ Users can download the PDF version for easy reference․ Additional resources, such as quick-start guides and video tutorials, are included to help users master the device․ Refer to these materials for a seamless experience with your Click Clock Cube․

Online Tutorials and Videos

Online tutorials and videos provide step-by-step guidance for mastering the Click Clock Cube․ Platforms like YouTube and the manufacturer’s website offer detailed walkthroughs․ These resources cover setup, feature customization, and troubleshooting․ Videos demonstrate how to navigate touch controls, adjust brightness, and enable sound-activated modes․ Tutorials also explore advanced functions, such as syncing with smart systems and setting custom alarms․ Perfect for visual learners, these guides ensure users can fully utilize their device․ They are regularly updated to reflect the latest features and improvements, making them invaluable for both new and experienced users․

Community Forums and Discussions

Community forums and discussions are vibrant spaces where Click Clock Cube users share experiences, tips, and solutions․ These platforms allow users to engage with one another, addressing common queries and exploring creative uses for the device․ Forum members often collaborate on troubleshooting, offer advice for customization, and discuss the latest updates․ They also provide feedback to the manufacturer, helping shape future improvements․ Engaging with these communities enriches the user experience and fosters a sense of belonging among Click Clock Cube enthusiasts․ Active participation ensures everyone gets the most out of their device․

john annie baker pdf

Annie Baker, a Pulitzer Prize-winning playwright, is renowned for her nuanced exploration of human relationships and the subtleties of dialogue. Her play John exemplifies her ability to craft emotionally charged, deeply introspective stories that resonate with audiences, blending realism with philosophical undertones.

Background and Biography of Annie Baker

Annie Baker, born in 1981 in Boston, Massachusetts, is a celebrated American playwright known for her profound exploration of human relationships and the subtleties of dialogue. She graduated from Yale University and later earned her MFA from New York University. Baker’s work often delves into the complexities of everyday life, blending realism with philosophical undertones. Her writing is characterized by nuanced character development and a meticulous attention to detail. Baker has received numerous accolades, including the Pulitzer Prize, for her contributions to contemporary theater. Her plays, such as John, have been widely praised for their emotional depth and thought-provoking themes. Baker’s unique voice has solidified her position as one of the most influential playwrights of her generation.

Annie Baker’s Writing Style and Themes

Annie Baker’s writing is distinguished by its meticulous attention to detail and its exploration of the subtleties of human interaction. Her plays often unfold at a slow, deliberate pace, allowing for deep emotional resonance and psychological complexity. Baker’s work frequently examines themes of existential inquiry, the fragility of relationships, and the search for meaning in everyday life. Her dialogue is remarkably realistic, capturing the nuances of conversation and the unspoken tensions between characters. In John, Baker employs a blend of realism and philosophical reflection, creating a sense of mystery and introspection. Her writing style is both understated and profound, inviting audiences to reflect on the intricacies of human consciousness and the enigmatic nature of reality.

Overview of the Play “John”

Annie Baker’s John is a full-length drama exploring intricate human relationships through subtle dialogue and emotional depth, offering a profound examination of interpersonal connections and existential themes.

Setting and Plot Summary

The play John by Annie Baker is set in a mysterious bed-and-breakfast run by the enigmatic Mertis, where the atmosphere is filled with tension and underlying unease. The story revolves around Elias and Jenny, a young couple on the brink of a breakup, who arrive at the B&B seeking refuge. Their relationship is strained, and the oppressive environment exacerbates their emotional struggles. The presence of Mertis, with her cryptic demeanor, and the haunting setting amplify the sense of isolation. As the plot unfolds, the characters’ interactions reveal deep-seated insecurities and misunderstandings, creating a complex web of emotions. The setting becomes a character in itself, reflecting the inner turmoil of the protagonists and the fragility of human connections.

Themes and Symbolism in “John”

Annie Baker’s John delves into themes of existential dread, the fragility of human relationships, and the elusive nature of truth. The play’s setting—a mysterious bed-and-breakfast—serves as a metaphor for life’s transient and isolating qualities. Symbolism is pervasive, with objects like the B&B’s decor and Mertis’s cryptic monologues hinting at deeper philosophical questions. The character of John himself remains unseen but deeply felt, symbolizing the unseen forces that shape human lives. Baker’s exploration of consciousness and the search for meaning underscores the play’s haunting tone, leaving audiences to grapple with the mysteries of existence long after the curtain falls.

Critical Reception and Reviews

John by Annie Baker has garnered widespread critical acclaim for its profound exploration of human dynamics and existential themes. Reviewers praise the play’s intricate dialogue and its ability to capture the subtleties of interpersonal communication. The mysterious undertones and philosophical depth have been highlighted as standout elements, with critics noting how Baker masterfully crafts an atmosphere of unease and introspection. Many have lauded the play’s ability to linger in audiences’ minds, sparking reflections on the nature of reality and relationships. The PDF version of John has also been commended for its clear formatting, making the complex narrative accessible to readers. Overall, John is celebrated as a haunting and thought-provoking work of contemporary theater.

Structure and Composition of the Play

Annie Baker’s John is structured as a full-length drama, comprising three acts that explore the intricacies of human relationships through nuanced dialogue and real-time pacing, reflecting her unique storytelling approach.

Act-by-Act Breakdown and Pacing

John, a full-length play by Annie Baker, is divided into three acts, each carefully crafted to build tension and emotional depth. Act 1 introduces the characters and setting, establishing the eerie atmosphere of the bed-and-breakfast. The pacing is deliberate, with long pauses and real-time dialogue that mirror the slow, uncomfortable interactions between Elias, Jenny, and Mertis. Act 2 delves deeper into the characters’ inner worlds, revealing their insecurities and relationships through subtle, nuanced exchanges. The final act brings the story to a haunting climax, leaving audiences with a lingering sense of unease. Baker’s use of real-time pacing and sparse action emphasizes the psychological complexity of her characters, creating a deeply immersive theatrical experience.

Character Development and Dialogue

In John, Annie Baker masterfully develops her characters through subtle, layered dialogue that reveals their inner lives. Elias, Jenny, and Mertis are crafted with precision, their personalities emerging through their interactions. The dialogue is natural yet charged with unspoken tensions, reflecting the characters’ insecurities and emotional struggles. Baker’s use of silence and pauses adds depth, allowing the audience to infer emotions beyond the spoken words. The conversations between Elias and Jenny, in particular, expose their strained relationship and longing for connection. Mertis, the enigmatic proprietor, speaks with a cryptic wisdom that hints at deeper truths. Through these exchanges, Baker explores themes of communication, misunderstanding, and the fragility of human bonds, creating a rich tapestry of psychological complexity and emotional nuance.

Major Themes Explored in “John”

John delves into human relationships, the mystery of reality, and the search for meaning. It explores consciousness, grace, and the fragility of emotional connections, offering profound insights.

Exploration of Human Relationships

Annie Baker’s John intricately examines human connections, focusing on the complexities of love, trust, and misunderstanding. The play delves into the strained relationship between Elias and Jenny, highlighting their emotional distance and unspoken tensions. Through subtle dialogue and nuanced character interactions, Baker reveals the fragility of human bonds and the challenges of genuine communication. The enigmatic figure of John further complicates these dynamics, forcing the characters to confront their insecurities and desires. Baker’s portrayal of relationships is both deeply relatable and profoundly unsettling, offering a stark reminder of the imperfections and vulnerabilities inherent in human interaction. Her work masterfully captures the intricacies of emotional intimacy, making John a compelling exploration of love and its many mysteries.

The Mystery of Reality and Perception

Annie Baker’s John delves into the enigmatic nature of reality, challenging characters and audiences to question their perceptions. The play’s setting, a mysterious bed and breakfast, creates an atmosphere of uncertainty, where the lines between truth and illusion blur. Through the characters’ interactions, Baker explores how individual anxieties and desires shape their understanding of the world. Mertis, the enigmatic proprietor, embodies this ambiguity, leaving both the characters and the audience questioning her true nature. The play’s subtle hints at the supernatural and the unknown further heighten the sense of mystery, prompting reflections on the fragility of human understanding. Baker’s work invites viewers to ponder the instability of reality and the subjective nature of truth, leaving a lasting impression on the audience’s perception of the world. The play’s depth lies in its ability to evoke these profound questions through its understated yet powerful narrative.

Key Characters in “John”

The play revolves around Elias, Jenny, and John, each navigating complex relationships and personal struggles. Mertis, the enigmatic proprietor, adds depth to the narrative, shaping their interactions and perceptions.

Analysis of Elias and His Motivations

Elias is a central character in Annie Baker’s John, driven by a mix of curiosity, alienation, and a desire for connection; His eagerness to explore historical sites contrasts with his struggles in relationships, particularly with Jenny. Elias’s motivations are deeply tied to his need to escape emotional discomfort, often manifesting in his fascination with the past. His interactions with Jenny and John reveal a complex interplay of trust, suspicion, and vulnerability. Through Elias, Baker explores how individuals navigate intimacy and the fragility of human bonds, making him a pivotal figure in the play’s emotional landscape.

Understanding Jenny and Her Struggles

Jenny, a key character in Annie Baker’s John, embodies a complex mix of vulnerability and resilience. Her struggles stem from her fraught relationship with Elias and her deep-seated need for connection. Jenny’s interactions reveal a fragility amplified by her mistrust of Elias, while her presence in the B&B setting underscores her isolation. Baker’s portrayal of Jenny highlights her emotional depth, as she grapples with the fragility of human bonds and the uncertainty of her own desires. Through Jenny’s journey, the play sheds light on the challenges of maintaining intimacy in a world filled with miscommunication and existential doubt.

The Enigmatic Figure of John

John, the titular character in Annie Baker’s play, remains an enigmatic figure whose true nature is shrouded in mystery. His presence is felt throughout the narrative, yet his physical absence leaves room for interpretation. John is portrayed as a catalyst for the emotional turmoil experienced by Elias and Jenny, whose relationship is strained by mistrust and unspoken tensions. Despite his limited direct involvement, John’s influence looms large, symbolizing the unseen forces that shape human connections. Baker’s portrayal of John masterfully evokes a sense of ambiguity, leaving audiences to ponder his role and significance in the story. This enigma adds depth to the play’s exploration of perception and reality.

Reception and Impact of the Play

John received widespread critical acclaim for its profound exploration of human relationships and existential themes. Audiences praised its nuanced dialogue and emotional depth, solidifying its place in contemporary theater.

Awards and Nominations

Annie Baker’s John has garnered significant recognition in the literary and theatrical world. Baker, a Pulitzer Prize-winning playwright, saw John receive critical acclaim and numerous nominations. The play was praised for its intricate dialogue and profound exploration of human dynamics, earning it a spot as a finalist for several prestigious theater awards. Its unique blend of realism and philosophical inquiry resonated with critics and audiences alike, further cementing Baker’s reputation as a master of contemporary drama. The play’s success highlights Baker’s ability to create works that provoke thought and emotional connection, solidifying her place among the most influential playwrights of her generation.

The Availability of “John” in PDF Format

The play John by Annie Baker is available in PDF format for easy access and reading. It can be downloaded from various online platforms such as Scribd or Google Drive, offering readers a convenient way to explore Baker’s insightful work digitally.

Features of the PDF Version

The PDF version of John by Annie Baker is a well-formatted digital document designed for easy reading. It includes 160 pages, published by Theatre Communications Group in 2016. The file size is approximately 394 KB, making it lightweight for quick downloads. The text is presented in a clear, readable font with proper spacing and formatting, ensuring a seamless reading experience. The PDF also preserves the original play’s structure, including dialogue, stage directions, and scene transitions. Additionally, it may include interactive features such as bookmarks for navigation. This digital format allows readers to access the play from various devices, making it a convenient option for students, theater enthusiasts, and researchers alike.

Where to Find and Download the PDF

The PDF version of John by Annie Baker can be found on various online platforms. Official sources include the publisher’s website, Theatre Communications Group, and Samuel French, Inc. Additionally, it is available on academic databases and online retailers like Amazon. Some websites offer free downloads, while others may require purchase. Platforms like Google Drive or file-sharing sites may host the PDF, though users should verify the source’s legitimacy. To ensure compliance with copyright laws, it is recommended to download from authorized platforms; Searching with keywords like “John Annie Baker PDF” can help locate reliable sources. Always prioritize legal and authorized downloads to support the creators and adhere to copyright regulations;

Themes and Symbolism in the Play

John delves into themes of grace, consciousness, and the human form, exploring how characters’ anxieties and desires shape their perception of reality. The play’s mysterious undertones leave audiences reflective.

Grace, Consciousness, and Human Form

Annie Baker’s John explores the concept of grace through the interplay of consciousness and the human form. The play suggests that grace is most pure in beings with either no consciousness, like puppets, or infinite consciousness, akin to divine entities. This duality highlights the tension between human limitations and transcendence. Baker’s characters, grappling with their anxieties and desires, embody flawed consciousness, revealing how human imperfections can manifest grace. The play’s philosophical depth invites audiences to reflect on the essence of existence, where grace emerges not from perfection but from the complexities of being human. This theme underscores Baker’s unique ability to weave profound ideas into relatable, intimate narratives, making John a compelling exploration of human and metaphysical realms.

yamaha rx v371 manual

The Yamaha RX-V371 manual provides essential guidance for setting up‚ troubleshooting‚ and optimizing your receiver. It ensures proper installation‚ sound calibration‚ and feature utilization‚ helping you achieve the best audio experience.

Overview of the Yamaha RX-V371 Receiver

The Yamaha RX-V371 is a 5.1-channel AV receiver designed to deliver high-quality home theater experiences. It features a 5-channel amplifier with 80 watts per channel (8 ohms‚ 1 kHz‚ 0.9% THD)‚ ensuring powerful and clear audio output. With 4 HDMI inputs and 1 output‚ it supports 3D video and Audio Return Channel (ARC) for seamless connectivity. The receiver also includes advanced sound technologies like CINEMA DSP and YPAO for automatic speaker calibration. Its user-friendly interface and robust feature set make it ideal for both beginners and enthusiasts. Compact yet versatile‚ the RX-V371 is a reliable choice for enhancing your home entertainment system.

Importance of the Manual for Proper Setup and Use

The Yamaha RX-V371 manual is crucial for ensuring proper installation‚ configuration‚ and operation of the receiver. It provides detailed instructions for connecting speakers‚ HDMI devices‚ and external components‚ as well as guidance for optimizing audio settings. The manual includes troubleshooting tips for common issues like no sound‚ distorted audio‚ or overheating‚ helping users resolve problems quickly. Additionally‚ it explains advanced features such as CINEMA DSP‚ SCENE modes‚ and ARC setup‚ enabling users to maximize the receiver’s capabilities. By following the manual‚ users can avoid setup errors‚ ensure optimal performance‚ and enjoy a seamless home theater experience tailored to their preferences.

Key Features of the Yamaha RX-V371

The Yamaha RX-V371 boasts 4 HDMI inputs‚ 3D and ARC support‚ HD Audio‚ and advanced features like CINEMA DSP and YPAO for enhanced sound quality and customization.

Amplifier Output and Audio Specifications

The Yamaha RX-V371 is equipped with a 5-channel amplifier‚ delivering 100 watts per channel at 8 ohms with a total harmonic distortion (THD) of 0.9% at 1 kHz. This ensures powerful and clear sound output for immersive home theater experiences. The receiver supports HD Audio formats‚ including Dolby TrueHD and DTS-HD Master Audio‚ providing high-fidelity sound reproduction. Additionally‚ it features 4 HDMI inputs and 1 output‚ supporting 3D video and Audio Return Channel (ARC) for seamless connectivity with modern devices. The YPAO (Yamaha Parametric Room Acoustic Optimizer) calibration system ensures optimal sound quality tailored to your room’s acoustics‚ making it a versatile and high-performance AV receiver.

Connectivity Options: HDMI‚ Bluetooth‚ and More

The Yamaha RX-V371 offers versatile connectivity options to enhance your home theater experience. It features 4 HDMI inputs and 1 HDMI output‚ supporting 3D video and Audio Return Channel (ARC) for seamless integration with modern TVs and devices. Bluetooth connectivity allows wireless streaming from smartphones‚ tablets‚ or laptops‚ ensuring convenient access to your favorite music. Additional ports include USB‚ optical‚ and analog inputs‚ providing flexibility for connecting external devices like CD players or gaming consoles. The receiver also supports HD Audio formats and CINEMA DSP for immersive soundscapes. With these connectivity options‚ the RX-V371 ensures effortless integration of all your audio-visual components.

Advanced Sound Processing Technologies

The Yamaha RX-V371 incorporates advanced sound processing technologies to deliver an immersive audio experience. Its CINEMA DSP feature creates expansive sound fields‚ simulating environments like movie theaters‚ concert halls‚ and sports stadiums. The receiver also supports HD Audio formats‚ ensuring high-fidelity sound reproduction. Additionally‚ the YPAO (Yamaha Parametric Acoustic Optimizer) automatically calibrates the speaker settings to optimize performance based on your room’s acoustics. SCENE modes simplify operation by presetting audio settings for specific scenarios‚ such as watching movies or listening to music. These technologies work together to enhance clarity‚ depth‚ and overall sonic precision‚ making the RX-V371 a versatile and powerful choice for home theater enthusiasts.

Setting Up the Yamaha RX-V371

Setting up the Yamaha RX-V371 involves unboxing‚ connecting speakers‚ and configuring basic settings. Follow the manual for a smooth‚ efficient installation process tailored to your home theater needs.

Unboxing and Initial Preparation

Unboxing the Yamaha RX-V371 is an exciting first step. Carefully unpack the receiver‚ remote control‚ power cord‚ and accessories. Ensure all components are included and undamaged. Begin by reading the manual to familiarize yourself with the device. Place the receiver in a well-ventilated area to prevent overheating. Connect the power cord securely‚ ensuring it is plugged into a stable electrical outlet. Before powering on‚ double-check that all connections are correct. Take a moment to organize cables and plan the layout of your home theater system. Proper preparation ensures a smooth setup process and optimal performance. This initial step sets the foundation for enjoying your Yamaha RX-V371 receiver;

Step-by-Step Installation Guide

Begin by connecting your HDMI devices to the Yamaha RX-V371. Use HDMI cables to link your TV‚ Blu-ray player‚ or gaming console to the receiver’s HDMI inputs. Ensure the HDMI output from your devices is connected to the correct input ports. Next‚ connect your speakers to the receiver using the color-coded terminals for proper channel assignment. Securely attach the speaker wires to the corresponding terminals‚ matching left‚ right‚ center‚ and surround channels. Plug in the power cord and turn on the receiver. Use the remote control to navigate the on-screen menu‚ selecting the correct input for your connected devices. Finally‚ run the YPAO (Yamaha Parametric Room Acoustic Optimizer) calibration to ensure optimal sound quality tailored to your room’s acoustics.

Connecting Speakers and External Devices

Start by connecting your speakers to the Yamaha RX-V371. Match each speaker wire to the corresponding terminals on the receiver‚ ensuring proper channel assignment for your 5.1 system. Connect the subwoofer using the dedicated RCA output. For external devices‚ use HDMI cables to link your Blu-ray player‚ gaming console‚ or TV to the receiver’s HDMI inputs. Assign each device to the correct input in the on-screen menu. Secure all connections to avoid loose wires. Finally‚ use the YPAO calibration feature to optimize your system’s sound quality based on your room’s acoustics.

Audio Settings and Configuration

Configure your audio settings by calibrating speakers using YPAO‚ adjusting sound modes like Movie or Music‚ and fine-tuning subwoofer levels for balanced bass response.

Speaker Configuration and Calibration

Proper speaker configuration and calibration are crucial for achieving optimal audio performance. The Yamaha RX-V371 features YPAO (Yamaha Parametric Acoustic Optimizer)‚ which automatically calibrates your speaker system by analyzing room acoustics and speaker placement. To begin‚ connect your speakers according to the manual’s wiring diagram‚ ensuring correct polarity and impedance. Next‚ use the provided calibration microphone to run the YPAO setup‚ which adjusts settings like speaker levels‚ distances‚ and crossover frequencies. For advanced users‚ manual adjustments can fine-tune bass management and channel levels. This process ensures balanced sound reproduction‚ minimizing room-induced distortions. Regular recalibration is recommended if you move speakers or rearrange your listening space for consistent audio quality.

Adjusting Sound Modes for Optimal Performance

Adjusting sound modes on the Yamaha RX-V371 ensures an immersive listening experience tailored to your content. The receiver offers multiple sound modes‚ such as Movie‚ Music‚ Game‚ and Sports‚ each optimized for specific scenarios. For cinematic experiences‚ enable CINEMA DSP to create a 3D sound field. Use SCENE modes for one-touch activation of pre-configured settings‚ such as watching movies or playing games. Experiment with these modes to match your content and preferences. The remote and on-screen menu provide easy access to these adjustments. Properly configuring these settings enhances dialogue clarity‚ bass response‚ and overall audio fidelity‚ ensuring you get the most out of your entertainment system.

Subwoofer Setup and Optimization

Proper subwoofer setup and optimization are crucial for achieving deep‚ impactful bass in your home theater system. Connect the subwoofer to the Yamaha RX-V371 using an RCA cable to the LFE input. Ensure the subwoofer is powered on and set to the correct input. In the receiver’s menu‚ navigate to the audio settings and select the subwoofer as the active speaker. Adjust the phase and volume levels to blend seamlessly with your main speakers. Use the YPAO (Yamaha Parametric Room Acoustic Optimizer) feature to calibrate the subwoofer’s output based on your room’s acoustics. Fine-tune the crossover frequency to ensure smooth transition between the subwoofer and speakers. Finally‚ test the setup with various audio content to confirm optimal performance and immersive bass response.

Troubleshooting Common Issues

Identify and resolve common issues like no sound‚ distorted audio‚ or overheating by referring to the manual. Diagnose symptoms‚ reset settings‚ and ensure proper connections for optimal performance.

Diagnosing No Sound or Distorted Audio

To diagnose no sound or distorted audio‚ start by checking all connections for loose or incorrect wiring. Ensure the receiver is set to the correct input and that the volume is not muted or too low. Verify that the speakers are properly configured in the setup menu. If distortion occurs‚ adjust the audio settings or reduce the volume. Resetting the receiver by unplugging it for a few minutes may resolve software-related issues. For persistent problems‚ refer to the manual for recalibrating the audio system or updating firmware. Always ensure the subwoofer and speaker settings align with your system configuration for optimal sound quality.

Resolving Overheating Problems

If your Yamaha RX-V371 is overheating‚ start by ensuring proper ventilation. Place the receiver in a well-ventilated area‚ away from enclosed spaces. Turn it off for 10-15 minutes to cool down. Check for dust buildup and clean vents with a soft cloth. Avoid blocking ventilation grilles. If overheating persists‚ reduce volume levels or limit continuous operation. Ensure all firmware is updated‚ as outdated software may cause overheating issues. If the problem remains‚ contact Yamaha support or a professional for servicing. Always monitor operating conditions to prevent damage and ensure optimal performance.

Fixing HDMI Connectivity Issues

To resolve HDMI connectivity issues with your Yamaha RX-V371‚ start by powering off the receiver and all connected devices. Ensure all HDMI cables are securely connected to the correct ports. If using an HDMI ARC (Audio Return Channel)‚ verify it’s enabled in the receiver’s settings. Check for loose or damaged cables and replace them if necessary. Update the receiver’s firmware to the latest version‚ as outdated software may cause compatibility problems. If issues persist‚ reset the receiver to factory settings by navigating to the menu and selecting the reset option. Finally‚ consult the manual or contact Yamaha support for further assistance if the problem remains unresolved.

Advanced Features and Customization

The Yamaha RX-V371 offers advanced features like 4K and 3D video support‚ CINEMA DSP for immersive sound‚ and ARC for seamless audio return channel functionality.

Using Surround Sound and 3D Audio

The Yamaha RX-V371 supports immersive surround sound and 3D audio technologies‚ enhancing your home theater experience. To engage surround sound‚ connect your speakers according to the manual’s configuration guide and ensure HDMI inputs are correctly assigned. Enable 3D audio modes like Dolby TrueHD or DTS-HD Master Audio for a cinematic feel. Use the YPAO calibration tool to optimize speaker settings for precise sound reproduction. For 3D audio‚ ensure your HDMI devices support 3D pass-through and select the appropriate mode via the receiver’s menu. Experiment with CINEMA DSP modes to customize your audio experience for movies‚ games‚ or music. This feature-rich setup ensures dynamic‚ lifelike sound tailored to your preferences.

Enabling Audio Return Channel (ARC)

To enable ARC (Audio Return Channel) on your Yamaha RX-V371‚ connect the receiver to your TV’s ARC-compatible HDMI port. Use an HDMI cable marked as ARC to ensure compatibility. Access the HDMI setup menu on your receiver‚ navigate to the ARC settings‚ and enable the feature. Ensure your TV is configured to output audio via ARC through its settings. This setup allows the TV to send audio signals back to the receiver‚ eliminating the need for an additional optical cable. ARC supports formats like Dolby Digital and ensures synchronized audio-visual playback. Proper configuration enhances your home theater experience by streamlining connections and improving sound quality.

Exploring CINEMA DSP and SCENE Modes

CINEMA DSP and SCENE modes on the Yamaha RX-V371 enhance your audio experience by simulating immersive sound fields and optimizing settings for specific scenarios. CINEMA DSP recreates the acoustics of iconic theaters‚ offering modes like Movie Theater‚ Concert Hall‚ and Sports. SCENE modes simplify setup by providing presets for activities such as watching movies‚ playing games‚ or listening to music. Use the remote to select these modes‚ ensuring optimal audio performance tailored to your content. Experiment with different settings to find your preferred sound. These features ensure a seamless and enjoyable experience‚ making it easy to customize your audio setup for any situation.

HDMI Management and Optimization

Effectively manage your HDMI setup by configuring inputs and outputs for optimal performance. Use 3D and Audio Return Channel (ARC) features‚ and troubleshoot connectivity issues for seamless functionality.

Configuring HDMI Inputs and Outputs

Configuring HDMI inputs and outputs on your Yamaha RX-V371 ensures seamless connectivity with your devices. The receiver features 4 HDMI inputs and 1 HDMI output‚ supporting 3D and Audio Return Channel (ARC). To set up‚ connect your devices to the HDMI inputs and TV to the HDMI output. Use the remote to navigate to the HDMI setup menu‚ enabling features like ARC for enhanced audio. Ensure proper calibration for optimal video and audio syncing. Label inputs for easy identification and use high-quality HDMI cables to avoid signal loss. Troubleshoot by checking cable connections and updating firmware if needed. This setup ensures a robust and reliable HDMI experience.

Troubleshooting HDMI-Related Problems

Troubleshooting HDMI issues on the Yamaha RX-V371 involves checking connections and settings. Ensure all HDMI cables are securely connected and use high-quality cables to prevent signal loss. If no video appears‚ verify that the correct HDMI input is selected on both the receiver and display. For flickering or unstable images‚ try lowering the HDMI resolution or enabling Enhanced Mode. If ARC (Audio Return Channel) isn’t working‚ confirm it’s enabled in the HDMI Setup menu. Restarting the receiver and connected devices often resolves temporary glitches. If problems persist‚ update the firmware or consult the manual for advanced troubleshooting steps. Proper configuration ensures a stable and high-quality HDMI experience.

Using the Remote Control Effectively

The remote control simplifies navigation through menus and settings. Use it to access setup options‚ adjust audio modes‚ and customize button functions for seamless operation.

Understanding Remote Control Functions

The remote control for the Yamaha RX-V371 is designed to provide intuitive control over the receiver’s features. It offers buttons for navigating menus‚ adjusting volume‚ and selecting input sources. Key functions include direct access to sound modes‚ such as CINEMA DSP and SCENE modes‚ allowing you to optimize audio for different scenarios. The remote also enables control of HDMI-connected devices and simplifies calibration processes. Additionally‚ the remote allows you to customize settings like tone controls and subwoofer levels for a personalized listening experience. Understanding these functions ensures efficient operation and enhances your ability to tailor the receiver’s performance to your preferences. Proper use of the remote maximizes the receiver’s capabilities and improves overall user satisfaction.

Customizing Remote Control Settings

Customizing the remote control settings for the Yamaha RX-V371 allows you to tailor its functionality to your specific needs. You can program the remote to control multiple devices‚ such as your TV or Blu-ray player‚ by assigning their functions to unused buttons. This eliminates the need for multiple remotes and streamlines your home theater experience. Additionally‚ you can adjust the remote’s sensitivity and backlight settings for better usability in low-light environments. Some users also find it helpful to set up macros‚ which allow a single button press to trigger a sequence of actions‚ such as turning on the receiver and switching to a specific input. These customization options enhance convenience and personalize your control over the receiver’s operations.

Maintenance and Upkeep

Regular cleaning and proper ventilation are essential for maintaining the Yamaha RX-V371. Avoid exposing the receiver to liquids or harsh chemicals. Check for dust buildup and update firmware periodically to ensure optimal performance and longevity.

Cleaning and Caring for the Receiver

Regular maintenance ensures the Yamaha RX-V371 operates efficiently. Use a soft‚ dry cloth to wipe the exterior and avoid harsh chemicals or liquids. Gently remove dust from vents to prevent overheating. For stubborn stains‚ lightly dampen the cloth but avoid moisture entering the unit. Never spray cleaners directly on the receiver. Ensure proper ventilation by leaving space around the device. Avoid placing objects on top of the receiver. Clean the remote control regularly with a soft cloth to maintain functionality. Protect the receiver from direct sunlight and extreme temperatures. Updating firmware periodically enhances performance and fixes issues. Proper care extends the lifespan and maintains sound quality.

Updating Firmware for Enhanced Performance

Updating the firmware of your Yamaha RX-V371 is crucial for optimal performance and functionality. Firmware updates often include improvements to sound quality‚ bug fixes‚ and compatibility enhancements. To update‚ connect the receiver to your internet router using a LAN cable and navigate to the setup menu. Select the firmware update option and follow on-screen instructions. Alternatively‚ download the latest firmware from Yamaha’s official website to a USB drive and install it manually. Ensure the receiver is powered on and avoid interruptions during the update process. Regularly checking for updates ensures you benefit from the latest features and improvements. Always follow the manufacturer’s instructions carefully to avoid any potential issues during the update process.

The Yamaha RX-V371 manual offers a comprehensive guide to unlocking your receiver’s full potential. With easy setup‚ great sound‚ and advanced features‚ it ensures an exceptional audio experience for all users.

Final Tips for Getting the Most Out of Your Yamaha RX-V371

To maximize your Yamaha RX-V371 experience‚ explore its advanced features like CINEMA DSP and SCENE modes for tailored sound. Regularly update firmware to ensure optimal performance and access new features. Use high-quality cables for HDMI and speaker connections to maintain sound clarity. Experiment with sound modes to find the best settings for movies‚ music‚ or gaming. Keep the receiver well-ventilated to prevent overheating. Organize cables neatly to avoid signal interference. Finally‚ refer to the manual for troubleshooting common issues and personalized setup advice. By following these tips‚ you’ll enjoy a seamless and immersive audio experience tailored to your preferences.

clear retain instructions

Proper care is essential for clear retainers to maintain their transparency and durability. Regular cleaning prevents discoloration and ensures they remain effective in holding your teeth alignment.

What Are Clear Retainers?

Clear retainers are custom-made, transparent devices designed to fit snugly over your teeth. Made from durable plastic, they are nearly invisible, making them a popular choice for post-orthodontic care. These retainers are crafted to maintain tooth alignment after braces or aligner treatment. Unlike traditional wire retainers, clear retainers are preferred for their aesthetic appeal, offering a discreet solution. They are worn overnight or as prescribed by your orthodontist to ensure your smile remains straight and aligned. Regular maintenance is crucial to keep them clean and effective, ensuring long-term oral health and a confident smile.

The Importance of Proper Retainer Care

Proper retainer care is vital for maintaining oral hygiene and ensuring the longevity of your clear retainers. Neglecting to clean retainers regularly can lead to bacterial buildup, which may cause bad breath, discoloration, and potential oral health issues. Additionally, poor maintenance can result in damage to the retainer, requiring costly repairs or replacements. By establishing a consistent cleaning routine, you can prevent plaque accumulation, keep your retainer odor-free, and ensure it continues to fit comfortably. Clean retainers not only support your oral health but also help maintain the aesthetic appeal and functionality of your orthodontic appliance for years to come.

Why Clear Retainers Require Special Attention

Clear retainers, often made from acrylic or plastic, are more prone to staining and bacterial growth than traditional metal retainers. Their transparent nature means any discoloration is easily noticeable, which can be aesthetically displeasing. Additionally, improper cleaning can lead to a buildup of plaque and harmful bacteria, potentially causing bad breath and oral health issues. To maintain their clarity and prevent damage, clear retainers need gentle yet effective cleaning methods, such as using soft-bristled toothbrushes and mild cleaning solutions. Regular maintenance ensures they remain effective and comfortable while preserving their appearance and functionality.

Types of Retainers and Their Maintenance

Hawley, clear plastic, and Invisalign retainers each require specific care to maintain their effectiveness and appearance. Regular cleaning and proper storage ensure longevity and hygiene.

Hawley Retainers: Cleaning and Care

Hawley retainers require gentle care to maintain their durability and hygiene. Use a soft-bristled toothbrush with mild toothpaste to clean daily, focusing on metal and acrylic areas. Soak weekly in a solution of warm water, baking soda, and Castile soap for 15 minutes. Avoid harsh chemicals and hot water, as they can damage the plastic. Store in a clean, dry case to prevent bacterial growth. Regular maintenance ensures proper fit and prevents discoloration, keeping your retainer effective and hygienic for long-term use. Consistency in cleaning routines is key to extending its lifespan.

Clear Plastic Retainers: Specific Cleaning Needs

Clear plastic retainers need gentle care to stay transparent and odor-free. Avoid using abrasive toothpaste, which can scratch the surface. Instead, clean with a soft toothbrush and mild, non-abrasive soap or water. Soaking in a 50/50 solution of water and white vinegar for 20 minutes helps disinfect and remove stains. Regular rinsing with cool water prevents bacteria buildup. Never expose retainers to hot water, as it can warp them. Store in a clean case to maintain hygiene. Consistent cleaning prevents discoloration and ensures optimal performance, keeping your retainer both functional and invisible for years to come with proper maintenance routines.

Invisalign and Essix Retainers: Unique Maintenance Tips

Invisalign and Essix retainers require specific care to maintain clarity and functionality. Clean daily with a soft-bristled toothbrush and mild, non-abrasive soap to remove plaque and bacteria. Avoid harsh chemicals, abrasive materials, or hot water, as these can damage the clear plastic. Soaking in a 50/50 water and white vinegar solution or hydrogen peroxide can help disinfect and remove stains. Rinse thoroughly before wearing. Store in a clean, dry case to prevent bacterial growth and warping. Regular maintenance ensures your retainers remain transparent, odor-free, and effective in retaining your smile, while also protecting your oral health from potential hygiene issues. Proper care extends their lifespan.

The Importance of Regular Cleaning

Regular cleaning prevents bacteria and plaque buildup on retainers, ensuring they stay hygienic and maintain their clarity. Neglecting this can lead to discoloration and oral health issues.

How Bacteria and Plaque Accumulate on Retainers

Bacteria and plaque naturally accumulate on retainers due to their constant exposure to saliva, food particles, and mouth bacteria. When not cleaned regularly, these microorganisms multiply, forming a sticky film on the retainer’s surface. If left unchecked, this buildup hardens into plaque, leading to discoloration and unpleasant odors. Additionally, bacteria can transfer back to the teeth, potentially causing cavities or gum inflammation. Regular cleaning is crucial to break this cycle and maintain both retainer hygiene and overall oral health. Neglecting this can result in a milky film on the retainer, signaling advanced plaque buildup that requires immediate attention.

Consequences of Poor Retainer Hygiene

Poor retainer hygiene can lead to discoloration, unpleasant odors, and the accumulation of harmful bacteria. If bacteria and plaque are not removed, they can transfer to your teeth, causing tooth decay and gum inflammation. Neglecting proper cleaning may result in tartar buildup, which is difficult to remove and can lead to more severe dental issues. Additionally, a dirty retainer can become less effective at maintaining your teeth alignment and may require premature replacement. Regular cleaning is essential to prevent these issues and ensure your retainer remains hygienic and functional, safeguarding both your oral health and investment in orthodontic care.

How Clean Retainers Support Oral Health

Clean retainers play a crucial role in maintaining oral health by preventing the buildup of bacteria, plaque, and tartar. These microorganisms can transfer to your teeth, leading to cavities, bad breath, and gum disease. A well-maintained retainer ensures that harmful substances do not accumulate and spread, protecting your teeth and gums from potential damage. Regular cleaning also prevents the growth of odor-causing bacteria, keeping your breath fresh and your mouth healthy. By keeping your retainer clean, you safeguard your overall oral hygiene and ensure that your teeth remain straight and your smile stays vibrant and confident.

Methods for Cleaning Clear Retainers

Clean your clear retainers using a soft-bristled toothbrush, mild toothpaste, or baking soda paste. Soak them in vinegar or hydrogen peroxide solutions for deeper disinfection and stain removal.

Daily Brushing: The First Line of Defense

Daily brushing is crucial for maintaining clear retainers. Use a soft-bristled toothbrush and mild, non-abrasive toothpaste to gently scrub both sides. This removes plaque and bacteria, preventing buildup. Avoid harsh chemicals or whitening toothpaste, as they can damage the retainer. Brushing should be done under cool or lukewarm water to avoid warping the plastic. Regular brushing helps maintain transparency and prevents odors. It’s recommended to dedicate a separate toothbrush for this purpose to ensure effectiveness and hygiene. Consistency in daily brushing is key to preserving your retainer’s integrity and longevity.

Baking Soda Paste: A Gentle Yet Effective Cleaner

A baking soda paste is a safe and effective method for cleaning clear retainers. Mix equal parts water and baking soda to form a thick paste. Using a soft-bristled toothbrush, gently scrub the interior and exterior of the retainer to remove plaque and bacteria. This method is non-abrasive and avoids harsh chemicals, preserving the retainer’s clarity. Rinse thoroughly with cool water to ensure no residue remains. Regular use of this paste helps maintain hygiene and prevents discoloration. For optimal results, create a fresh paste for each cleaning session to minimize bacterial transfer.

Vinegar Soak: A Natural Disinfectant Solution

A vinegar soak is a natural and effective way to disinfect clear retainers. Mix equal parts water and white vinegar, then submerge the retainer for 20 minutes. This solution helps kill bacteria and break down stains without harsh chemicals. After soaking, rinse thoroughly with cool water to remove any lingering vinegar taste. This method is gentle on clear retainers and helps maintain their clarity while preventing discoloration. Regular vinegar soaks can complement daily brushing and other cleaning methods, ensuring your retainer stays hygienic and odor-free. This eco-friendly approach is ideal for those seeking a chemical-free cleaning option.

Hydrogen Peroxide Solution: Removing Stains and Killing Bacteria

A hydrogen peroxide solution is effective for removing stains and killing bacteria on clear retainers. Mix equal parts water and 3% hydrogen peroxide. Soak the retainer for 30 minutes to allow the solution to penetrate and lift stains. After soaking, rinse thoroughly with warm water to remove any residue. This method helps maintain the retainer’s clarity and prevents yellowing. It’s important to note that while hydrogen peroxide is excellent for disinfecting, it may not remove stubborn plaque, so brushing with a baking soda paste beforehand is recommended. Regular use keeps retainers clean and ensures optimal oral hygiene.

Ultrasonic Cleaners: Deep Cleaning for Tough Buildup

Ultrasonic cleaners offer a deep cleaning solution for tough buildup on clear retainers. These devices use high-frequency sound waves to create a cleaning solution that gently removes plaque and bacteria. Simply place the retainer in the cleaner with water and a mild detergent or cleaning solution. The ultrasonic vibrations penetrate hard-to-reach areas, ensuring a thorough clean. This method is particularly effective for stubborn stains or heavy plaque accumulation. For best results, use distilled water and avoid harsh chemicals. Ultrasonic cleaning is a gentle yet powerful way to maintain your retainer’s clarity and hygiene, especially when combined with regular brushing and soaking.

Dos and Don’ts of Retainer Cleaning

Clean retainers daily with a soft-bristled toothbrush and mild toothpaste. Avoid harsh chemicals, abrasive materials, and hot water. Soak retainers in vinegar or hydrogen peroxide for deep cleaning.

Recommended Cleaning Tools and Products

Use a soft-bristled toothbrush and mild, non-abrasive toothpaste for daily cleaning. Baking soda paste or white vinegar solutions are effective for gentle scrubbing and disinfecting. Hydrogen peroxide soak helps remove stains and kill bacteria. Premade retainer cleaners, like Brite tablets, offer convenience and deep cleaning. Avoid harsh chemicals or abrasive materials that may damage the retainer. Lukewarm water is ideal for rinsing to prevent warping. Regularly cleaning with these tools ensures your retainer remains clear, odor-free, and functional, supporting long-term oral health and proper teeth alignment.

avoiding Harsh Chemicals and Abrasive Materials

Harsh chemicals and abrasive materials can damage clear retainers, causing scratches or discoloration. Avoid using bleach, acidic cleaners, or rough scrubbers, as they weaken the plastic. Instead, opt for gentle cleaners like baking soda paste or vinegar solutions. These methods effectively remove plaque without causing harm. Always rinse thoroughly to prevent residual taste. Using soft-bristled toothbrushes and mild toothpaste ensures safe cleaning. Preventing damage from harsh substances maintains the retainer’s clarity and ensures it remains effective in preserving your smile and oral health.

Why Hot Water Should Be Avoided

Hot water can warp or deform clear retainers, causing them to lose their shape and fit. Proper retention is essential for maintaining tooth alignment, and a misshapen retainer may not hold teeth correctly. Always use cool or lukewarm water for cleaning to prevent damage. Excessive heat can also degrade the plastic material, making the retainer more prone to cracks or breaks. Using the right temperature ensures longevity and maintains the effectiveness of your retainer in preserving your smile and oral health over time.

The Role of Water in Maintaining Retainer Hygiene

Water is crucial for maintaining retainer hygiene as it helps rinse away plaque, bacteria, and food particles. Regular rinsing under cool or lukewarm water prevents buildup and odors. It also keeps the retainer moist, preventing dryness that can lead to brittleness. Water dilutes acids and sugars in the mouth, reducing the risk of tooth decay. Proper hydration supports saliva production, which naturally cleanses the mouth and retainer. Using water consistently ensures the retainer remains clean, comfortable, and effective in maintaining oral health and proper tooth alignment over time.

Keeping the Retainer Case Clean

Cleaning your retainer case is vital to prevent bacteria growth and maintain hygiene. Rinse the case daily with cool water and mild dish soap, then wipe it dry. For deeper cleaning, soak it in a mixture of water and white vinegar or place it in the dishwasher. Avoid harsh chemicals or hot water, as they can damage the case. Regularly cleaning your retainer case ensures a hygienic environment for your retainer, preventing odors and bacteria buildup. A clean case supports overall oral health and keeps your retainer fresh and effective.

Maintenance and Care Tips

Storing Your Retainer When Not in Use

Store your clear retainer in its case, ensuring it remains dry and protected from damage. Keep the case clean and in a safe location to prevent loss or breakage.

Always store your clear retainer in its protective case to prevent damage or loss. Ensure the case is clean, dry, and kept in a secure location. Avoid exposure to extreme temperatures, as heat can warp the retainer. When not wearing it, submerge the retainer in water mixed with baking soda or a mild soap to maintain hygiene. Use a stainless steel or plastic container for soaking, and rinse thoroughly before storing. Label the case for easy identification and avoid placing it near pets or children to prevent accidental damage or misplacement. Proper storage ensures your retainer remains clean and functional.

Cleaning Your Retainer Case

Cleaning your retainer case is crucial to prevent bacteria growth and maintain hygiene. Regularly rinse the case with cool water and mild soap. Use a soft toothbrush to scrub away any visible buildup or debris. Soak the case in a mixture of equal parts water and white vinegar for 10-15 minutes to disinfect it. Avoid using harsh chemicals or hot water, as they may damage the material. Dry the case thoroughly with a clean cloth before storing your retainer. Cleaning the case weekly ensures a hygienic environment for your retainer, reducing the risk of odors and bacterial contamination.

Travel Tips for Retainer Maintenance

When traveling, keep your retainer case in an easily accessible place to avoid misplacing it. Pack a portable cleaning kit with a soft-bristled toothbrush, mild soap, and a small container for soaking. Use a protective case to prevent damage during transit. Avoid wrapping your retainer in tissues, as it may get lost. If you don’t have cleaning supplies, rinse your retainer with water and brush it gently when possible. Store your retainer in its case when not in use to prevent exposure to germs. Regular cleaning and safe storage ensure your retainer remains hygienic and functional while on the go.

Regular Inspections for Wear and Tear

Regularly inspect your clear retainer for signs of wear and tear, such as cracks, discoloration, or misalignment. Check for thinning areas or warping, which can affect its fit and effectiveness. Ensure the retainer remains secure and comfortable, as looseness may indicate damage. Inspect for plaque buildup or stains, which can lead to discoloration if not addressed. If you notice any issues, consult your orthodontist promptly to avoid further damage or the need for costly repairs. Regular inspections help maintain your retainer’s condition and ensure it continues to protect your smile effectively. A well-maintained retainer supports long-term oral health and alignment.

Troubleshooting Common Issues

Address discoloration with vinegar soaks or baking soda paste. Eliminate odors using hydrogen peroxide. Repair damaged retainers promptly to prevent alignment issues. Regular cleaning prevents most problems.

Dealing with Discoloration or Stains

Discoloration or stains on clear retainers can be addressed using gentle cleaning methods. Mix equal parts water and white vinegar, soak for 20 minutes, then rinse thoroughly. For tougher stains, a 50/50 solution of water and hydrogen peroxide can help. Always brush gently with a soft toothbrush and mild soap before soaking. Avoid harsh chemicals or abrasive materials. Regular cleaning prevents discoloration. If stains persist, consult your orthodontist for professional advice. Proper maintenance ensures your retainer stays clear and effective, maintaining its appearance and functionality over time.

Eliminating Odors from Retainers

Odors on retainers often stem from bacteria and plaque buildup. To eliminate them, soak the retainer in a mixture of equal parts water and white vinegar for 20 minutes. This natural solution helps neutralize odors and disinfects the surface. For tougher smells, a 50/50 solution of water and hydrogen peroxide can be effective. Regular brushing with a soft toothbrush and mild soap is also crucial. Ensure the retainer is rinsed thoroughly after cleaning to remove any lingering solution taste. Keeping the retainer case clean and dry further prevents odor-causing bacteria from thriving, ensuring a fresh and hygienic retainer at all times.

Repairing or Replacing a Damaged Retainer

If your retainer is damaged, contact your orthodontist immediately to avoid teeth shifting. Minor cracks or bends may be repairable, but severe damage often requires a replacement. Avoid using harsh chemicals or attempting DIY fixes, as this can worsen the damage. Store the retainer in its case when not in use to prevent accidental breaks. Regular inspections can catch issues early, ensuring timely repairs. Your orthodontist will assess the damage and recommend the best course of action, whether it’s a simple adjustment or a new retainer for optimal oral health and alignment maintenance.

Advanced Cleaning Techniques

For tough buildup, ultrasonic cleaners provide deep cleaning. Combining methods like baking soda paste and hydrogen peroxide enhances effectiveness. Premade solutions offer convenience and superior disinfection for clear retainers.

Using Premade Retainer Cleaning Solutions

Premade retainer cleaning solutions, like Brite tablets, offer convenience and effectiveness. Simply dissolve a tablet in water, soak your retainer, and rinse. These products eliminate plaque and bacteria without harsh chemicals, ensuring your retainer remains clear and odor-free. They are especially useful for maintaining hygiene while traveling. Always follow the manufacturer’s instructions for soaking time and concentration to avoid damage. Regular use prevents buildup and extends the lifespan of your retainer, keeping it clean and functional for years to come.

Soaking vs. Brushing: Which is More Effective?

Both soaking and brushing are essential for retainer hygiene. Brushing removes surface plaque and food particles, while soaking in solutions like vinegar or hydrogen peroxide disinfects deeply. For tough buildup, soaking is more effective, but daily brushing maintains cleanliness. Combining both methods ensures optimal results, preventing bacteria and stains. Always rinse thoroughly after soaking to avoid lingering tastes. Regular inspection ensures effectiveness and keeps your retainer fresh and functional, supporting long-term oral health and retainer longevity.

Combining Multiple Cleaning Methods for Optimal Results

For maximum effectiveness, combining cleaning methods is recommended. Start with daily brushing using a soft toothbrush and mild toothpaste to remove plaque. Follow with a soak in a solution like vinegar or hydrogen peroxide to disinfect and remove stains. For tough buildup, use an ultrasonic cleaner to deep clean. Regularly using a premade retainer cleaner can also enhance results. By integrating these methods, you ensure a thorough cleaning, maintain transparency, and prevent bacteria growth. Consistency is key to keeping your retainer hygienic and extending its lifespan, ensuring it continues to support your oral health effectively.

The Impact of Cleaning on Retainer Longevity

Regular cleaning significantly extends the lifespan of clear retainers by preventing plaque buildup and bacteria growth, ensuring they remain effective and maintain proper fit over time.

How Proper Cleaning Extends Retainer Lifespan

Regular cleaning prevents plaque buildup, bacteria growth, and discoloration, all of which can damage retainers. Using methods like brushing with a soft toothbrush, baking soda paste, or vinegar soaks helps maintain clarity and structural integrity. Avoiding harsh chemicals and hot water prevents warping and ensures the retainer retains its shape. Proper care habits not only extend the lifespan but also prevent the need for frequent replacements, saving time and money while keeping your smile aligned and healthy. Consistency is key to maximizing durability and effectiveness of clear retainers.

The Role of Consistency in Maintenance

Consistency is crucial for maintaining clear retainers. Regular cleaning prevents plaque buildup and bacteria growth, ensuring retainers remain clear and odor-free. Daily brushing and periodic soaking help preserve their shape and functionality. Irregular care can lead to discoloration, warped retainers, or oral health issues. Sticking to a cleaning routine ensures long-term effectiveness and comfort. Proper maintenance habits protect your investment in orthodontic care, keeping your smile aligned and healthy. Consistency is key to extending the lifespan of your clear retainers and maintaining optimal oral hygiene;

Signs It’s Time for a New Retainer

If your clear retainer shows persistent discoloration or stains despite cleaning, it may be time for a replacement. Cracks or fractures weaken its structure, affecting alignment. If the retainer no longer fits snugly or causes discomfort, it’s likely lost its shape. Additionally, lingering odors that don’t fade after cleaning indicate bacteria buildup. Regular inspections can help identify wear and tear early, ensuring your teeth remain aligned and your oral health protected. Replacing a damaged or ineffective retainer prevents further issues and maintains the results of your orthodontic treatment.

Proper care of clear retainers is crucial for maintaining oral health and ensuring their longevity. Regular cleaning and storage help prevent damage and keep your smile aligned. Stay committed to your retainer routine for lasting results.

Summarizing the Key Points of Retainer Care

Regular cleaning is vital to maintain clear retainers’ effectiveness and hygiene. Use a soft-bristled toothbrush daily to remove plaque and bacteria. Soaking in vinegar or hydrogen peroxide solutions helps disinfect, while baking soda paste gently removes stains. Avoid harsh chemicals, abrasive materials, and hot water to prevent damage. Store retainers in clean cases to avoid contamination. Consistent care ensures retainers remain transparent, odor-free, and functional. Neglecting maintenance can lead to discoloration and oral health issues. Proper storage and cleaning routines are essential for long-term retainer durability and overall oral hygiene.

Encouraging Long-Term Commitment to Retainer Maintenance

Maintaining clear retainers requires consistent effort, but the benefits are well worth it. Regular cleaning prevents discoloration, odors, and bacterial buildup, ensuring your retainer remains effective and comfortable. By incorporating daily brushing and periodic soaking into your routine, you protect your investment in orthodontic care. Over time, proper maintenance helps retain the clarity and fit of your retainer, supporting long-term oral health. Encourage yourself to stay committed by remembering how your retainer safeguards your smile. With dedication, you can enjoy a healthy, aligned smile for years to come.

Final Thoughts on the Importance of Clear Retainer Hygiene

Clear retainer hygiene is crucial for maintaining oral health and preserving your smile. Neglecting proper cleaning can lead to discoloration, odors, and bacterial buildup, which may harm your teeth and gums. Regular maintenance ensures your retainer remains effective and comfortable. By prioritizing daily brushing and periodic soaking, you protect your investment in orthodontic care. Clean retainers not only uphold their clarity and fit but also prevent potential health issues. Consistent hygiene practices are essential for long-term satisfaction with your clear retainers and overall dental well-being. Remember, a clean retainer is a key part of maintaining a healthy, confident smile.