necklaces length guide

Necklace length is a crucial aspect of accessorizing, as it enhances both style and comfort. Standard lengths range from 14 to 36 inches, catering to various body types, face shapes, and outfit needs. Choosing the right length ensures a flattering fit, drawing attention to desired features while complementing personal aesthetics. This guide helps you navigate through sizes, styles, and tips to find the perfect necklace length for any occasion.

Understanding Standard Necklace Lengths

Standard necklace lengths typically range from 14 to 36 inches, with 16-20 inches being the most common for women. These sizes are designed to complement various body types and personal styles.

Common Necklace Lengths for Women

Common necklace lengths for women typically range from 16 to 20 inches, with 16-inch necklaces sitting at the base of the neck and 18-inch being the most popular, hitting just above the collarbone. A 20-inch necklace is slightly longer, offering versatility for various outfits; These lengths complement different body types, necklines, and personal styles, making them ideal for everyday wear or special occasions. Understanding these standard lengths helps women choose necklaces that flatter their features and enhance their overall appearance effortlessly.

Common Necklace Lengths for Men

Standard necklace lengths for men typically range from 18 to 24 inches. An 18-inch necklace sits at the collarbone, making it a popular choice for everyday wear. A 20-inch length is versatile, complementing most body types and outfits. Longer lengths, such as 22 or 24 inches, are ideal for formal occasions or layering. These sizes ensure comfort and style, accommodating different neck sizes and personal preferences while offering a polished, elegant appearance suitable for both casual and formal settings.

Necklace Lengths for Children

Necklace lengths for children are designed for comfort and safety, typically ranging from 14 to 16 inches. These shorter lengths ensure the necklace sits snugly around their neck without being too tight or restrictive. A 14-inch necklace is ideal for younger children, while a 16-inch length is suitable for older kids or teens. These sizes are chosen to accommodate smaller neck sizes and provide a secure fit, ensuring the child’s comfort while adding a touch of style to their outfits.

How to Measure for the Perfect Necklace Fit

Measuring for a perfect necklace fit involves wrapping a tape around your neck snugly, adding length for desired dangle, and adjusting for pendants.

Using a Measuring Tape

To measure for a necklace, wrap a flexible tape snugly around your neck at the desired resting point. Ensure the tape is level and not too tight or loose. Add 1-2 inches for comfort. This method provides an accurate fit, ensuring the necklace sits comfortably and proportionally. For pendants, measure the length from the base of the neck to the desired drop point. Record the total length for a perfect fit. This approach guarantees a necklace that complements your style and body type effortlessly.

Using a String or Existing Necklace

To measure without a tape, use a string or a necklace you already own. Wrap the string around your neck snugly, mark the desired length with a finger, and lay it flat to measure with a ruler. For an existing necklace, measure its length while worn to ensure it rests where you prefer. Add 1-2 inches for comfort. This method provides a practical way to determine your ideal necklace length, ensuring a comfortable and flattering fit without specialized tools.

Considering Pendant Size

Pendant size plays a significant role in determining the ideal necklace length. Larger pendants look best on longer chains, while smaller ones are balanced on shorter lengths. Measure the pendant’s height and width to ensure proportionality. A longer chain allows the pendant to hang lower, creating a balanced look. For heavier pendants, a slightly longer length may be needed for comfort. Standard lengths like 16-18 inches are often recommended for small to medium pendants, while larger designs may require 20 inches or more for optimal visibility and comfort.

Factors Influencing Necklace Length Choice

Body type, neck size, face shape, and outfit are key factors influencing necklace length choice. These elements help determine the most flattering length for a balanced and stylish look.

Body Type and Height

Body type and height play a significant role in selecting necklace lengths. Taller individuals can balance longer necklaces, while petite frames look best with shorter lengths. For hourglass figures, a necklace that rests just below the collarbone enhances curves, whereas rectangular body types benefit from longer chains that add vertical lines. Pear-shaped individuals should opt for necklaces that draw the eye upward, such as princess or matinee lengths, to balance proportions. Understanding these guidelines ensures a harmonious and flattering fit for every body type.

Neck Size and Shape

Neck size and shape significantly influence necklace length choice. Smaller necks look best with shorter lengths (14-16 inches), while larger necks can carry longer chains (20 inches or more). Oval-shaped necks are versatile, complementing most lengths, whereas round necks benefit from longer necklaces to elongate the appearance. V-shaped necks are flattered by shorter lengths that draw focus upward. Consider your neck circumference and shape to ensure the necklace sits comfortably and proportionally, enhancing your overall silhouette without overwhelming or getting lost on your frame.

Face Shape and Features

Face shape and features play a key role in selecting necklace lengths. Oval faces can pull off any length, while round faces benefit from longer necklaces (20+ inches) to create elongation. Heart-shaped faces look stunning with shorter lengths (14-18 inches) that draw attention upward. Square faces are complemented by soft, curved pendants with medium lengths (18-22 inches). Consider your face shape and features to balance proportions and enhance your natural beauty, ensuring the necklace harmonizes with your overall appearance.

Outfit and Occasion

Necklace length should align with your outfit and occasion for a polished look. Formal events call for longer lengths, such as opera or rope necklaces (30+ inches), which complement evening wear. Casual outfits pair well with shorter, delicate chains (16-18 inches) that add subtle elegance. Layering necklaces in varying lengths creates a stylish, modern aesthetic. Consider the neckline of your outfit—lower necklines suit longer necklaces, while higher necklines work best with shorter lengths. Match your necklace length to the occasion to enhance your overall style and create a cohesive look.

Popular Necklace Styles and Their Lengths

Popular necklace styles vary in length, from chokers (14-16 inches) to opera necklaces (30+ inches). Princess necklaces (18-20 inches) are timeless, while matinee necklaces (20-24 inches) add versatility, perfect for layering or everyday wear. Each style offers unique elegance, catering to different preferences and occasions, ensuring a flattering fit for any wardrobe choice.
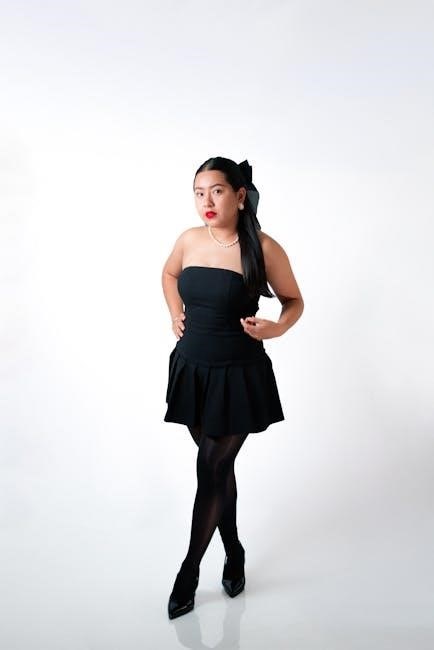
Choker Necklaces

Choker necklaces are a stylish and timeless choice, typically measuring between 14 and 16 inches in length. They sit snugly around the neck, creating a bold, eye-catching statement. Often paired with off-shoulder styles, boat necks, or V-necks, chokers draw attention to the face and neck. Popular materials include velvet, lace, or leather, and they can be adorned with pendants or left simple for a minimalist look. Chokers are versatile, suitable for both casual and formal occasions, making them a chic addition to any jewelry collection.

Princess Necklaces

Princess necklaces are a classic choice, typically measuring 18 to 20 inches in length. They rest gracefully on the collarbone, creating a balanced and elegant look. This length is ideal for most body types and face shapes, as it draws attention to the face while complementing the neckline. Princess necklaces are versatile, suitable for both casual and formal occasions, and pair beautifully with pendants or solitaire diamonds. Their timeless appeal makes them a popular choice for everyday wear or special events, offering a sophisticated yet understated style.

Matinee Necklaces

Matinee necklaces typically measure between 20 and 24 inches in length, making them slightly longer than princess necklaces. They sit below the collarbone, adding a touch of elegance to any outfit. This length is particularly flattering for taller individuals or those with longer torsos, as it creates balance and proportions. Matinee necklaces are versatile, suitable for both daytime and evening wear, and can be paired with pendants or worn alone for a sleek, understated look. Their mid-length design makes them ideal for layering or as a standalone statement piece.

Opera and Rope Necklaces

Opera necklaces are among the longest, typically measuring between 30 and 36 inches. These dramatic pieces are designed to make a bold statement, often paired with elegant evening wear or formal events. Rope necklaces, similarly long, feature intricate detailing and can be wrapped or layered for added style. Both styles are versatile, offering adjustability to suit various necklines and outfits. Their extended length allows for creative styling, making them a favorite for special occasions and red-carpet appearances, where a striking, eye-catching accessory is desired.

Necklace Length Guide for Different Occasions

Necklace lengths vary by occasion, with shorter styles suiting casual wear and longer lengths perfect for formal events. This guide helps you choose the ideal length for any setting, ensuring your jewelry complements your outfit and occasion seamlessly.

Formal Events

For formal events, necklace lengths typically range from 18 to 24 inches, offering an elegant and sophisticated look. Longer necklaces, such as opera or rope styles, are ideal for evening gowns or tailored suits, as they draw attention downward and create a balanced silhouette. Opt for a 24-inch or longer necklace to complement high-neckline dresses or plunge necklines. Pair bold pendants with shorter lengths like 18 inches for a striking statement. Consider the weight of the necklace to ensure it doesn’t overpower the outfit. Layering delicate chains or wearing a single, eye-catching piece can elevate your formal look, ensuring the necklace enhances the overall ensemble while reflecting personal style and the event’s grandeur.

Casual Outfits

Casual outfits pair well with necklaces in shorter to medium lengths, such as 16 to 20 inches. These lengths complement everyday looks, like t-shirts, sweaters, or jeans. For a relaxed vibe, opt for a 18-inch necklace, which sits just above the collarbone, adding subtle elegance. Layering shorter chains, such as 14-16 inches, with longer ones creates a trendy, laid-back aesthetic. Consider pendant size—smaller pendants work best for casual wear, while medium-sized ones can add a statement touch without feeling overly formal. Pairing the right necklace length with your outfit ensures a polished yet effortless look for daily wear.

Layering Necklaces

Layering necklaces is a stylish way to add depth to your look. Mixing different lengths creates visual interest and enhances your outfit. Opt for necklaces in varying lengths, such as 14-20 inches for shorter layers and 24-30 inches for longer ones, to achieve a balanced look. Pair delicate chains with bold pendants or textured designs to avoid overwhelming the ensemble. When layering, consider the outfit’s neckline and your body type to ensure the layers complement rather than clash. This technique allows for endless creativity, making it easy to personalize your style for any occasion.

Understanding necklace lengths is key to enhancing your personal style and complementing your features. Whether you prefer delicate chains or bold pendants, the right length ensures a flattering fit. Consider your body type, neck size, and outfit to make informed choices. Layering necklaces or opting for adjustable lengths offers versatility. By exploring different styles and lengths, you can discover what works best for you, making accessorizing effortless and enjoyable for any occasion.

nclex 3500 practice questions with answers pdf download

The NCLEX 3500 Practice Questions provide a comprehensive resource for nursing exam preparation, offering over 3,500 exam-like questions in PDF format for offline study convenience.

1.1 Overview of NCLEX-RN and NCLEX-PN Exams

The NCLEX-RN and NCLEX-PN exams are standardized tests for nursing licensure, assessing the knowledge and skills required for safe and effective patient care. The NCLEX-RN typically includes 75–265 questions, while the NCLEX-PN has 85–205 questions, both featuring multiple-choice and alternative question formats. These exams use adaptive testing technology to tailor questions based on the candidate’s ability, ensuring a precise measure of competency. The NCLEX exams are essential for becoming a licensed registered nurse (RN) or practical nurse (PN), with content covering a wide range of nursing topics and clinical scenarios; The exams are administered by the National Council of State Boards of Nursing (NCSBN) and are a critical step in the nursing licensure process in the United States. Candidates must demonstrate their ability to apply nursing knowledge, think critically, and prioritize patient care effectively. The exams are continually updated to reflect current nursing practices and standards, ensuring they remain relevant and challenging for aspiring nurses. Successful completion of the NCLEX exam is a significant milestone in a nursing career, enabling graduates to practice professionally and deliver high-quality patient care. Understanding the exam format, content, and strategies is crucial for success, making preparation tools like practice questions and study guides invaluable. The NCLEX exams are designed to ensure that new nurses are prepared to meet the demands of the healthcare industry and provide safe, evidence-based care to patients across various settings. By passing the NCLEX, candidates demonstrate their readiness to enter the nursing profession and contribute to improving patient outcomes.

1.2 Importance of Practice Questions in NCLEX Preparation

Practice questions are vital for NCLEX preparation as they simulate real exam conditions, helping candidates assess their knowledge and identify weaknesses. Regular practice enhances problem-solving skills, improves critical thinking, and builds confidence. Access to resources like NCLEX 3500 practice questions with answers in PDF format provides a structured study tool, allowing candidates to review and master nursing concepts effectively. This repetitive practice ensures better retention of key information and familiarity with the exam format, ultimately leading to improved performance on test day.

Benefits of Using NCLEX 3500 Practice Questions

NCLEX 3500 practice questions enhance exam readiness by providing exposure to diverse nursing topics, improving time management, and boosting knowledge retention. The free PDF format ensures easy offline access, allowing candidates to study efficiently and effectively, while the detailed answer rationales help clarify complex concepts and strengthen understanding.

2.1 Enhanced Knowledge Retention Through Repetitive Practice

Repetitive practice with NCLEX 3500 questions reinforces key nursing concepts, ensuring better retention. Consistently answering questions helps solidify information, reduce forgetting, and improve recall during exams. The inclusion of detailed answer rationales provides clarity, while the PDF format allows easy offline access, enabling candidates to practice anytime and strengthen their understanding of critical topics effectively.

2.2 Improved Time Management and Exam Strategies

NCLEX 3500 practice questions enhance time management by simulating real exam conditions, helping candidates allocate time wisely. Regular practice fosters familiarity with question formats, enabling quicker decision-making. Strategies like prioritization and elimination of distractors are refined, leading to improved performance under timed conditions. This systematic approach ensures candidates are well-prepared to manage their time effectively during the actual NCLEX exam.

2.3 Exposure to a Wide Range of Nursing Topics

NCLEX 3500 practice questions cover a broad spectrum of nursing topics, ensuring candidates are well-versed in areas like pharmacology, pediatrics, and gerontology. This extensive exposure helps identify weak areas and builds confidence. The questions are designed to reflect real exam content, providing a thorough understanding of diverse patient care scenarios and clinical situations, which is essential for success in the NCLEX exam.

How to Effectively Use NCLEX 3500 Practice Questions

Use NCLEX 3500 practice questions to enhance understanding of exam content and improve problem-solving skills. Incorporate them into your study routine, focusing on weak areas and reviewing rationales.

3.1 Creating a Study Schedule with Practice Questions

Organize your study sessions by incorporating NCLEX 3500 practice questions into a structured schedule. Allocate specific time slots for different topics, ensuring systematic coverage of all areas. Prioritize high-weightage subjects and include regular breaks to maintain focus. Utilize the PDF format for offline access, allowing you to study anywhere. Regularly review answer rationales to reinforce learning and improve retention effectively.

3.2 Analyzing Answer Rationales for Better Understanding

Examining the rationales behind NCLEX 3500 practice questions enhances comprehension of complex nursing concepts. Each answer explanation provides insights into the logic and reasoning, helping you grasp the subject deeply. This approach fosters critical thinking and clarifies doubts, making it easier to apply knowledge in real exam scenarios.

Regularly reviewing rationales also highlights common mistakes, enabling you to avoid them in future; This method ensures continuous improvement and a stronger grasp of nursing principles, ultimately boosting confidence and performance in the NCLEX exam.

3.3 Focusing on High-Weightage Topics

Focusing on high-weightage topics in NCLEX 3500 practice questions ensures efficient preparation by targeting areas frequently tested. Prioritizing these subjects, such as prioritization in nursing, enhances understanding and application of key concepts. Utilizing case studies and adaptive quizzes helps assess mastery of critical topics, aligning with the exam format and improving time management for better performance.

Finding Reliable NCLEX 3500 Practice Questions

Trusted websites like Nurseslabs and PDFDrive offer free, expert-authored NCLEX questions. These resources provide high-quality, updated practice materials to aid in effective exam preparation and success.

4.1 Trusted Websites and Resources for NCLEX Questions

Reputable platforms like Nurseslabs and PDFDrive provide access to NCLEX 3500 practice questions. These websites ensure content accuracy and relevance, offering free PDF downloads and updated materials. Nurseslabs features over 2,100 free sample questions, while PDFDrive offers comprehensive study guides. Both resources are widely recognized for their reliability and effectiveness in exam preparation.

4.2 Evaluating the Quality of Practice Questions

Evaluate NCLEX 3500 practice questions by ensuring they align with the exam format and cover a broad range of nursing topics. Look for questions with detailed answer rationales to enhance understanding. Additionally, verify that the questions are updated and reflect current nursing standards, ensuring they are challenging and relevant to the actual NCLEX exam experience.

4;3 Avoiding Common Mistakes in Question Selection

When selecting NCLEX 3500 practice questions, avoid choosing outdated or irrelevant content. Ensure questions align with the latest exam format and cover high-weightage topics. Steer clear of questions without detailed rationales, as they hinder understanding. Additionally, verify the source’s credibility to avoid low-quality or inaccurate questions, which can mislead exam preparation and reduce effectiveness in achieving success.

Content Coverage in NCLEX 3500 Practice Questions

NCLEX 3500 Practice Questions cover a wide range of nursing topics, including clinical judgment, pharmacology, and patient care. They incorporate case studies and adaptive quizzes for realistic exam preparation.

5.1 Detailed Breakdown of Nursing Topics

NCLEX 3500 Practice Questions cover extensive nursing areas, including clinical judgment, pharmacology, and patient care. They feature case studies, adaptive quizzes, and prioritization techniques, mirroring real exam scenarios for effective preparation.

5.2 Inclusion of Case Studies and Adaptive Quizzes

NCLEX 3500 Practice Questions feature case studies and adaptive quizzes to simulate real exam scenarios. These tools enhance critical thinking and time management skills, preparing candidates for diverse clinical challenges. Adaptive quizzes adjust difficulty based on performance, while case studies provide practical, scenario-based learning experiences, both designed to improve exam readiness and confidence.

5.3 Alignment with the Latest NCLEX Exam Format

NCLEX 3500 Practice Questions are carefully updated to align with the latest exam format, ensuring candidates encounter realistic question types and content. Reflecting the 2025 NCLEX-RN and PN updates, these questions emphasize analysis and application of knowledge. They include item formats like SATA, drag-and-drop, and hotspots, mirroring the actual exam experience to help candidates build familiarity and confidence with the test structure and question styles.

Advantages of PDF Format for NCLEX Practice Questions

PDF format offers easy accessibility, offline use, and customizable study materials. It provides a convenient, environmentally friendly option for exam preparation, aligning with modern study preferences;

6.1 Easy Accessibility and Offline Use

The PDF format allows seamless access to NCLEX practice questions without internet connectivity. Students can download and study anywhere, on any device, enhancing flexibility and convenience. Offline access ensures uninterrupted study sessions, making it ideal for candidates with limited internet access. This feature maximizes study time and supports efficient exam preparation, aligning with the need for portability and ease of use in modern learning environments.

6.2 Customizable Study Materials

The PDF format allows users to tailor their study materials to individual needs. Candidates can create personalized study plans, focus on specific topics, and organize content for efficient review. This flexibility enables learners to prioritize challenging areas, enhancing their preparation process and ensuring a more effective use of study time.

6.3 Environmentally Friendly Study Option

PDF format offers an eco-friendly alternative to traditional study materials. By reducing the need for printed books, it minimizes paper usage and lowers carbon footprint. Digital access eliminates transportation and storage demands, making it a sustainable choice for learners. This environmentally conscious option aligns with modern efforts to reduce waste while providing convenient access to essential study resources.

Test-Taking Strategies for NCLEX Success

Master prioritization techniques, eliminate distractors, and manage time effectively to enhance exam performance. These strategies, refined through practice, ensure confidence and accuracy during the NCLEX exam.

7.1 Prioritization Techniques

Prioritization techniques are essential for NCLEX success, helping candidates focus on the most critical patient needs. By identifying high-priority actions, nurses can manage complex care scenarios effectively. Episode 12 on prioritization offers valuable insights, emphasizing the importance of ethical decision-making and patient-centered care. These strategies, refined through practice, ensure accurate and efficient responses during the exam, reflecting real-world nursing challenges and ethical considerations.

7;2 Elimination of Distractors

Elimination of distractors is a key strategy for NCLEX success, helping candidates identify and remove incorrect answer choices. By analyzing practice questions, nurses can recognize common distractors, such as similar-sounding options or irrelevant details. Reviewing answer rationales enhances this skill, improving critical thinking and accuracy. This technique ensures focus on the most plausible answers, reducing errors and boosting confidence during the exam.

7.3 Time Management During the Exam

Time management is crucial for NCLEX success. Utilize NCLEX 3500 practice questions to enhance speed and accuracy. The PDF format allows offline access, enabling efficient study sessions. Review answer rationales to improve decision-making and reduce exam hesitation. Allocate 60-90 seconds per question, reserving time to review answers, ensuring optimal performance under timed conditions.

Answer Rationales and Their Importance

Answer rationales provide detailed explanations for correct and incorrect responses, enhancing understanding and critical thinking. They help identify knowledge gaps and improve decision-making skills for exam success.

8.1 Understanding the Logic Behind Correct Answers

Understanding the logic behind correct answers in NCLEX 3500 practice questions enhances learning by revealing the reasoning and principles driving each response. This approach fosters critical thinking, enabling nurses to apply knowledge in diverse clinical scenarios effectively. Detailed rationales clarify concepts, improving comprehension and exam strategies for future questions.

8.2 Learning from Mistakes

Analyzing errors in NCLEX 3500 practice questions helps identify knowledge gaps and improve understanding. Reviewing incorrect answers with detailed rationales provides insights, enabling learners to avoid repeat mistakes. This process strengthens critical thinking and clinical reasoning skills, enhancing overall performance in the actual exam. The PDF format allows easy access to these resources, facilitating continuous learning and improvement.

8.3 Building Critical Thinking Skills

NCLEX 3500 practice questions with answers PDF download fosters critical thinking by presenting exam-like scenarios. Detailed rationales guide learners to understand the reasoning behind each answer, enhancing their ability to analyze complex situations. Regular practice helps develop the skills to prioritize information, identify key concepts, and make sound clinical decisions, mirroring real-world nursing challenges.

NCLEX 3500 practice questions with answers PDF download is an invaluable resource, offering comprehensive exam preparation and boosting confidence for aspiring nurses aiming to ace the NCLEX-RN exam successfully.

9.1 Final Tips for NCLEX Preparation

  • Master time management by simulating exam conditions with practice questions.
  • Focus on understanding rather than memorizing answers for better retention.
  • Leverage PDF resources for offline study and customizable note-taking.
  • Practice regularly with the NCLEX 3500 questions to build confidence.
  • Prioritize high-weightage topics to maximize score potential.

These strategies, combined with consistent review of answer rationales, will ensure a well-rounded preparation for the NCLEX exam.

9.2 Encouragement to Utilize Practice Questions Effectively

Maximizing the use of NCLEX 3500 practice questions can significantly enhance your study habits and exam readiness. By consistently reviewing and analyzing these questions, you’ll improve your critical thinking and problem-solving skills. Take advantage of the PDF format for easy access and create a structured study plan to ensure thorough preparation. Remember, understanding the rationale behind each answer is key to long-term success.

kill move paradise pdf

KILL MOVE PARADISE, written by James Ijames, is a powerful play exploring themes of identity, justice, and the afterlife through the story of four Black men in a cosmic waiting room. The script delves into their pasts and the circumstances that led them to this liminal space, blending physical theater and emotional dialogue to create a thought-provoking experience. Available as a PDF, the play has garnered attention for its unique style and cultural significance.

1.1 Overview of the Play

KILL MOVE PARADISE, written by James Ijames, is a compelling play that delves into the lives of four Black men—Isa, Daz, Grif, and Tiny—who find themselves in a mysterious, cosmic waiting room after their deaths. The play explores their struggles to understand their new reality and confront their past actions. Blending dialogue, physical theater, and emotional depth, it examines themes of identity, justice, and the afterlife. The script, available as a PDF, offers a unique perspective on existential questions and societal issues, making it a significant work in contemporary theater.

1.2 Background and Context

KILL MOVE PARADISE by James Ijames is set against the backdrop of a cosmic waiting room, where four Black men grapple with their existence post-death. Drawing inspiration from real-world issues, the play reflects on systemic injustices and racial disparities. Ijames’ work is influenced by his exploration of identity and social justice, creating a poignant narrative that resonates with contemporary audiences. The PDF version of the script captures the essence of this powerful storytelling, offering readers a glimpse into the lives of Isa, Daz, Grif, and Tiny as they navigate their unearthly limbo and confront their pasts. The play’s unique blend of dialogue and physical theater enhances its emotional impact, making it a vital contribution to modern theater.

Plot and Structure

The play unfolds in a cosmic waiting room where four Black men—Isa, Daz, Grif, and Tiny—confront their pasts and the circumstances of their deaths, blending dialogue with physical theater to explore their liminal existence.

2.1 The Setting: A Cosmic Waiting Room

The play is set in a mysterious, open space described as a cosmic waiting room in the afterlife. This liminal environment, neither fully earthly nor divine, serves as a backdrop for the characters’ reflections and confrontations. The setting is abstract, with minimalistic elements that emphasize the characters’ emotional and psychological journeys. The waiting room’s Otherworldly nature creates a sense of detachment, allowing the audience to focus on the characters’ struggles and interactions. Physical theater and movement are integral to conveying the space’s ethereal quality, blending the surreal with the intimate.

2.2 Main Characters and Their Roles

Isa, Grif, Daz, and Tiny are four Black men trapped in a cosmic waiting room. Isa, the central figure, interacts with the audience, guiding the narrative. Grif emerges from the shadows, sparking conversations that reveal their shared fate. Daz and Tiny bring unique perspectives, their stories intertwined with themes of identity and justice. Each character’s role is pivotal, as they confront their pasts and the mysterious space they inhabit. Their interactions drive the play’s exploration of mortality, guilt, and redemption, creating a dynamic interplay that underscores the human condition.

Themes and Motifs

KILL MOVE PARADISE explores identity, justice, and the afterlife, blending physical theater with emotional dialogue to confront the struggles of Black America and the paradox of modern existence.

3.1 Exploration of Identity and Justice

KILL MOVE PARADISE delves into the intersection of identity and justice through the stories of four Black men in a cosmic waiting room. The play examines systemic oppression and personal struggles, highlighting how their experiences shape their sense of self. Justice is questioned in the context of their deaths and the afterlife, challenging notions of fairness and accountability. Through their interactions, the characters confront their pasts, revealing the societal and personal burdens they carried. The play’s exploration of identity and justice is both deeply personal and universally resonant, offering a powerful commentary on race, mortality, and redemption.

3.2 The Concept of the Afterlife

KILL MOVE PARADISE reimagines the afterlife as a cosmic waiting room, where four Black men grapple with their existence post-mortem. This liminal space serves as a metaphor for transition, reflection, and unresolved earthly matters. The play challenges traditional notions of the afterlife, presenting it as a place of ambiguity rather than clarity. Through their struggles, the characters confront the reality of their deaths and the lives they left behind. The afterlife here is not a place of judgment but a space for reckoning, where the past and present collide, forcing them to confront their truths and the systemic injustices that shaped their lives.

3.3 Physical Theater and Movement

Physical theater in Kill Move Paradise plays a pivotal role in storytelling, with movement and gesture amplifying emotional depth. The play often shifts from dialogue to kinetic expression, allowing characters to convey their inner turmoil and memories. A notable example is the reenactment of Tiny’s murder, where physicality becomes a powerful narrative tool. The use of space and movement highlights the characters’ disorientation in the afterlife, creating a visceral connection with the audience. This blend of motion and emotion underscores the play’s themes of identity and justice, making the performance both visually striking and deeply resonant.

Character Analysis

The play focuses on four Black men—Isa, Grif, Daz, and Tiny—each with unique backgrounds and struggles. Their interactions reveal their identities and the circumstances of their deaths, exploring themes of justice, trauma, and redemption. Isa, the central figure, guides the group through their collective journey, while Grif, Daz, and Tiny each bring their own stories and emotional depth to the narrative. Together, they embody the complexities of Black masculinity and the search for meaning in the afterlife.

4.1 Isa: The Central Character

Isa is the central character in Kill Move Paradise, guiding the audience and his fellow characters through the cosmic waiting room. His interactions with Grif, Daz, and Tiny reveal his leadership and emotional depth. Isa’s dialogue often serves as a catalyst for introspection, pushing the group to confront their pasts. His role is both that of a mediator and a seeker of truth, embodying the play’s themes of identity and justice. Through Isa’s journey, the audience gains insight into the collective struggle of the characters and the broader implications of their circumstances in the afterlife.

4.2 Grif, Daz, and Tiny: Their Stories

Grif, Daz, and Tiny each bring unique perspectives and experiences to the cosmic waiting room. Grif, portrayed as tough and street-smart, often challenges Isa, while Daz’s introspective nature hints at a deeper emotional struggle. Tiny’s story is particularly poignant, as his murder is reenacted, showcasing the violence and injustice he endured. Their interactions reveal how their pasts shape their present, with each character grappling with personal guilt and societal expectations. Together, their stories underscore the play’s exploration of race, identity, and the consequences of their earthly lives, adding depth to the group’s collective journey in the afterlife;

Dramatic Elements

KILL MOVE PARADISE employs powerful dialogue, physical theater, and emotional intensity to explore its themes. The interplay between characters, combined with symbolic movements, creates a compelling narrative experience.

5.1 Dialogue and Interaction

The dialogue in Kill Move Paradise is sharp and evocative, driving the narrative forward while revealing the characters’ complex backgrounds and emotions. Conversations between Isa, Grif, Daz, and Tiny are fraught with tension, humor, and vulnerability, creating a dynamic interplay that reflects their shared struggles. The interactions are deeply rooted in themes of identity and justice, often challenging the audience to confront uncomfortable truths. The playwright’s use of language blends poetic imagery with raw honesty, making the dialogue both haunting and impactful. These exchanges not only advance the plot but also deepen the emotional connection between the characters and the audience, amplifying the play’s resonance.

5.2 Symbolism and Metaphor

The play employs powerful symbolism, with the cosmic waiting room serving as a metaphor for the afterlife and transitional states of existence. The characters’ movements and interactions symbolize their internal struggles and collective search for justice. The reenactment of Tiny’s murder through physical theater underscores the cyclical nature of violence and its impact on Black lives. The concept of “paradise” itself is a metaphor, questioning the notion of a utopian afterlife and highlighting the elusiveness of peace. These symbolic elements deepen the narrative, inviting audiences to reflect on identity, trauma, and the quest for redemption.

Reception and Impact

KILL MOVE PARADISE has received critical acclaim for its bold exploration of race, justice, and identity. Audiences and critics praise its emotional weight and cultural relevance, making it a significant work in contemporary theater.

6.1 Audience and Critical Response

Audiences and critics have praised Kill Move Paradise for its raw emotion and unflinching portrayal of systemic injustice. The play has been described as haunting and thought-provoking, with many highlighting its ability to spark necessary conversations about race and identity. Critics note the powerful physical theater elements and the cast’s compelling performances. The PDF version of the script has been widely shared, allowing readers to engage deeply with the text and its themes. Overall, the play has left a lasting impact on both theatrical audiences and academic circles.

6.2 Cultural Significance

Kill Move Paradise holds profound cultural significance as it confronts systemic injustice and amplifies Black voices. The play challenges audiences to reflect on race, identity, and the afterlife, resonating deeply in contemporary discourse. Its unique blend of physical theater and emotional storytelling has made it a landmark work in modern theater. The PDF version has facilitated widespread access, enabling educators and performers to study and stage the play globally. By addressing the struggles of Black America, it has become a vital tool for sparking conversations about justice and humanity, leaving a lasting cultural legacy.

Resources for Further Study

The Kill Move Paradise PDF is available for download, offering the full script and analysis. Additional resources include interviews with James Ijames and study guides for deeper exploration.

7.1 Available Scripts and PDFs

The full script of Kill Move Paradise is available as a PDF, providing access to the complete dialogue, stage directions, and thematic elements. This document allows readers to explore the play’s structure, character dynamics, and emotional depth in detail. The PDF can be downloaded from various online platforms, including academic and theatrical resources. It serves as a valuable tool for students, researchers, and theater enthusiasts to analyze the work’s language, symbolism, and dramatic techniques. The script also includes insights into the playwright’s vision and the cultural significance of the narrative.

7.2 Interviews with the Playwright

Interviews with playwright James Ijames provide deeper insights into the creation and themes of Kill Move Paradise. In discussions, Ijames shares his inspiration for the play, emphasizing its exploration of identity, justice, and the afterlife. He also reflects on the cultural significance of the work and its resonance with contemporary issues. One notable interview, conducted by actor Lindsay Smiling, highlights Ijames’ connection to Philadelphia’s artistic scene and his approach to storytelling. These interviews are available online and offer valuable context for understanding the play’s emotional and theatrical depth.

Educational and Performance Materials

Educational materials for Kill Move Paradise include study guides and production notes, aiding both students and directors in understanding and staging the play effectively.

8.1 Study Guides and Analysis

Study guides for Kill Move Paradise offer in-depth analysis of themes, characters, and dramatic elements. These resources provide insights into the play’s exploration of identity, justice, and the afterlife. Guides often include scene breakdowns, character motivations, and historical context, helping students and educators understand the play’s complex narrative. Analysis sections focus on the use of physical theater and dialogue, highlighting how these elements convey the characters’ emotional journeys. Exercises and discussion points are also included to facilitate deeper engagement with the material. These guides are essential for both academic and performance-based studies of the play.

8.2 Production Notes and Staging

The staging of Kill Move Paradise requires a minimalist yet evocative set design, emphasizing the cosmic waiting room’s openness. Lighting and sound are crucial in creating an ethereal atmosphere, guiding the audience’s emotional journey. Movement and choreography play a central role, as physical theater is integral to conveying the characters’ struggles and memories. Directors should focus on balancing dialogue with non-verbal expressions to highlight the play’s themes. The use of staging tools like projections and silence can enhance the surreal nature of the setting. These production elements work together to create a visually and emotionally immersive experience.

armani luminous silk foundation shade guide

Giorgio Armani’s Luminous Silk Foundation is renowned for its smooth, luminous finish and versatile coverage․ With a wide 40-shade range, it caters to diverse skin tones and undertones, ensuring a natural, radiant complexion․ This foundation is celebrated for its light to medium coverage and silk-like texture, making it a popular choice for achieving a flawless base․ Whether you’re fair, medium, tan, or deep-skinned, Armani’s innovative formula and extensive shade options aim to enhance your natural beauty with precision and elegance․

1․1 Overview of the Foundation

The Armani Luminous Silk Foundation is a luxurious, lightweight formula designed to provide a smooth, natural-looking base․ Renowned for its radiant finish, it offers light to medium coverage that enhances skin texture without feeling heavy․ The foundation is celebrated for its silk-like texture and ability to blend seamlessly, creating a flawless complexion․ Its versatility makes it suitable for various skin types, from dry to oily, while its extensive shade range ensures a match for diverse skin tones․ This iconic formula has become a staple in many beauty routines worldwide․

1․2 Importance of Shade Matching

Accurate shade matching is essential for achieving a natural, seamless look with the Armani Luminous Silk Foundation․ A well-matched shade ensures the foundation blends effortlessly, enhancing your natural complexion without appearing cakey or artificial; Poor shade matching can accentuate imperfections or leave an unnatural finish․ By catering to diverse skin tones and undertones, Armani’s extensive range allows for precise matching, ensuring a flawless base that boosts confidence and complements individual beauty․ Proper shade selection is key to unlocking the foundation’s full potential for a radiant, luminous effect․

Understanding Skin Tone and Undertones

Skin tone refers to your natural complexion, ranging from fair to deep, while undertones are the subtle hues beneath, such as cool, warm, or neutral․ Accurate identification of both ensures a seamless foundation match, enhancing your natural beauty․

2․1 What is Skin Tone?

Skin tone refers to the natural color of your complexion, categorized as fair, light, medium, tan, or deep․ It is determined by melanin levels and can vary with sun exposure or seasonal changes․ Understanding your skin tone is essential for selecting the right foundation shade, as it forms the base for matching your complexion․ Accurate identification ensures a natural-looking finish, whether your skin is fair and porcelain-like or deep with rich undertones․ This foundational knowledge helps in navigating the extensive Armani Luminous Silk Foundation shade range effectively․

2․2 What Are Undertones?

Undertones are the subtle, underlying hues that lie beneath your skin’s surface, influencing how foundation shades appear on your complexion․ They remain relatively consistent and are categorized as cool, warm, or neutral․ Cool undertones feature pink or blue veins, while warm undertones display yellow or golden ones․ Neutral undertones balance both cool and warm characteristics․ Accurately identifying your undertone is crucial for selecting the right foundation shade, as it ensures the product blends seamlessly with your natural skin color, creating a flawless, natural-looking finish․

2․3 Importance of Undertones in Foundation Matching

Undertones play a crucial role in achieving a natural, seamless foundation match․ They determine how the foundation interacts with your skin, ensuring it complements rather than clashes․ A mismatched undertone can result in an unnatural appearance, such as overly pink, yellow, or ashy tones․ Cool undertones require foundations with pink or blue undertones, while warm undertones benefit from yellow or golden hues․ Neutral undertones need balanced shades․ Correctly identifying your undertone ensures the foundation enhances your natural complexion, creating a flawless, radiant finish that looks like second skin․

The Armani Luminous Silk Foundation Shade Range

Armani’s Luminous Silk Foundation offers an extensive 40-shade range, catering to diverse skin tones from fair to deep․ Each shade is thoughtfully designed to address specific undertones, ensuring a natural, inclusive match for every complexion․

3․1 Fair to Light Shades (1․5-6․25)

The Armani Luminous Silk Foundation offers a range of shades from 1․5 to 6․25, catering to fair to light skin tones․ These shades are designed to enhance natural radiance, with undertones ranging from pink to neutral, golden, and olive․ Shade 1․5 is ideal for very fair skin with cool undertones, while 6․25 suits light skin with warm tones․ Each shade ensures a seamless match, blending effortlessly for a luminous, natural-looking finish tailored to lighter complexions․

3․2 Medium to Tan Shades (7-8․5)

Armani Luminous Silk Foundation’s medium to tan shades (7-8․5) cater to skin tones with a natural glow․ Shade 7 offers a warm, sun-kissed look, while 8․5 provides a deeper tan hue․ These shades are designed for medium to tan complexions, with undertones ranging from warm to neutral and cool․ They enhance the skin’s natural radiance, blending seamlessly for a flawless, luminous finish․ Whether your skin has warm golden undertones or cooler tones, these shades ensure a perfect match for medium to tan skin, offering a natural, sunlit appearance․

3․3 Deep Shades (9-10)

Armani Luminous Silk Foundation’s deep shades (9-10) are crafted for rich, darker skin tones․ Shade 9 offers a warm, deep hue, while shade 10 provides the darkest option with cool undertones․ These shades are designed to complement deeper complexions, ensuring a natural, luminous finish․ With undertones tailored to suit warm, cool, or neutral skin, these shades blend seamlessly, enhancing the skin’s natural radiance․ Perfect for those with deeper skin tones, they deliver the same flawless, second-skin effect the foundation is known for, with a formula that lasts and adapts to your skin․

Using Armani’s Online Tools for Shade Matching

Armani’s online tools, like the Shade Finder and Virtual Try-On, help users discover their perfect match effortlessly․ These innovative features ensure a personalized and accurate shade selection experience․

4․1 Armani Shade Finder Tool

The Armani Shade Finder Tool is an advanced online feature designed to simplify shade matching․ By answering questions about skin tone, undertone, and current foundation shade, users receive personalized recommendations․ The tool leverages AI technology to analyze inputs and suggest suitable Luminous Silk Foundation shades․ It also allows users to upload photos or use their camera for a more precise match, ensuring a tailored and accurate foundation selection experience tailored to individual skin characteristics․

4․2 Virtual Try-On Feature

The Virtual Try-On Feature by Armani allows users to test Luminous Silk Foundation shades virtually․ Using a photo or live camera, the tool applies the selected shade to your face, providing a realistic preview․ This innovative feature helps you assess how the foundation looks under different lighting conditions, ensuring a more informed decision․ It minimizes the risk of shade mismatch and offers a convenient way to explore various options before purchase, enhancing your online shopping experience with Armani Beauty․

Decoding Armani Luminous Silk Shade Names

Armani Luminous Silk shades combine numerical depth indicators with descriptive undertones (warm, cool, neutral) to guide selection․ This system ensures precise matching based on skin tone and undertone․

5․1 Understanding Shade Numbering

The Armani Luminous Silk Foundation uses a numbered system to categorize its 40 shades, ranging from fair to deep․ The numbering starts with lighter shades and progresses to darker ones, ensuring a customized match․ This method helps users identify their skin tone and undertone quickly, providing a personalized recommendation for a flawless match․ The system is designed to cater to all complexions, enhancing natural beauty with precision and ease․

5․2 Shade Descriptions and Undertones

Armani Luminous Silk Foundation shades are accompanied by descriptive terms like “Warm” or “Cool,” indicating undertones․ These descriptions guide users to their perfect match by specifying whether a shade has yellow, pink, or neutral undertones․ For example, “Light Medium, Warm” signifies a golden undertone, while “Tan, Cool” reflects pinkish hues․ This system ensures users can align the foundation with their skin’s natural undertones, achieving a seamless, natural-looking finish․ Understanding these descriptions is key to selecting the most flattering shade for your complexion․

Cross-Referencing with Other Brands

Shade comparison charts and online tools help match Armani Luminous Silk shades with other brands, simplifying the transition․ Individual variations may still require adjustments for perfect alignment․

6․1 Using Shade Comparison Charts

Shade comparison charts are invaluable for translating your foundation shade from other brands to Armani Luminous Silk․ These charts list corresponding shades across brands, aiding in seamless transitions․ By aligning your current shade with Armani’s range, you can identify potential matches․ However, variations in lighting and individual skin tones may affect accuracy․ Use these charts as a guide, but consider virtual try-ons or professional advice for precise matching․ They simplify the process but aren’t foolproof, so combining methods ensures the best results․

6․2 Considering Individual Variations

Individual variations in skin tone, undertones, and lighting conditions can affect how foundation shades appear․ While shade comparison charts are helpful, personal factors like oxidation and skin type may influence the final look․ Lighting differences and screen variations can also alter perceptions․ To ensure accuracy, combine chart references with virtual try-ons, customer reviews, and professional advice․ Personal preferences for coverage and finish further tailor the selection process, making it essential to test shades dynamically․ This dual approach enhances precision and satisfaction in finding your perfect match․

The Role of Customer Reviews and Swatches

Customer reviews and swatches provide real-life insights, helping you gauge how Armani Luminous Silk Foundation shades perform on similar skin tones and undertones․ They offer visual accuracy and feedback․

7․1 Importance of Real-Life Feedback

Real-life feedback from customers is invaluable for determining how Armani Luminous Silk Foundation shades perform on different skin tones and undertones․ Reviews often highlight aspects like coverage, finish, and longevity, providing insights into how the foundation behaves over time․ Many users share their experiences with specific shades, noting whether they oxidize or match their skin’s undertones․ This feedback, combined with swatches, helps potential buyers make informed decisions and avoids costly mismatches․ It also offers a practical perspective on the foundation’s suitability for various skin types and preferences․

7․2 Analyzing Swatches for Accuracy

Analyzing swatches is crucial for accurately determining how Armani Luminous Silk Foundation shades appear on different skin tones․ Swatches provide a visual representation of the foundation’s color, helping you assess its undertones and depth․ Look for swatches taken in natural lighting, as they offer the most realistic depiction․ Comparing multiple swatches from various sources can also help account for differences in skin types and lighting conditions․ This step ensures a more precise match, especially when shopping online without in-person testing․

Common Questions and Concerns

Common concerns include oxidation, where shades darken after application, and matching similar shades across brands․ Armani’s virtual try-on tool helps address these issues effectively․

8․1 Differences Between Similar Shades

Determining the differences between similar shades can be confusing due to subtle variations in undertones․ For instance, shades labeled “warm” and “cool” may appear alike but cater to different skin undertones․ Warm shades lean toward golden or yellow hues, ideal for those with warm undertones, while cool shades have pink or blue undertones, suited for cooler skin․ Even slight differences in numbering (e․g․, 5․25 vs․ 5․5) can indicate variations in depth or undertone․ Understanding these distinctions is key to selecting the perfect match․ Utilize Armani’s Shade Finder Tool and customer reviews for clearer insights․

8․2 Understanding Oxidation

Oxidation in foundation occurs when the formula reacts with your skin’s natural oils or pH, causing the shade to darken or change tone over time․ This can lead to mismatched color, especially if not accounted for during the initial application․ To address oxidation, test shades on your jawline and observe how they look after a few hours․ Reading customer reviews and analyzing swatches can also provide insights into whether specific shades are prone to oxidation․ This helps ensure a more accurate and long-lasting match with the Armani Luminous Silk Foundation․

leupold 450 bushmaster scope manual

Welcome to the Leupold 450 Bushmaster Scope Manual‚ your comprehensive guide to understanding and maximizing the performance of this high-quality riflescope․ Designed for hunters and shooters‚ this manual provides detailed instructions and insights to ensure optimal accuracy and reliability․ Learn about key features‚ proper installation‚ and maintenance tips to get the most out of your scope․

Overview of the Leupold 450 Bushmaster Scope

The Leupold 450 Bushmaster Scope is a robust‚ precision-engineered riflescope designed for hunters and shooters seeking accuracy and reliability․ It features a durable construction‚ making it suitable for challenging environments․ The scope is optimized for the ․450 Bushmaster cartridge‚ offering exceptional performance for medium to large game hunting․ With its clear optics and versatile reticle options‚ it enhances target acquisition and shot placement․ The elevation adjustment dial is pre-configured for 250gr FTX ammunition‚ simplifying zeroing․ This scope is ideal for both beginners and experienced shooters‚ combining reliability with ease of use in the field․

Importance of the Manual for Optimal Scope Performance

The Leupold 450 Bushmaster Scope Manual is essential for unlocking the full potential of your riflescope․ It provides detailed guidance on sighting-in‚ elevation adjustments‚ and maintenance‚ ensuring accurate and reliable performance․ By following the manual‚ users can avoid common setup errors and optimize their scope for specific shooting conditions․ The manual also includes troubleshooting tips to address issues like blurry optics or adjustment malfunctions․ Whether you’re a seasoned hunter or a new shooter‚ this guide is your key to understanding and maintaining your scope for years of precise and dependable use in the field․

Key Features of the Leupold 450 Bushmaster Scope

The manual provides essential guidance for setting up and maintaining the Leupold 450 Bushmaster Scope‚ ensuring accurate performance and helping users troubleshoot common issues for optimal results․

Design and Construction of the Scope

The Leupold 450 Bushmaster Scope is built with a robust design‚ ensuring durability and reliability․ Constructed from high-quality materials like aircraft-grade aluminum‚ it offers strength and light weight․ The scope features a nitrogen-filled tube to prevent fogging‚ enhancing reliability in various environments․ Its elevation adjustment dial is precisely configured for the Bushmaster 450 with 250gr FTX ammo at 2200FPS‚ ensuring accurate performance․ The scope also boasts exceptional optical clarity and precision engineering‚ providing clear views in different lighting conditions․ With a range of reticle options‚ it meets diverse shooting needs‚ making it a versatile choice for hunters and shooters alike․

Reticle Options and Their Applications

The Leupold 450 Bushmaster Scope offers versatile reticle options designed to meet specific shooting needs․ The standard Duplex reticle provides clear aiming points for quick target acquisition‚ ideal for close-range and medium-distance shooting․ For precision shooting‚ the scope features a fine-diameter reticle‚ enhancing accuracy at longer ranges․ Additionally‚ the Ballistic Drop Compensation (BDC) reticle is calibrated for the Bushmaster 450 cartridge‚ offering precise holdover points for various distances․ Each reticle is designed to optimize shooting performance‚ ensuring clarity and reliability in diverse hunting and tactical scenarios․ The optical clarity and reticle versatility make it a trusted choice for both hunters and tactical shooters․

Elevation and Windage Adjustment Mechanisms

The Leupold 450 Bushmaster Scope features precise elevation and windage adjustment mechanisms‚ allowing shooters to fine-tune their aim for optimal accuracy․ The elevation dial is configured to match the trajectory of the ․450 Bushmaster cartridge‚ with clear markings for easy adjustments; Each click represents a 1/2 MOA increment‚ ensuring precise control․ The windage mechanism is similarly designed for accuracy‚ enabling shooters to compensate for crosswinds effectively․ Both adjustments are smooth and tactile‚ providing a secure feel․ Proper use of these mechanisms is essential for sighting in and achieving consistent results‚ making them a cornerstone of the scope’s reliability and performance in the field․

Durability and Reliability in Various Environments

The Leupold 450 Bushmaster Scope is built to withstand the toughest conditions‚ ensuring reliability in any environment․ Its rugged‚ aircraft-grade aluminum construction provides exceptional strength‚ while the nitrogen-filled‚ waterproof and fog-proof design protects internal components from moisture and debris․ The scope’s scratch-resistant lenses maintain clarity in harsh settings‚ and its matte finish reduces glare․ Whether hunting in dense forests or shooting in extreme weather‚ this scope delivers consistent performance․ Its durability ensures years of dependable service‚ making it a trusted companion for hunters and shooters who demand uncompromising reliability in the field․

Installation and Setup of the Leupold 450 Bushmaster Scope

Mounting the scope securely on your rifle is the first step․ Ensure proper alignment and tighten the rings evenly․ Bore-sighting helps achieve initial accuracy before live fire․ Always follow the manual’s specific instructions for a precise setup to maximize performance and reliability in the field․

Mounting the Scope on Your Rifle

Mounting the Leupold 450 Bushmaster Scope on your rifle requires precision and care․ Begin by attaching the scope rings to your rifle’s Picatinny rail or mounting base using a torque wrench․ Ensure the rings are evenly tightened to the manufacturer’s specifications to prevent damage․ Next‚ carefully place the scope into the rings‚ aligning the eyepiece with the rifle’s stock for proper eye relief․ Secure the scope by tightening the ring screws evenly․ Double-check that the scope is level and properly aligned with your rifle’s bore․ This step is critical for achieving accurate shots and optimal performance in the field․

Bore-Sighting and Initial Alignment

Bore-sighting ensures your Leupold 450 Bushmaster Scope is properly aligned with your rifle’s barrel․ Start by securing your rifle in a stable position‚ such as a vice․ Remove the bolt (if applicable) and look through the barrel‚ aiming at a target 25-100 yards away․ Adjust the scope’s elevation and windage dials to center the reticle with the target․ Replace the bolt and verify alignment by firing a test group․ This step ensures the scope is roughly zeroed‚ saving time during live fire․ For precision‚ use a bore-sighting tool if available‚ and always shoot from a stable platform for best results․

Zeroing the Leupold 450 Bushmaster Scope

Zeroing ensures your scope aligns with your rifle’s trajectory․ Fire a test group‚ adjust elevation and windage dials to center shots‚ and verify accuracy at desired distances․

Sighting-In Process for Accuracy

Begin by securing your rifle on a stable surface․ Remove any lens covers and ensure the scope is clear․ Set the magnification to its lowest power for a wider field of view․ Look through the scope and adjust the eyepiece until the reticle is sharp․ Align the rifle with a target 25 yards away․ Fire a shot and observe the impact point․ Adjust the windage and elevation knobs to center the shot․ Repeat the process until the reticle aligns perfectly with the target․ This ensures precision for longer-range shots and optimal performance in the field․

Adjusting for Elevation and Windage

Elevation and windage adjustments are crucial for precise targeting․ Locate the adjustment knobs on the scope; elevation is typically on top‚ and windage on the side․ Each click adjusts the impact point by a specific amount‚ often 1/4 inch at 100 yards․ Stabilize the rifle using a rest or sandbags to prevent movement during adjustment․ After firing‚ observe the bullet’s impact relative to the target․ Adjust elevation by turning the knob counterclockwise to lower or clockwise to raise the aim․ For windage‚ move the knob in the opposite direction of the bullet’s drift․ Keep track of the number of clicks for easy reference and retest after each adjustment to ensure accuracy․ Environmental factors like temperature and humidity can affect zero over time‚ so regular checks are essential for maintaining precision․

Maintenance and Troubleshooting

Regular cleaning of the lens ensures optimal clarity․ Inspect for damage or misalignment․ Address common issues like fogging or loose mounts promptly to maintain performance and reliability․

Cleaning and Care Tips for the Scope

Regularly clean the lens with a soft‚ dry cloth to maintain clarity․ Avoid harsh chemicals or abrasive materials that could scratch the glass․ For stubborn smudges‚ use a microfiber cloth dampened with distilled water․ Inspect the scope for debris or damage‚ especially after heavy use․ Ensure all adjustment rings and turrets are secure․ Store the scope in a protective case when not in use to prevent dust or moisture buildup․ Proper care extends the lifespan and ensures consistent performance in various environments․

Common Issues and Solutions

Common issues with the Leupold 450 Bushmaster Scope include blurry vision‚ which may result from improper focusing or dirty lenses․ Clean the lenses with a soft cloth and ensure they are free of debris․ If the reticle appears misaligned‚ check the scope’s mounting and adjust as needed․ For zeroing difficulties‚ ensure the elevation and windage dials are correctly calibrated․ If problems persist‚ consult the manual or contact Leupold support․ Regular maintenance and proper care can prevent most issues and ensure reliable performance in the field․

ge adora side-by-side refrigerator manual

Welcome to the GE Adora Side-by-Side Refrigerator Manual, your comprehensive guide to understanding and utilizing your appliance effectively. This manual provides essential information on features, safety, installation, and maintenance to ensure optimal performance and longevity. Designed to enhance your experience, it serves as a valuable resource for both initial setup and daily use, helping you make the most of your refrigerator’s advanced capabilities and energy-efficient design.

1.1 Overview of the Manual

This manual provides a detailed guide for the GE Adora Side-by-Side Refrigerator, covering installation, maintenance, and troubleshooting. It includes safety precautions, feature explanations, and energy efficiency tips. Designed to help users optimize performance, the manual ensures safe and effective operation. Refer to this guide for comprehensive instructions tailored to enhance your experience with the GE Adora refrigerator.

1.2 Importance of Reading the Manual

Reading the GE Adora Side-by-Side Refrigerator Manual is crucial for understanding its features, proper installation, and safe operation. It provides essential safety precautions, troubleshooting tips, and maintenance advice to ensure optimal performance. By following the manual, you can maximize energy efficiency, prevent potential issues, and extend the appliance’s lifespan. It serves as a quick reference for resolving common problems and maximizing your refrigerator’s potential.

Key Features of the GE Adora Side-by-Side Refrigerator

The GE Adora Side-by-Side Refrigerator offers advanced cooling systems, spacious storage options, and energy-efficient designs. It features angled LED lighting, humidity control, and a sleek stainless steel finish for modern kitchens.

2.1 Capacity and Storage Options

The GE Adora Side-by-Side Refrigerator offers a spacious interior with a capacity of approximately 24.8 to 25.3 cubic feet, providing ample storage for groceries and beverages. Adjustable shelves, door bins, and crisper drawers allow for customizable organization, while the freezer compartment includes convenient storage solutions to keep items fresh and easily accessible, ensuring efficient use of space for modern households.

2.2 Energy Efficiency and ENERGY STAR Certification

The GE Adora Side-by-Side Refrigerator is ENERGY STAR certified, ensuring high energy efficiency and lower utility bills. Its advanced insulation and smart cooling systems optimize energy use while maintaining performance. This certification confirms the refrigerator meets strict energy efficiency standards set by the U.S. Environmental Protection Agency, helping reduce environmental impact and saving you money over time.

2.3 Advanced Cooling and Humidity Control Features

The GE Adora Side-by-Side Refrigerator features advanced cooling technology that maintains consistent temperatures and humidity levels. Its dual evaporator system ensures optimal freshness in both the refrigerator and freezer sections. Additionally, the humidity-controlled crisper drawers preserve fruits and vegetables longer. These features work together to create an ideal environment for storing food, enhancing overall performance and food preservation.

How to Use the Refrigerator Manual Effectively

Navigation, understanding safety guidelines, and locating specific features are key to using the manual effectively. This ensures optimal appliance performance and enhances user experience.

3.1 Navigation and Structure of the Manual

The manual is organized into clear sections, starting with safety guidelines, followed by installation, features, and troubleshooting. Each chapter is designed for easy navigation, allowing users to quickly locate specific information. Detailed tables of contents and indexes further enhance accessibility, ensuring that users can efficiently find and understand the information they need to operate and maintain their refrigerator effectively.

3.2 Understanding Safety Information and Precautions

The manual emphasizes critical safety guidelines to ensure safe operation and maintenance of your GE Adora Side-by-Side Refrigerator. Key precautions include proper electrical connections, avoiding overloaded circuits, and keeping children away from moving parts. Electrical safety is a priority, with warnings against improper grounding or using damaged cords. Child safety features like door locks are highlighted to prevent accidents. Always follow installation and handling instructions to maintain safety standards and appliance longevity.

3.3 Finding Specific Features and Functions

The manual is organized to help you quickly locate information on specific features and functions of your GE Adora Side-by-Side Refrigerator. Use the index or table of contents to find detailed explanations of advanced cooling systems, humidity control, and energy-saving modes. For model-specific details, refer to the model number section, which provides tailored guidance for your appliance, ensuring you can fully utilize its capabilities, such as LED lighting or water filter maintenance.

Installation and Setup Guidelines

This section provides essential steps for installing and setting up your GE Adora Side-by-Side Refrigerator, ensuring proper placement, leveling, and connection to maximize performance and longevity.

4.1 Pre-Installation Requirements

Before installing your GE Adora Side-by-Side Refrigerator, ensure the space meets the model’s specifications, including dimensions, weight capacity, and electrical requirements. Verify the floor strength, ensure proper ventilation, and prepare necessary tools. Check for level ground and adequate clearance for doors to open fully. Review the manual for specific model needs to ensure a smooth and safe installation process.

4.2 Step-by-Step Installation Instructions

Carefully unpack the refrigerator and inspect for damage. 2. Move the unit to the prepared location, ensuring it fits the space. 3. Level the refrigerator using the adjustable legs to ensure even placement. 4. Connect the water supply line if applicable. 5. Plug in the refrigerator and set the temperature controls. 6. Allow the unit to cool for 24 hours before loading food. Follow all safety guidelines for a successful setup.

4.3 Leveling and Aligning the Refrigerator

Proper leveling ensures your refrigerator operates efficiently and prevents noise. Adjust the leveling legs by turning them clockwise or counterclockwise until the unit is stable. Use a spirit level to confirm the refrigerator is level front-to-back and side-to-side. Ensure the doors align properly and the unit does not tilt. A stable surface is crucial for optimal performance and longevity of the appliance.

Safety Information and Precautions

Always read the manual thoroughly to avoid hazards. Follow electrical requirements and ensure proper installation. Keep children away from moving parts and use safety locks to prevent accidents.

5.1 General Safety Guidelines

Always follow safety guidelines to ensure safe operation. Keep children away from moving parts and electrical components. Avoid overloading shelves and ensure proper door closure. Never unplug the refrigerator by pulling the cord. Use only genuine GE parts for repairs. Follow installation instructions carefully to prevent hazards. Regularly inspect for wear and tear to maintain safety standards. Proper usage and maintenance are key to preventing accidents and ensuring longevity.

5.2 Electrical Requirements and Precautions

Your GE Adora Side-by-Side Refrigerator requires a dedicated 120-volt, 60-Hz electrical outlet. Ensure the outlet is grounded and capable of handling the appliance’s power needs. Avoid using extension cords or overloaded circuits. Never expose the refrigerator to moisture or operate it near water sources. Always unplug the appliance before servicing to prevent electrical shock. Keep the power cord accessible and undamaged to ensure safe operation.

5.3 Child Safety Features

The GE Adora Side-by-Side Refrigerator includes child safety features to prevent accidental injuries. The appliance is equipped with secure door locks and latches to keep children from accessing internal components or tampering with settings. Additionally, the refrigerator’s design ensures that all sharp edges are rounded, and critical controls are out of reach for young children. Regularly check these features to maintain their effectiveness.

Maintenance and Care Tips

Regular cleaning, filter replacements, and door alignment checks ensure optimal performance. Inspect seals and gaskets for wear to maintain efficiency and prevent leaks or temperature fluctuations.

6.1 Cleaning the Refrigerator and Freezer

Regular cleaning is essential to maintain hygiene and efficiency. Wipe shelves, drawers, and walls with mild soap and water, ensuring all surfaces remain clean and free from spills. Clean the drain and check for blockages to prevent water accumulation. Avoid harsh chemicals to preserve the finish and safety of your appliance.

For the exterior, use a soft cloth and gentle detergent to remove fingerprints and stains. This routine maintenance ensures optimal performance and extends the lifespan of your refrigerator. Regular cleaning also helps prevent odors and keeps your appliance looking new.

6.2 Replacing Water and Ice Filters

Regularly replace the water and ice filters every 6 months or as indicated by the manual. Turn off the water supply before replacing the filter. Locate the filter, typically found in the refrigerator or freezer section, and follow the instructions in the manual for proper removal and installation. Use GE-approved filters to ensure optimal water quality and ice performance. This maintenance ensures clean water and ice production while maintaining your refrigerator’s efficiency and longevity.

6.3 Regular Maintenance Schedule

Perform routine maintenance every 3-6 months to ensure optimal performance. Check and clean the condenser coils, inspect door seals for tightness, and verify proper drainage. Replace filters as recommended and wipe down shelves and drawers. Regularly cleaning the refrigerator and freezer compartments prevents odors and maintains hygiene. Schedule professional servicing annually to address internal components and ensure energy efficiency. Consistent upkeep prolongs appliance lifespan and maintains reliability.

Troubleshooting Common Issues

Identify and resolve common problems like uneven cooling, ice maker malfunctions, or unusual noises. Consult error codes in the manual for specific solutions. Regular checks and maintenance often prevent issues from escalating, ensuring smooth operation and extending appliance lifespan. Always refer to the troubleshooting guide for step-by-step solutions before contacting professional support.

7.1 Identifying and Solving Common Problems

Common issues with the GE Adora Side-by-Side Refrigerator include cooling inconsistencies, ice maker malfunctions, or unusual noises. Identify problems by checking error codes displayed on the control panel. Refer to the manual for specific solutions, such as resetting the ice maker or leveling the appliance. For persistent issues, consult the troubleshooting section or contact GE support for professional assistance. Regular maintenance can often prevent these problems.

7.2 Error Codes and Their Meanings

The GE Adora Side-by-Side Refrigerator manual lists specific error codes to help diagnose issues. Codes like “E1” or “E2” indicate sensor malfunctions or communication errors between components. Refer to the manual for detailed explanations of each code and recommended solutions. If issues persist, contact GE customer support for professional assistance to resolve the problem effectively and ensure proper appliance function.

7.3 When to Contact a Professional

If you encounter issues beyond basic troubleshooting, such as persistent error codes or mechanical failures, it’s essential to contact a professional. Complex repairs, like compressor or electronic control replacements, require specialized expertise to avoid further damage.

Reach out to GE’s customer support or authorized service providers for assistance. Ensure you have your model number and error codes ready for quicker resolution, guaranteeing your refrigerator operates safely and efficiently.

Energy Efficiency and Savings

The GE Adora Side-by-Side Refrigerator is ENERGY STAR certified, ensuring energy efficiency and lower utility bills. This manual guides you in optimizing settings to maximize savings and eco-friendly performance.

8.1 Understanding Energy Consumption

Understanding energy consumption is crucial for optimizing your GE Adora Side-by-Side Refrigerator’s performance. This section explains how factors like compressor operation, insulation quality, and smart sensors impact energy use. Learn how features like LED lighting and adaptive defrost contribute to efficiency. By following the manual’s guidelines, you can adjust settings to minimize energy consumption while maintaining optimal cooling, ensuring lower utility bills and eco-friendly operation.

8.2 Tips for Optimizing Energy Use

Optimize your GE Adora Side-by-Side Refrigerator’s energy use by ensuring proper temperature settings and maintaining door seals. Adjust settings based on usage patterns and utilize features like LED lighting and smart sensors. Regular maintenance, such as cleaning condenser coils, also enhances efficiency. By following these tips, you can reduce energy consumption while preserving performance, ensuring both cost savings and environmental benefits.

8.3 Benefits of ENERGY STAR Certification

Earning the ENERGY STAR certification, the GE Adora Side-by-Side Refrigerator exceeds federal energy efficiency standards, consuming less energy than standard models. This certification ensures lower utility bills and reduced environmental impact. By meeting strict EPA guidelines, it offers long-term cost savings and supports eco-friendly practices, making it a sustainable and economical choice for homeowners seeking energy-efficient appliances.

Warranty and Support Information

The GE Adora Side-by-Side Refrigerator is backed by a comprehensive warranty, offering coverage for parts and labor. Dedicated customer support is available to address questions and concerns, ensuring a smooth ownership experience. Visit the GE Appliances website or contact their support team for detailed warranty terms and additional assistance options.

9.1 Understanding the Warranty Coverage

The GE Adora Side-by-Side Refrigerator comes with a comprehensive warranty covering parts and labor for defective components. The warranty period varies depending on the specific model and components, ensuring protection for your investment. For detailed coverage terms, refer to the warranty section in your manual or visit the GE Appliances website. Dedicated customer support is also available to assist with warranty-related inquiries and claims;

9.2 Contacting GE Customer Support

For assistance with your GE Adora Side-by-Side Refrigerator, contact GE Customer Support at 1-800-626-2005. Visit the GE Appliances website for live chat, email support, or to find answers in the FAQs. Have your model number ready for efficient service. Support is available to address warranty claims, troubleshooting, and general inquiries, ensuring your needs are met promptly and professionally.

9.3 Online Resources and FAQs

GE Appliances offers extensive online resources and FAQs to help you navigate your GE Adora Side-by-Side Refrigerator. Visit their official website to access downloadable manuals, troubleshooting guides, and installation instructions. The FAQ section addresses common questions about features, maintenance, and warranty. You can also search for specific models, ensuring quick and easy access to information tailored to your appliance, enhancing your user experience and resolving queries efficiently.

With this manual, you now have a complete guide to your GE Adora Side-by-Side Refrigerator. Proper use and care will ensure years of efficient performance and reliability, making it a valued addition to your home.

10.1 Summary of Key Points

This manual provides a comprehensive guide to your GE Adora Side-by-Side Refrigerator, covering installation, safety, features, and maintenance. It emphasizes energy efficiency, storage solutions, and advanced cooling systems. Regular maintenance and proper care ensure optimal performance. Troubleshooting tips and warranty details are included for your convenience. Refer to this manual for any questions, ensuring your refrigerator delivers reliable service for years to come.

10.2 Final Tips for Optimal Performance

Regularly clean the refrigerator and freezer to maintain efficiency. Replace water and ice filters as recommended. Check door seals for proper alignment and ensure the appliance is level. Keep temperature settings within the recommended range. Avoid overloading shelves to ensure proper air circulation. Follow the maintenance schedule and refer to the manual for specific guidance to ensure your GE Adora refrigerator performs at its best.

manual weber spirit e 310

The Weber Spirit E-310 is a high-quality gas grill designed for efficient outdoor cooking. It features three stainless steel burners, electronic ignition, and a spacious cooking surface. Ideal for home barbecues, this grill offers excellent heat distribution and durability. The manual provides essential guidance for assembly, operation, and maintenance, ensuring optimal performance and safety. Understanding the manual is key to unlocking the full potential of this versatile grilling companion.

The Weber Spirit E-310 manual is a comprehensive guide that covers everything from initial setup to troubleshooting. It includes detailed instructions for assembling the grill, connecting the gas supply, and operating the burners safely. The manual also offers tips for achieving perfect grilling results and maintaining the grill’s condition over time. Whether you’re a seasoned griller or a newcomer, this manual is your go-to resource for a seamless and enjoyable cooking experience.

1.1 Overview of the Grill

The Weber Spirit E-310 is a versatile gas grill designed for outdoor cooking enthusiasts. It features three stainless steel burners producing 32,000 BTUs, ensuring even heat distribution. The grill offers a spacious cooking surface, electronic ignition for easy startups, and a durable construction. Its compact design and user-friendly controls make it ideal for both novice and experienced grillers, providing a reliable grilling experience for various occasions.

1.2 Importance of the Manual

The Weber Spirit E-310 manual is essential for safe and effective use of the grill. It provides detailed instructions for assembly, operation, and maintenance, ensuring optimal performance and longevity. The manual includes safety precautions, troubleshooting tips, and grilling techniques, making it a vital resource for both new and experienced users to maximize their grilling experience and prevent potential hazards.

Product Specifications and Features

The Weber Spirit E-310 features three stainless steel burners producing 32,000 BTUs, a spacious cooking surface, electronic ignition, and a durable design. Built with high-quality materials, it ensures efficient grilling and long-lasting performance, making it ideal for outdoor cooking enthusiasts seeking a reliable and versatile gas grill experience.

2.1 Key Features of the Weber Spirit E-310

  • Three stainless steel burners producing 32,000 BTUs for consistent heat distribution.
  • Electronic ignition system for quick and reliable burner lighting.
  • Spacious cooking surface with 424 square inches of primary grilling area.
  • Durable construction with high-quality materials for long-lasting performance.
  • Flavorizer bars to enhance grill flavor and reduce flare-ups.
  • Portable design with wheels for easy mobility and storage.

2.2 Technical Specifications

The Weber Spirit E-310 measures 1310 mm in width and weighs 61.2 kg. It operates on LP gas, with a primary cooking area of 424 square inches. The grill features three stainless steel burners, producing 32,000 BTUs of heat. It includes a built-in thermometer for precise temperature control and is available in a sleek black finish. Durable construction ensures longevity and reliable performance for outdoor cooking enthusiasts.

Assembly and Installation

The Weber Spirit E-310 requires careful assembly, starting with unboxing and inventorying all parts. Follow the manual’s step-by-step instructions to ensure proper installation and safety.

3.1 Unboxing and Inventory of Parts

Begin by carefully unboxing the Weber Spirit E-310 and inventorying all components. Remove the protective film from stainless steel parts and verify the presence of burner tubes, grates, and hardware. Cross-reference each item with the manual’s parts list to ensure nothing is missing or damaged. This step is crucial for a smooth assembly process and proper functionality of the grill.

3.2 Step-by-Step Assembly Instructions

Begin by attaching the wheels and base to the grill body. Next, install the burner tubes, ensuring they align properly with the igniter. Secure the cooking grates and heat deflectors according to the manual. Connect the gas supply lines carefully, following safety guidelines. Finally, test the ignition system to ensure all burners light correctly. Refer to the manual for precise instructions and diagrams to complete the assembly efficiently.

3.3 Connecting the Gas Supply

  1. Turn off the gas supply and ensure the tank valve is closed before connecting.
  2. Attach the gas line regulator to the propane tank, ensuring a secure fit.
  3. Connect the other end of the hose to the grill’s gas inlet, tightening firmly.
  4. Check for leaks by applying soap water to connections; bubbles indicate a leak.
  5. Open the tank valve slowly and test burner ignition to confirm proper connection.

Safety Precautions and Warnings

Always follow safety guidelines to ensure safe operation. Keep children away, never use indoors, and ensure proper ventilation. Follow all warnings in the manual.

4.1 General Safety Guidelines

Always prioritize safety when using the Weber Spirit E-310. Ensure the grill is placed on a stable, heat-resistant surface and keep children away during operation. Never use the grill indoors or in enclosed spaces, as this can lead to carbon monoxide buildup. Avoid wearing loose clothing that could catch fire and keep a fire extinguisher nearby. Follow all instructions in the manual carefully.

Before grilling, inspect the grill for damage or wear. Ensure all connections are secure and leak-free. Never leave the grill unattended while lit, and always shut off the gas supply when finished. Proper ventilation is essential to avoid accidents. By adhering to these guidelines, you can enjoy a safe and enjoyable grilling experience with your Weber Spirit E-310.

4.2 Gas Safety and Leak Prevention

Ensure gas safety by turning off the supply when not in use. Regularly inspect hoses and connections for damage or wear. Use soapy water to check for leaks—bubbles indicate a gas escape. Always tighten connections securely and follow the manual’s guidelines for proper installation. Keep the grill area clear of flammable materials and never store a propane tank near open flames or high heat sources.

Before each use, verify that all valves and fittings are in good condition. If a leak is detected, shut off the gas immediately and contact a professional. Proper maintenance and adherence to these precautions will help prevent gas-related hazards and ensure a safe grilling experience with your Weber Spirit E-310.

Operating the Weber Spirit E-310

The Weber Spirit E-310 operates with electronic ignition for easy startups. Its three burners deliver consistent heat distribution across the cooking surface. Use the built-in thermometer to monitor and adjust temperatures for perfect grilling results. Always preheat the grill before cooking for optimal performance.

5.1 Lighting the Burners

To light the burners on your Weber Spirit E-310, first ensure the gas supply is turned on. Turn the burner knob to the “light” position and press the electronic igniter. If the burner doesn’t light immediately, repeat the process. For manual lighting, open the lid, turn the knob to “light,” and use a match or lighter near the burner ports. Always preheat the grill with the lid closed for optimal performance.

5.2 Temperature Control and Monitoring

The Weber Spirit E-310 features a built-in thermometer for precise temperature monitoring. Adjust the burner knobs to regulate heat across the cooking surface. Preheat the grill with all burners on high for 10-15 minutes. Use the thermometer to maintain desired temperatures, ensuring even cooking; For indirect heat, turn off middle burners and use the outer ones, ideal for slow-cooking meats and vegetables. Regularly monitor the thermometer to achieve perfect grilling results every time.

Maintenance and Cleaning

Regular cleaning and maintenance ensure the Weber Spirit E-310 performs optimally. Clean grates and burners after each use to prevent food residue buildup. Check burner tubes for blockages and clear them with a brush if necessary. Seasonal maintenance includes lubricating moving parts and inspecting gas lines for leaks. Proper care extends the grill’s lifespan and maintains its performance.

6.1 Cleaning the Grill and Burners

Regularly clean the Weber Spirit E-310 to maintain its performance. Use a wire brush to scrub grates before heating. After cooking, remove food debris with a scraper and mild detergent. Burners should be cleaned with a soft brush to ensure proper gas flow. Drip pans can be removed and washed with soapy water. For tougher stains, mix baking soda and water for a gentle yet effective cleaning solution. Always wear gloves for protection and avoid abrasive cleaners that may damage surfaces. Cleaning the grill and burners regularly prevents rust and ensures even heat distribution for consistent grilling results. Refer to the manual for specific cleaning recommendations to keep your grill in optimal condition.

6.2 Seasonal Maintenance Tips

Protect your Weber Spirit E-310 during the off-season by covering it with a durable grill cover. Regularly inspect burner tubes for blockages and clean them with a wire brush. Lubricate moving parts to maintain smooth operation. Store the grill in a dry, protected area to prevent rust. Follow the manual’s seasonal care tips to ensure your grill remains in excellent condition year-round and performs optimally for every grilling session.

Troubleshooting Common Issues

If the grill doesn’t light, check igniter alignment, battery condition, and burner cleanliness. For uneven heat, ensure burner tubes are clear of obstructions. If gas leaks are suspected, inspect connections and tighten them. Low flame issues may require adjusting the regulator or cleaning the venturi. Refer to the manual for detailed solutions to restore optimal grilling performance.

7.1 Common Problems and Solutions

Common issues with the Weber Spirit E-310 include ignition failure, gas leaks, and uneven heating. For ignition problems, ensure the igniter aligns with the burner and the battery is functional. Gas leaks can be resolved by tightening connections and inspecting hoses. Uneven heat may result from clogged burner tubes, which can be cleaned with a wire brush. Refer to the manual for detailed troubleshooting steps.

7.2 Ignition System Troubleshooting

If the ignition system fails to spark, check the battery and ensure the igniter aligns with the burner. Turn off the gas, disconnect the tank, and clean the igniter with a soft brush. If issues persist, replace the battery or consult the manual for further guidance. Proper maintenance ensures reliable ignition and safe grilling experiences.

Grilling Techniques and Tips

The Weber Spirit E-310 excels with its three burners and electronic ignition, ensuring quick starts and even heat distribution. Preheat the grill to desired temperatures for consistent cooking. Use direct heat for searing and indirect heat for slower cooking. Adjust burner controls to maintain precise temperatures, ensuring perfectly grilled dishes every time.

8;1 Cooking Zones and Heat Distribution

The Weber Spirit E-310 features three stainless steel burners, creating distinct cooking zones for versatile grilling. The grill’s design ensures even heat distribution across the cooking surface, allowing for simultaneous direct and indirect cooking. Preheating the grill to the desired temperature ensures consistent results. With 32,000 BTUs of heat, the burners deliver precise control, making it easy to achieve perfect searing and even cooking for all your dishes.

8.2 Achieving Perfect Grilling Results

Achieving perfect grilling results with the Weber Spirit E-310 requires attention to temperature control and cooking techniques. Preheat the grill to the desired temperature, using the built-in thermometer for accuracy. For even cooking, ensure food is placed in the center for direct heat or indirect zones for slower cooking. Utilize the Weber Grills App for recipe guidance and timing tips to enhance your grilling experience and deliver flavorful, perfectly cooked dishes every time.

Warranty and Customer Support

The Weber Spirit E-310 is backed by a comprehensive warranty, ensuring coverage for parts and labor. For assistance, contact Weber support through their website or phone. Resources like manuals and FAQs are also available online to address common inquiries and troubleshooting needs efficiently.

9.1 Warranty Information

The Weber Spirit E-310 is covered by a comprehensive warranty, ensuring protection for parts and labor. The warranty period varies by component, with most parts covered for several years. Specific details, including the duration of coverage for burners and other components, are outlined in the manual. The warranty is valid from the date of purchase and may exclude damage caused by misuse or improper maintenance. For warranty claims, contact Weber customer support directly.

9.2 Contacting Weber Support

Weber offers comprehensive customer support to address any questions or concerns. You can contact Weber Support by phone at 1-800-446-1071 or visit their official website for assistance. Additionally, the Weber Grills App provides a convenient platform to register your grill, access resources, and receive support. For warranty inquiries or troubleshooting, reach out to their team for prompt and reliable service.

The Weber Spirit E-310 is a durable, efficient gas grill perfect for outdoor cooking. This manual has guided you through its features, operation, and maintenance. Happy grilling!

10.1 Final Thoughts on the Weber Spirit E-310

The Weber Spirit E-310 is a standout gas grill, offering durability, efficiency, and ease of use. Its three burners and ample cooking space make it ideal for both casual gatherings and precise grilling. With proper care and maintenance, this grill will serve you well for years. The comprehensive manual ensures you’re equipped to maximize its potential, making it a worthwhile investment for any grilling enthusiast.

10.2 Encouragement to Explore Further

Take your grilling skills to the next level by exploring advanced techniques like indirect cooking and smoking. The Weber Grills App offers recipe ideas and tips to inspire creativity. Experiment with different cooking methods and flavors to make the most of your Weber Spirit E-310. Keep discovering new ways to enhance your outdoor cooking experiences and enjoy the rewards of mastering your grill.

epic training test answers pdf

EPIC training and certification are essential for healthcare professionals to master EPIC software, enhancing patient care and streamlining clinical workflows. This certification validates expertise in using EPIC systems effectively.

1.1 Overview of EPIC Certification

EPIC certification is a professional credential for healthcare IT specialists, validating their expertise in using EPIC software. It ensures proficiency in managing electronic health records, streamlining clinical workflows, and optimizing patient care. The certification covers key modules like ClinDoc, Resolute, and Chronicles, essential for effective data management. To obtain certification, candidates must complete EPIC-approved training and pass a rigorous exam. This credential is highly valued in the healthcare industry, demonstrating a deep understanding of EPIC systems and their real-world applications. Professionals with EPIC certification are better equipped to handle complex healthcare IT challenges efficiently.

1.2 Importance of EPIC Training in Healthcare IT

EPIC training is crucial for healthcare professionals as it enhances their ability to use EPIC software effectively, improving patient care and operational efficiency. By mastering EPIC systems, healthcare IT specialists can streamline clinical workflows, reduce errors, and ensure compliance with regulatory standards. The training also equips professionals with the skills to manage electronic health records securely and efficiently. Investing in EPIC training not only boosts individual career prospects but also contributes to better healthcare outcomes. It ensures that healthcare organizations can leverage EPIC’s full potential, making it a vital component of modern healthcare IT infrastructure.

Understanding EPIC Training Test Answers PDF

EPIC Training Test Answers PDF provides a comprehensive resource for exam preparation, offering questions, answers, and insights into key modules like ClinDoc and Inpatient Orders.

2.1 Structure of the EPIC Training Test

The EPIC training test is designed to assess proficiency in using EPIC software, with a focus on clinical workflows and system functionality. The exam typically includes multiple-choice questions, scenario-based problems, and hands-on tasks to evaluate practical skills. Candidates are tested on their ability to navigate modules like ClinDoc and Inpatient Orders, as well as their understanding of data management tools such as Chronicles. The test format ensures a comprehensive evaluation of both theoretical knowledge and real-world application, preparing professionals for effective use of EPIC in healthcare settings.

2.2 Key Modules Covered in the Test

The EPIC training test evaluates proficiency across core modules, including ClinDoc, Inpatient Orders, and Chronicles; ClinDoc focuses on clinical documentation, while Inpatient Orders assesses medication and treatment management. Chronicles, EPIC’s database system, is tested for data organization and reporting. The exam also covers patient scheduling, billing, and population health management. Each module requires hands-on expertise and understanding of real-world healthcare applications. The test ensures professionals can navigate these tools effectively, streamlining workflows and improving patient care outcomes. Mastery of these modules is essential for successful EPIC certification and effective system utilization in healthcare settings.

2.3 Benefits of Using PDF Study Guides

PDF study guides offer unparalleled convenience and accessibility for EPIC certification preparation. They provide comprehensive overviews of exam topics, including ClinDoc, Chronicles, and Inpatient Orders. PDFs can be easily annotated and organized, allowing for personalized study plans. Their portability enables learning on-the-go, making them ideal for busy professionals. Additionally, PDF guides often include practice questions and answers, simulating real exam scenarios. They are cost-effective and environmentally friendly compared to printed materials. By leveraging PDF study guides, candidates can efficiently review and retain critical information, ensuring they are well-prepared for the EPIC certification test and beyond.

Preparing for the EPIC Certification Exam

Understanding exam objectives, utilizing official resources, and practicing with sample questions are key strategies. Organized study plans and consistent review ensure readiness for the certification test.

3.1 Recommended Study Materials and Resources

Official EPIC resources, including practice exams and certification guides, are essential for effective preparation. Utilize EPIC UserWeb for self-study proficiency courses and access PDF study guides with sample questions. These materials cover key modules, real-world applications, and exam objectives, ensuring comprehensive understanding. Additionally, review flashcards and multiple-choice questions for targeted practice. Leverage EPIC’s official training documents and Chronicles for insights into data management. Stay updated with industry trends and best practices through EPIC’s unified platform for next-generation applications. Organize your study plan and consistently review to master the EPIC system effectively.

3.2 Practice Exams and Sample Questions

Practice exams and sample questions are crucial for assessing readiness for the EPIC certification exam. Utilize EPIC UserWeb for access to official practice exams, which simulate real test scenarios. Review sample questions covering various modules to identify knowledge gaps. Flashcards and multiple-choice questions with hints enhance understanding. PDF guides, such as the EPIC Certification Study Guide: Questions and Answers, provide comprehensive preparation. Regularly taking practice exams helps familiarize yourself with the exam format and improves time management. Focus on understanding the rationale behind each answer to deepen your knowledge of EPIC systems and applications.

3.3 Effective Study Techniques for EPIC Certification

Mastering EPIC certification requires a structured and disciplined approach. Begin with official EPIC UserWeb resources, including practice exams and study guides. Engage in active learning by reviewing chronicled data and real-world applications. Use spaced repetition for terminology retention and focus on understanding workflow modules. Prioritize hands-on exercises to apply theoretical knowledge practically. Set realistic study goals and track progress. Join study groups or forums to discuss challenging topics. Regularly review and analyze sample questions to refine test-taking strategies. Simulate exam conditions during practice sessions to improve time management and reduce anxiety. Consistent effort and focused study will enhance your readiness for the certification exam.

EPIC Certification Process

EPIC certification involves structured training, practice exams, and in-person classes. Completing these steps ensures proficiency in EPIC systems, with study guides like PDFs aiding preparation and understanding.

4.1 Steps to Obtain EPIC Certification

To obtain EPIC certification, candidates must enroll in EPIC’s official training program, often requiring in-person classes in Wisconsin. Self-study options like EPIC UserWeb are available for select modules. Completing practice exams and reviewing study guides, such as PDF materials, is crucial for preparation. Candidates must pass a proctored exam to demonstrate mastery of EPIC systems. Official training resources and practice questions are highly recommended to ensure readiness. Certification validates proficiency in EPIC software, making it essential for healthcare IT professionals aiming to enhance their skills and career opportunities in the field.

4.2 Understanding Exam Objectives and Formats

EPIC certification exams assess candidates’ ability to apply EPIC software in real-world healthcare scenarios. The exams typically include multiple-choice questions and practical tasks. Understanding the exam objectives is crucial, as they focus on patient care, data management, and system navigation. Candidates should familiarize themselves with the format, which may vary by module. Study guides and practice exams provide insights into question types and content. Mastery of EPIC modules and their applications is essential for success. Official resources and practice materials are recommended to align preparation with exam expectations, ensuring readiness for the certification process.

4.3 Tips for Success on Test Day

To excel on the EPIC certification exam, arrive early and ensure all necessary materials are ready. Skim through questions to identify key areas and manage time effectively. Practice with sample exams to build familiarity with the format. Stay calm and read each question carefully. Utilize the process of elimination for unclear answers. Review training materials beforehand to reinforce knowledge. Focus on practical applications of EPIC software, as exams emphasize real-world scenarios. Avoid last-minute cramming and ensure adequate rest before the test. Confidence and preparation are key to achieving success.

The Role of Chronicles in EPIC Training

Chronicles serve as EPIC’s database management system, organizing data efficiently across all applications. They are crucial for streamlined workflows and effective data retrieval in healthcare settings.

5.1 What Are Chronicles?

Chronicles are EPIC’s database management system, organizing data into structured, accessible formats. They function like digital filing cabinets, storing patient records, clinical data, and workflow information. Chronicles enable efficient data retrieval and organization, supporting seamless healthcare operations. By standardizing data storage, Chronicles ensure consistency and accuracy across EPIC applications. They are fundamental to EPIC training, as understanding their structure and functionality is crucial for effective system use. Chronicles play a central role in EPIC’s clinical and administrative workflows, making them essential for healthcare professionals seeking certification.

5.2 How Chronicles Are Used in EPIC Software

Chronicles in EPIC software serve as a centralized database management tool, organizing patient data and clinical workflows efficiently. They act as digital filing systems, storing records and enabling quick access to critical information. Chronicles support various EPIC modules by maintaining structured data, ensuring consistency and accuracy. They are integral to clinical documentation, order management, and patient tracking. By organizing data chronologically, Chronicles facilitate seamless workflow management and informed decision-making. Their functionality is a key focus in EPIC training, as mastering Chronicles enhances proficiency in using EPIC systems effectively for patient care and operational efficiency.

5.3 Importance of Chronicles in Data Management

Chronicles are vital for efficient data management in EPIC software, ensuring organized and accessible patient records. They act as a centralized repository, maintaining structured data for clinical workflows. By storing information chronologically, Chronicles enhance data integrity and retrieval speed. This organization supports accurate clinical decision-making and streamlined operations. Additionally, Chronicles enable compliance with healthcare regulations by maintaining audit trails and secure data storage. Their role in managing vast amounts of patient data makes them indispensable for healthcare providers, ensuring seamless integration across EPIC modules and improving overall system performance.

Advanced Topics in EPIC Training

Advanced EPIC training explores complex modules, real-world applications, and industry trends, enabling professionals to enhance their technical and analytical skills for optimal healthcare IT solutions.

6.1 In-Depth Look at EPIC Modules

EPIC modules are specialized tools designed to manage specific healthcare functions, such as patient records, billing, and clinical workflows. Each module, like ClinDoc for clinical documentation or Resolute for financial management, offers tailored features to streamline operations. Chronicles, EPIC’s database system, organizes data efficiently, enabling seamless integration across modules; Advanced training dives into module customization, real-world applications, and troubleshooting, ensuring professionals can optimize system performance. Understanding these modules deeply enhances workflow efficiency and patient care outcomes, making them foundational for healthcare IT success.

6.2 Real-World Applications of EPIC Skills

Professionals with EPIC certification apply their skills in real-world healthcare settings to optimize patient care and operational efficiency. EPIC modules like ClinDoc and Resolute enable tasks such as clinical documentation, billing, and patient scheduling. Chronicles, EPIC’s data management system, helps organize patient records and streamline workflows. Real-world applications include improving patient outcomes, reducing errors, and enhancing communication between healthcare teams. These skills are essential for modern healthcare IT, ensuring systems run smoothly and effectively. Practical experience with EPIC software is critical for professionals aiming to excel in healthcare technology roles.

6.3 Staying Updated with Industry Trends

Staying updated with industry trends is crucial for EPIC professionals, as healthcare technology evolves rapidly. EPIC regularly releases updates and new features to improve functionality and patient care. Professionals can stay informed through official EPIC resources, such as UserWeb, and by participating in industry conferences and webinars. Networking with peers and joining online communities also helps in sharing best practices and learning about real-world applications of EPIC skills. Continuous learning ensures professionals remain competitive and adapt to the latest advancements in healthcare IT, making their EPIC certification more valuable and relevant in the field.

EPIC certification is a valuable asset in healthcare IT, enhancing skills and career prospects. Utilizing study guides like PDFs ensures effective preparation for the certification exam, leading to success.

7.1 Final Thoughts on EPIC Certification

Obtaining EPIC certification is a significant achievement, demonstrating mastery of EPIC systems and commitment to excellence in healthcare IT. It not only enhances professional credibility but also opens doors to advanced career opportunities. Leveraging resources like EPIC training test answers PDFs ensures comprehensive preparation, equipping individuals with the knowledge and confidence needed to excel. The certification process, while challenging, is highly rewarding, making it a worthwhile investment for anyone aiming to thrive in the dynamic field of healthcare technology. Embracing continuous learning and staying updated with industry trends will further solidify the benefits of this certification.

7.2 Encouragement to Pursue EPIC Training

Pursuing EPIC training is a valuable step toward advancing your career in healthcare IT. It equips you with the skills to optimize patient care and streamline clinical workflows. With resources like EPIC training test answers PDFs, you can confidently prepare for certification, enhancing your professional credibility. The demand for EPIC-certified professionals is growing, making this training a smart investment. Embrace the opportunity to stay ahead in the industry, improve your expertise, and contribute to better healthcare outcomes. Start your journey today and unlock new possibilities in your career!

rain bird maxi-paw 2045a manual

The Rain Bird Maxi-Paw 2045A manual is a comprehensive guide for installing, operating, and maintaining the sprinkler system․ It provides detailed specifications, troubleshooting tips, and maintenance advice to ensure optimal performance and longevity․ This manual is essential for users to understand the product’s features and operation, helping them achieve efficient irrigation results․

1․1 Overview of the Rain Bird Maxi-Paw 2045A Sprinkler

The Rain Bird Maxi-Paw 2045A is a high-performance, full- or part-circle pop-up rotor sprinkler designed for medium to large irrigation areas․ It features a durable, impact-driven design with straight-through flow for superior performance in dirty water conditions․ The sprinkler offers flexible nozzle options, including the 5000 Series MPR nozzles, ensuring efficient and uniform water distribution․ Its powerful throw and low pressure loss make it ideal for various irrigation needs․

1․2 Importance of the Manual for Proper Installation and Use

The manual is crucial for ensuring correct installation, operation, and maintenance of the Rain Bird Maxi-Paw 2045A․ It provides detailed step-by-step guides, troubleshooting tips, and safety precautions to optimize performance and longevity․ Adhering to the manual’s instructions helps prevent errors, ensures efficient water distribution, and maintains warranty validity, making it an essential resource for both novice and experienced users․

Key Features and Benefits of the Rain Bird Maxi-Paw 2045A

The Rain Bird Maxi-Paw 2045A offers superior performance in dirty water conditions, durable construction, and efficient watering․ Its full- or part-circle functionality ensures versatile irrigation, while the straight-through flow design maximizes water distribution efficiency, making it ideal for medium to large-sized areas․

2․1 Design and Construction of the Sprinkler

The Rain Bird Maxi-Paw 2045A features a robust design with a durable rotor and pop-up mechanism․ Built with high-quality materials, it ensures reliability and longevity in various irrigation environments; Its construction includes a straight-through flow path for superior performance, especially in dirty water conditions, and an adjustable arc for tailored water distribution․ This design enhances efficiency and ensures consistent watering patterns across landscapes․

2․2 Full- or Part-Circle Pop-Up Rotor Functionality

The Rain Bird Maxi-Paw 2045A offers versatile irrigation with its full- or part-circle pop-up rotor․ This feature allows users to customize water distribution, covering areas from 40 to 360 degrees․ The rotor’s pop-up design ensures even coverage, while its adjustable settings provide flexibility for different landscape needs, making it suitable for both small and large irrigation areas with precision and efficiency․

2․3 Superior Performance in Dirty Water Conditions

The Maxi-Paw 2045A excels in dirty water conditions due to its straight-through flow design, which minimizes clogging․ This feature ensures consistent performance even with debris-filled water sources․ The sprinkler’s robust construction and self-cleaning mechanism allow it to handle harsh environments effectively, making it ideal for areas with less-than-pristine water quality while maintaining reliable irrigation results consistently over time․

Installation and Setup Guidelines

Proper installation ensures optimal performance․ Follow step-by-step instructions for aligning and connecting components, adjusting rotor settings, and testing the system․ Ensure all parts are securely connected and calibrated for precise water distribution, adhering to the manual’s guidelines for a smooth setup process and efficient irrigation system operation․

3․1 Step-by-Step Installation Process

Start by preparing the installation site, ensuring the area is clear of debris․ Dig holes for the sprinkler according to the recommended depth and spacing․ Carefully assemble the rotor and nozzle, then install the unit, ensuring proper alignment․ Connect the water supply and test the system for leaks and coverage․ Adjust the rotor settings as needed for optimal performance․ Follow the manual for precise calibration and final checks․

3․2 Adjusting the Rotor for Optimal Water Distribution

Adjust the rotor by locating the adjustment mechanisms, typically small screws or tabs controlling the rotation range․ Set the desired spray pattern, choosing between full-circle or part-circle modes․ Use a screwdriver to make precise adjustments․ Test the water distribution by running a cycle and observing coverage․ Fine-tune as needed for even watering, ensuring optimal performance and water efficiency․

Troubleshooting Common Issues

Address clogged nozzles by cleaning debris․ Adjust rotor settings if spray patterns are uneven․ Replace worn seals to prevent leaks․ Use the provided wrench for adjustments․

4․1 Identifying and Resolving Common Problems

Identify issues like uneven watering or rotor malfunction․ Inspect nozzles for clogs and clean them regularly․ Adjust rotor settings using the provided wrench․ Replace worn-out seals to prevent leaks․ Ensure proper installation and alignment for optimal performance․ Regular maintenance helps maintain efficiency and extends the sprinkler’s lifespan․ Refer to the manual for detailed troubleshooting steps and solutions․

4․2 DIY Fixes for Improved Performance

Clean nozzles and filters to ensure proper water flow․ Use the provided wrench to adjust rotor settings for even coverage․ Replace worn-out seals to eliminate leaks․ Inspect and clean the rotor gear for debris buildup․ Regular DIY maintenance enhances performance and extends the lifespan of the sprinkler system․ These simple fixes ensure optimal irrigation results without professional assistance․

Maintenance and Care Tips

Regularly inspect and clean nozzles to ensure proper water flow․ Check for debris in the rotor and gear․ Perform routine lubrication and replace worn parts promptly to maintain efficiency and longevity․

5․1 Regular Maintenance for Longevity

Regular maintenance ensures the longevity of the Rain Bird Maxi-Paw 2045A․ Clean the nozzles and filters to prevent clogging․ Inspect and replace worn-out seals to avoid leaks․ Lubricate moving parts annually to maintain smooth operation․ Check the rotor for debris and ensure proper alignment for even water distribution․ Schedule seasonal inspections to prepare for extreme weather conditions, ensuring optimal performance year-round․

5․2 Best Practices for Cleaning and Upkeep

Regularly clean the Maxi-Paw 2045A’s nozzles and filter to maintain water flow․ Use a soft brush to remove dirt without damaging components․ Flush the system seasonally to clear debris․ Apply silicone-based lubricant to moving parts for smooth operation․ Store the sprinkler in a dry place during winter to prevent corrosion․ Follow these practices to ensure consistent performance and extend the sprinkler’s lifespan․

Nozzle Performance and Customization

The Maxi-Paw 2045A utilizes the 5000 Series MPR nozzle chart for precise water distribution․ Customizable nozzles allow users to adjust flow rates and patterns for tailored irrigation needs․

6․1 Understanding the 5000 Series MPR Nozzle Chart

The 5000 Series MPR Nozzle Chart provides detailed flow rates and pressure specifications for the Maxi-Paw 2045A․ It helps users select the right nozzle for their irrigation needs, ensuring efficient water distribution․ By referencing this chart, users can optimize performance and achieve uniform coverage, making it an essential tool for system customization and maintenance․

6․2 Customizing Water Distribution with Additional Nozzles

Additional nozzles for the Maxi-Paw 2045A allow users to customize water distribution patterns․ By selecting from a range of optional nozzles, users can adjust flow rates and coverage areas to suit specific landscaping needs․ This customization enhances efficiency, reduces water waste, and ensures uniform irrigation across different zones, making it ideal for tailored irrigation systems․

Comparison with Other Rain Bird Models

The Maxi-Paw 2045A stands out for its superior performance in dirty water and durability․ It offers full-circle or part-circle functionality, making it ideal for medium to large areas, surpassing other models like the Mini-Paw in range and versatility․

7․1 Differences Between Maxi-Paw and Mini-Paw

The Maxi-Paw 2045A is designed for medium to large areas, offering superior performance in dirty water conditions, while the Mini-Paw is better suited for smaller spaces with cleaner water․ The Maxi-Paw features a 8-inch pop-up height and higher flow rate (1․5–8․4 GPM), making it ideal for larger irrigation needs compared to the Mini-Paw, which is more compact and designed for smaller-scale applications․

7․2 Unique Features of the 2045A Model

The 2045A model stands out with its full- or part-circle pop-up rotor, offering versatile water distribution․ It features straight-through flow for superior performance in dirty water and comes with five standard nozzles, allowing customization․ Its powerful throw ensures uniform watering and maximum spacing, while low pressure loss enhances efficiency․ This model is designed for medium to large areas, providing reliable and efficient irrigation solutions․

Warranty and Customer Support

Rain Bird offers a comprehensive warranty for the Maxi-Paw 2045A, ensuring coverage for defects․ Their customer support provides access to manuals, troubleshooting guides, and expert assistance through their dynamic support center․

8․1 Warranty Information for the Maxi-Paw 2045A

Rain Bird provides a limited warranty for the Maxi-Paw 2045A, covering defects in materials and workmanship․ The warranty period varies by product and region, typically spanning several years․ For specific details, users should refer to the official Rain Bird website or contact customer support․ Proper registration and maintenance are often required to uphold warranty benefits․

8․2 Accessing Rain Bird Customer Support Resources

Rain Bird offers extensive customer support resources for the Maxi-Paw 2045A, accessible through their official website․ The Support Center provides manuals, literature, and instructional videos, ensuring comprehensive guidance․ Additional tools like the Impact Troubleshooting Guide and the 5000 Series MPR Nozzle Performance Chart are available for optimal system performance․ Customers can easily access these resources online, facilitating efficient problem-solving and maintenance․

Environmental Considerations

The Rain Bird Maxi-Paw 2045A promotes water conservation through efficient irrigation, reducing waste․ Its design handles dirty water conditions, ensuring optimal performance while conserving this vital resource effectively․

9․1 Water Conservation Tips Using the Maxi-Paw

Use the Rain Bird Maxi-Paw 2045A to optimize water usage by adjusting the rotor for part-circle operation, reducing unnecessary watering․ Install the recommended 5000 Series MPR nozzles for uniform distribution․ Regularly inspect and maintain the system to prevent leaks and ensure efficient performance, conserving water while maintaining healthy landscapes․

9․2 Impact of Proper Installation on Water Efficiency

Proper installation of the Rain Bird Maxi-Paw 2045A ensures optimal water efficiency by preventing overwatering and promoting uniform distribution․ Correct rotor adjustment and nozzle installation minimize water waste, while strategic system design maximizes coverage․ Regular maintenance of the sprinkler, as outlined in the manual, further enhances water conservation, ensuring the system operates at peak efficiency and reduces unnecessary water usage․

The Rain Bird Maxi-Paw 2045A manual provides comprehensive guidance for optimal irrigation․ Its durable design and efficient performance make it a top choice for water management and conservation․

10․1 Summary of Key Takeaways

The Rain Bird Maxi-Paw 2045A manual provides essential guidance for installation, operation, and maintenance․ It covers key features like full- or part-circle functionality and superior performance in dirty water conditions․ Proper setup and regular upkeep ensure optimal water distribution and system longevity․ Understanding the 5000 Series MPR Nozzle Chart and customization options enhances irrigation efficiency․ Troubleshooting tips and DIY fixes improve performance and extend product life․

10․2 Final Thoughts on the Rain Bird Maxi-Paw 2045A

The Rain Bird Maxi-Paw 2045A is a reliable and durable sprinkler system designed for efficient irrigation․ Its robust construction and versatile features make it ideal for various water conditions․ With proper installation and maintenance, it ensures optimal performance and longevity․ This sprinkler is a valuable investment for maintaining lush, healthy landscapes while conserving water effectively․

dymo letratag lt 100h user guide

Product Overview

The Dymo LetraTag LT-100H is a portable, user-friendly label maker designed for home or office use. It features thermal printing technology, a monochrome display, and battery operation, making it ideal for creating customizable labels on various materials, including paper, nylon, and more, with ease and convenience;

1.1 Key Features of the Dymo LetraTag LT-100H

The Dymo LetraTag LT-100H is a portable label maker with a monochrome display, thermal printing technology, and battery operation. It supports 12mm-wide labels, offering five font styles and the ability to store up to nine labels. The device features a built-in cutter for easy label trimming and includes functional keys for formatting text. Its compact design makes it ideal for both home and office use, while its user-friendly interface ensures straightforward label creation. The LT-100H is compatible with various label materials, including paper, nylon, and metallic tapes.

1.2 Compatibility and Usage Scenarios

The Dymo LetraTag LT-100H is compatible with 12mm-wide label cassettes, supporting paper, nylon, and metallic labels. Its portability and battery operation make it suitable for home, office, or industrial environments. The device is ideal for organizing files, labeling cables, or marking storage containers. Its ease of use and versatility allow it to adapt to various labeling needs, ensuring efficient and professional results in different settings.

Getting Started

Unbox and set up your Dymo LetraTag LT-100H by inserting the label cassette, selecting your language, and setting the date and time for a smooth start.

2.1 Unboxing and Initial Setup

Begin by carefully unboxing the Dymo LetraTag LT-100H. Inside, you’ll find the label maker, a label cassette, user manual, and batteries. Insert the batteries following the diagram on the compartment. Next, locate a flat surface to place the device. Ensure all components are included and undamaged. Familiarize yourself with the buttons and display. Proceed to insert the label cassette as instructed in the next section for a seamless setup experience.

2.2 Inserting the Label Cassette

To insert the label cassette, open the compartment by sliding it open from the top. Carefully remove the cassette from its packaging and ensure the label roll is properly seated. Align the cassette with the guides inside the compartment, gently pushing it in until it clicks. Close the compartment securely. Ensure the label feeds correctly by testing with a short print. Always handle the cassette by the edges to avoid damage.

2.3 Selecting a Language

Selecting a language on the Dymo LetraTag LT-100H is straightforward. Use the arrow keys to navigate to the language menu. Scroll through the options and press the confirmation key to choose your preferred language. The device will confirm the selection and display it on the screen. Ensure the language is correctly set before creating labels to avoid formatting issues. The selected language will apply to all subsequent label creations until changed. This feature ensures clear and accurate label text customization.

2.4 Setting the Date and Time

To set the date and time on the Dymo LetraTag LT-100H, navigate to the settings menu using the arrow keys. Select the date and time option, then use the arrow keys to adjust the values. Choose from formats like MM/DD/YYYY or DD/MM/YYYY. After setting, press the confirmation key to save. The device will update and display the new date and time. This feature is useful for date-stamping labels, ensuring accuracy and consistency in your labeling tasks. The settings will remain until manually changed.

Label Creation

Enter text for simple labels using the keyboard, then format using functional keys. Create custom labels with ease, selecting from various styles and options for professional results.

3.1 Entering Text for Simple Labels

To create a simple label, type your desired text using the keyboard. The display will show your input, allowing you to preview before printing. After entering, use functional keys to format text or add symbols. The LT-100H supports various label sizes and types, ensuring versatility for different needs. Once satisfied, press the print key to produce your label. This straightforward process makes it easy to generate clear, professional-looking labels quickly and efficiently for any task. The device handles multiple materials, including paper and nylon labels, with ease.

3.2 Using Functional Keys for Formatting

The Dymo LetraTag LT-100H features functional keys that enable text formatting, such as bold, italic, and underline. Users can also adjust font sizes and toggle between uppercase and lowercase letters. Special characters and symbols can be accessed via dedicated keys, enhancing customization. These tools allow for creativity and precision in label design, ensuring your labels stand out and meet specific formatting requirements. The intuitive interface makes it easy to explore and apply various formatting options to suit your needs.

Customization Options

The Dymo LetraTag LT-100H offers multiple customization options, including font styles, sizes, and the ability to add symbols and special characters. Users can also toggle between uppercase and lowercase text, enhancing label personalization and versatility for various applications. These features ensure labels are both functional and visually appealing, catering to different needs and preferences.

4.1 Font Styles and Sizes

The Dymo LetraTag LT-100H allows users to customize labels with various font styles and sizes. By using the functional keys, you can easily switch between bold, italic, or standard fonts. The device also supports multiple font sizes, enabling you to adjust text to fit different label sizes or emphasize specific information. This feature enhances readability and allows for more creative and professional-looking labels, catering to both personal and professional labeling needs effectively.

4.2 Adding Symbols and Special Characters

The Dymo LetraTag LT-100H allows users to enhance labels by adding symbols and special characters. Using the functional keys, you can access a variety of symbols, such as arrows, icons, and punctuation marks. Simply navigate through the menu, select the desired symbol, and it will appear on the display. This feature is ideal for creating visually appealing and informative labels, ensuring your text stands out and conveys the intended message clearly and efficiently.

Printing Options

The Dymo LetraTag LT-100H supports printing on various label types, including paper, plastic, iron-on, and metallic labels. It uses 12mm label cassettes, offering flexibility in size and material.

5.1 Choosing Label Sizes and Styles

The Dymo LetraTag LT-100H offers flexibility in label sizes and styles, supporting 12mm wide labels in various materials, including paper, plastic, iron-on, and metallic. Users can select from multiple cassette options, each designed for specific applications. The printer allows customization of label appearance, with options for different fonts, text sizes, and formats. This versatility makes it ideal for organizing, crafting, or professional use, ensuring labels are both functional and visually appealing. The LT-100H is compatible with Dymo LetraTag (LT) cassettes, providing a wide range of choices for diverse needs.

5.2 Printing on Different Label Types

The Dymo LetraTag LT-100H supports various label types, including paper, plastic, iron-on, and metallic labels, offering versatility for different applications. Paper labels are ideal for general use, while plastic labels are durable and suitable for harsh environments. Iron-on labels are perfect for fabric, and metallic labels provide a professional, polished look. The printer uses thermal printing technology to ensure crisp text and graphics on all label types. Compatibility with 12mm-wide LT cassettes ensures a wide range of options for diverse labeling needs.

Maintenance and Troubleshooting

Regularly clean the printer to maintain performance. Troubleshoot common issues like jams or print quality problems. Refer to the user manual for detailed guidance and solutions for optimal results.

6.1 Cleaning the Printer

To maintain your Dymo LetraTag LT-100H, clean it regularly. Turn off the printer and unplug it. Use a soft, dry cloth to wipe the exterior and interior, removing dust or debris. For stubborn dirt, dampen the cloth with water, but avoid moisture inside the printer. Gently wipe the print head and label path. Allow all parts to dry completely before turning it on again. Regular cleaning ensures optimal performance and prevents jams or print quality issues.

6.2 Resolving Common Issues

For label jams, turn off the printer, remove the cassette, and gently pull out the jammed label. If print quality is poor, clean the print head with a soft cloth. Low battery warnings indicate it’s time to replace or recharge. If the printer doesn’t power on, check battery connections and ensure they are correctly installed. Refer to the user manual for detailed troubleshooting steps to address these and other common issues effectively.

Accessories and Supplies

The Dymo LetraTag LT-100H uses compatible label cassettes in various sizes and materials. Additional supplies include replacement batteries and instructional guides for optimal performance and maintenance.

7.1 Compatible Label Cassettes

The Dymo LetraTag LT-100H uses LT series label cassettes, available in various widths and materials. These include standard paper labels, durable nylon, and iron-on options. Each cassette is designed for easy insertion and ensures high-quality printing. Popular sizes include 12mm widths, offering versatility for different labeling needs. The cassettes are widely available, making it convenient to replenish supplies and maintain consistent label production.

7.2 Replacing the Battery

Replacing the battery in your Dymo LetraTag LT-100H is a straightforward process. First, locate the battery compartment, typically found at the bottom or back of the device, and open it by sliding or releasing the latch. Remove the old batteries carefully, ensuring not to mix types or orientations. Insert the new batteries according to the polarity markings, close the compartment, and test the device; Proper disposal of old batteries is recommended, and consulting the user guide or contacting support can address any issues.

Additional Resources

Access the Dymo LetraTag LT-100H user manual and quick start guide for detailed instructions. Visit the official Dymo website for downloads, support, and label purchasing options.

8.1 Downloading the User Manual

To download the Dymo LetraTag LT-100H user manual, visit the official Dymo website. Navigate to the support section and search for your model. Select the manual link to download the PDF file. This guide provides comprehensive instructions for setup, usage, and troubleshooting. Ensure you have a PDF reader installed to view the document. The manual is available in multiple languages, including English, and is free to access.

8.2 Accessing Online Support

For additional assistance, visit the official Dymo website and navigate to the support section. Here, you can access FAQs, troubleshooting guides, and contact options for technical help. The site also offers downloadable resources and a community forum for user discussions. If you encounter issues, use the online contact form or live chat for direct support from Dymo experts. This ensures you can resolve any problems efficiently and continue using your LetraTag LT-100H effectively.