The Nikon D700 manual is a comprehensive guide essential for understanding and mastering the camera’s features, providing detailed insights into its operation and capabilities for photographers of all levels․

Overview of the Nikon D700
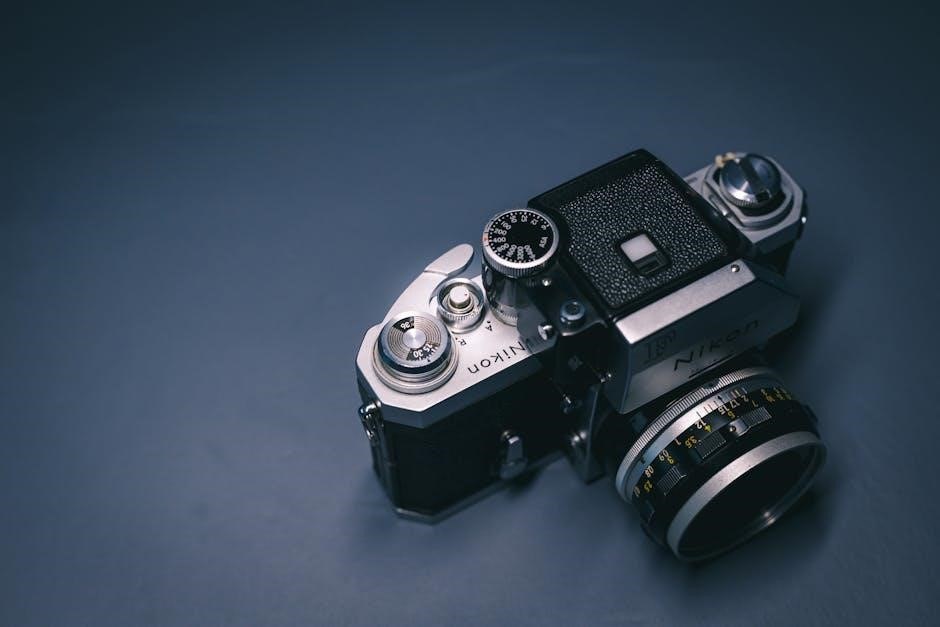
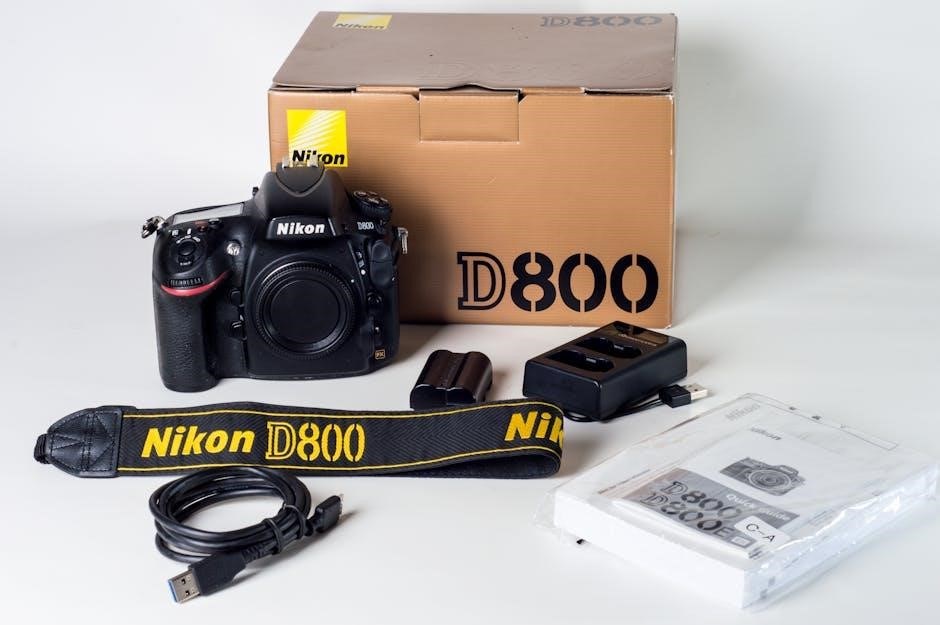
The Nikon D700 is a high-performance DSLR camera designed for professional and enthusiast photographers․ It features a 12․1-megapixel full-frame CMOS sensor, delivering exceptional image quality with precise detail and rich tonal range․ The camera supports a wide ISO range of 200-6400, extendable to 25600, ensuring versatility in various lighting conditions․ With its robust weather-sealed body and intuitive controls, the D700 offers a reliable shooting experience․ It also supports advanced autofocus systems and is compatible with a wide range of Nikon lenses and accessories, making it a versatile tool for diverse photography needs․
Importance of the Manual for Photographers
The Nikon D700 manual is essential for photographers to unlock the camera’s full potential․ It provides detailed insights into advanced features, customization options, and troubleshooting tips, ensuring users can optimize their shooting experience․ By understanding the manual, photographers can master complex settings, improve workflow efficiency, and enhance creativity․ It serves as a comprehensive guide for both beginners and professionals, helping them navigate the camera’s capabilities confidently․ Regularly referencing the manual ensures photographers stay updated on best practices and can fully leverage the D700’s powerful tools to achieve exceptional results in various photography scenarios․

Accessing the Nikon D700 Manual
Access the Nikon D700 manual via Nikon’s official website, the Nikon Manual Viewer 2 app, or third-party sources for comprehensive camera guidance․
Downloading from Nikon’s Official Website
Downloading the Nikon D700 manual from Nikon’s official website is a straightforward process․ Visit Nikon’s support page, select your camera model, and navigate to the manuals section․ Choose your preferred language and download the PDF file․ This ensures you access the most accurate and up-to-date guide․ The manual is comprehensive, covering all camera functions, settings, and troubleshooting tips․ It’s a reliable source for understanding your D700’s full potential․ Always prefer the official website to avoid third-party software risks․ The manual is also compatible with various devices, making it easy to reference anytime, anywhere․ This method guarantees authenticity and clarity․
Using the Nikon Manual Viewer 2 App
The Nikon Manual Viewer 2 App provides a convenient way to access the D700 manual digitally․ Available for both iOS and Android, this app allows users to view and search the manual offline․ It offers a user-friendly interface with zoom functionality for detailed sections․ The app is particularly useful for quick reference in the field or during shoots․ It ensures that photographers always have the guide handy, eliminating the need to carry a physical copy․ Regular updates keep the content current, making it a reliable tool for mastering the Nikon D700’s features and settings anytime, anywhere․
Availability on Third-Party Sources
The Nikon D700 manual is also accessible through various third-party websites and forums․ Platforms like Amazon, eBay, and specialized photography forums often host downloadable PDF versions of the manual․ Additionally, enthusiasts and photographers frequently share links to the manual in online communities such as Reddit or DPReview․ While these sources can be convenient, users should exercise caution to ensure the files are authentic and free from malware․ It’s important to verify the credibility of the source before downloading to avoid potential risks associated with unofficial distributions․

Key Features of the Nikon D700 Manual
The Nikon D700 manual offers detailed explanations of camera functions, shooting modes, autofocus settings, and customization options․ It also includes troubleshooting guides and advanced techniques for enhanced photography․
Shooting Modes Explained
The Nikon D700 manual provides a comprehensive guide to its shooting modes, including Program Auto, Aperture Priority, Shutter Priority, and Manual Mode․ Each mode is explained in detail, highlighting its purpose and best-use scenarios․ Program Auto offers automatic settings with user adjustments, while Aperture Priority allows control over depth of field․ Shutter Priority enables precise control over motion capture, and Manual Mode offers full creative freedom․ The manual also covers Scene Modes, such as Portrait, Landscape, and Close-Up, tailoring camera settings for specific photography genres․ This section helps photographers choose the right mode for their creative vision and shooting conditions․
Understanding Autofocus Settings
The Nikon D700 manual details its advanced autofocus system, offering modes like Single AF, Continuous AF, and Manual Focus․ Single AF locks focus on stationary subjects, while Continuous AF tracks moving ones dynamically․ The camera features 51 autofocus points, with options for single-point, dynamic-area, or 3D tracking AF․ Custom settings allow photographers to fine-tune AF behavior, such as adjusting focus priority or AF-C mode parameters․ The manual explains how to assign autofocus modes to camera buttons and customize focus point selections for enhanced control․ This section empowers users to optimize autofocus performance for various shooting scenarios and achieve precise results․
Customization Options Overview
The Nikon D700 manual highlights extensive customization options, enabling photographers to tailor the camera to their preferences․ Users can assign specific functions to buttons, such as the Fn button or AE-L/AF-L button, streamlining their workflow․ Custom Shooting Banks allow saving personalized settings for quick access in different scenarios․ Additionally, the menu system can be customized to prioritize frequently used options․ These features empower photographers to adapt the camera to their unique shooting styles, enhancing efficiency and creativity․ By leveraging these customization tools, users can optimize their D700 for consistent and professional results in various photographic situations․
Technical Specifications Covered
The Nikon D700 manual details its 12․1MP full-frame CMOS sensor, high-performance EXPEED processor, ISO 200-6400 range, 1/8000th shutter speed, and durable weather-sealed magnesium alloy construction․
Camera Construction and Build
The Nikon D700 manual highlights the camera’s robust magnesium alloy body, designed for durability and resistance to dust and moisture, making it ideal for challenging environments․ The weather-sealed construction ensures reliability in outdoor and harsh conditions, while the ergonomic design provides a comfortable grip and intuitive control layout․ Built to professional standards, the D700 combines lightweight yet sturdy materials, ensuring long-lasting performance and reliability for photographers․ This section emphasizes the camera’s physical integrity and build quality, essential for withstanding heavy use and demanding shooting situations․
Image Sensor and Processor Details
The Nikon D700 manual details its 12․1-megapixel full-frame CMOS image sensor, delivering high-resolution images with exceptional detail and color accuracy․ Paired with Nikon’s EXPEED image processing engine, the camera ensures efficient noise reduction and optimized image quality across its ISO range․ The sensor captures a wide dynamic range, preserving highlights and shadows, while the EXPEED processor enhances speed and precision in image rendering․ This combination enables photographers to achieve professional-grade results, with crisp and vibrant imagery in various lighting conditions, making it a robust tool for capturing life’s moments with precision and clarity․
ISO Range and Noise Reduction
The Nikon D700 manual highlights its ISO range of 200 to 6400, extendable to 25600 in expanded mode, offering flexibility in diverse lighting conditions․ The camera employs advanced noise reduction technologies to minimize grain and maintain image clarity, especially in low-light scenarios․ The EXPEED processor optimizes noise handling, ensuring crisp details are preserved․ Photographers can adjust noise reduction levels to balance detail retention and smoothness․ This feature is particularly useful for capturing high-quality images in challenging environments, making the D700 versatile for both professional and enthusiast photographers seeking consistent results across various lighting setups and creative projects․

Camera Settings and Configuration
The Nikon D700 manual guides photographers through configuring camera settings, from initial setup to advanced customization, ensuring optimal performance tailored to individual preferences and shooting styles․
Navigating the Menu System
The Nikon D700 manual details a streamlined menu system designed for intuitive navigation․ Photographers can access shooting modes, custom settings, and playback options through a logical structure․ The multi-selector allows easy scrolling, while the OK button confirms selections․ Sub-menus are organized by function, reducing complexity․ Customization options enable users to tailor settings to their workflow․ The manual emphasizes using the menu’s help system for quick explanations of advanced features․ This ensures photographers can efficiently adjust settings without missing crucial details․ Mastering the menu system is essential for unlocking the D700’s full potential and enhancing creative control during shoots․
Setting Up the Camera for First Use
Setting up the Nikon D700 for the first time involves several key steps․ Begin by inserting the battery and charging it fully․ Attach the strap and monitor cover for protection․ Format the memory card in the camera to ensure compatibility․ Set the language, date, and time in the setup menu; Mount a lens securely, ensuring it clicks into place․ Finally, set the shooting mode to Program Mode for automatic settings․ These initial steps ensure the camera is ready for use, allowing photographers to focus on capturing images immediately․ Proper setup is crucial for a smooth shooting experience․
Configuring Custom Shooting Profiles
Configuring custom shooting profiles on the Nikon D700 allows photographers to tailor settings to specific shooting scenarios․ Access the menu system and navigate to the “Shooting Menu․” Select “Custom Shooting Profile” and choose from predefined options or create a new profile․ Adjust settings such as ISO sensitivity, white balance, and autofocus modes to suit your needs․ Save the profile for quick access during future shoots․ This feature enhances workflow efficiency and ensures consistent results across similar photography situations․ Custom profiles can be renamed and stored for easy recall, making it ideal for photographers who frequently switch between different styles or environments․

Customization and Personalization
The Nikon D700 allows extensive customization, enabling photographers to tailor camera functions to their workflow․ Assigning functions to buttons and customizing shooting profiles simplifies operations, enhancing efficiency and personalization․
Assigning Functions to Buttons
The Nikon D700 manual explains how to assign custom functions to buttons, enhancing workflow efficiency․ Users can configure the Fn button, preview button, and AE-L/AF-L button to perform specific tasks like RAW formatting, metering modes, or bracketing․ This customization allows photographers to streamline operations, reducing time spent navigating menus․ The manual provides step-by-step guidance on button assignment, ensuring users can tailor camera controls to their shooting style․ This feature is particularly useful for professionals seeking quick access to frequently used settings, making the camera more intuitive and personalized for their needs․
Creating Custom Shooting Banks
The Nikon D700 manual details how to create custom shooting banks, allowing photographers to save personalized camera settings․ These banks store configurations like ISO, white balance, and autofocus modes, enabling quick access during shoots․ Up to four unique banks can be created, catering to different photography scenarios such as portraits, landscapes, or low-light conditions․ This feature enhances efficiency by eliminating the need to adjust settings repeatedly․ The manual guides users through the process of naming, saving, and recalling these banks, ensuring seamless adaptability to varying photographic situations and improving overall workflow․
Managing and Saving Custom Settings
The Nikon D700 manual explains how to manage and save custom settings, ensuring photographers can organize their preferences efficiently․ Custom settings can be saved to the camera’s memory, allowing quick recall for consistent results․ The manual details how to access the “Save/Load Settings” option in the menu system, enabling users to store configurations on memory cards or transfer them to a computer․ This feature is ideal for photographers who frequently switch between setups or collaborate with others․ Proper management of these settings ensures streamlined workflow and maintains shooting consistency across different projects and environments․

Troubleshooting Common Issues
The Nikon D700 manual provides guidance for resolving common issues, such as camera malfunctions or unexpected behavior, ensuring photographers can quickly address and fix problems․
Resolving Error Messages
The Nikon D700 manual helps users identify and fix error messages that may appear on the camera’s LCD screen․ Common errors include lens communication issues, memory card problems, or sensor cleaning notifications․ The manual provides step-by-step guidance to diagnose and resolve these errors․ For example, it explains how to check lens connections, format memory cards, or clean the image sensor safely․ Additionally, it advises resetting the camera to default settings if errors persist․ By following the manual’s troubleshooting tips, photographers can quickly restore their camera to proper functioning and minimize downtime during shoots․ Regular firmware updates are also recommended to prevent recurring issues․
Addressing Autofocus Problems
The Nikon D700 manual provides detailed solutions for common autofocus issues, such as inaccurate focus acquisition or slow performance; It recommends cleaning the lens and image sensor to ensure proper communication between the camera and lens․ Additionally, the manual suggests checking AF mode settings and customizing AF-C (continuous autofocus) parameters for better subject tracking; If problems persist, resetting the camera to default settings or updating the firmware may resolve the issue․ Users are also advised to test different lenses to isolate the problem․ Persistent autofocus errors may require professional servicing to ensure optimal performance․
Fixing Exposure and Metering Issues
The Nikon D700 manual offers solutions for exposure and metering problems, ensuring accurate image capture․ It suggests resetting exposure compensation and checking metering modes to match lighting conditions․ Users can also use the histogram to verify exposure levels and adjust settings accordingly․ Bracketing shots for HDR photography is another recommended approach to handle high-contrast scenes․ Cleaning the image sensor and ensuring proper lens calibration can also resolve metering inaccuracies․ If issues persist, resetting the camera to default settings or updating firmware may help․ The manual emphasizes experimenting with white balance and ISO settings for optimal results․ Properly addressing these issues ensures consistent image quality․

Advanced Techniques and Features
The Nikon D700 manual details advanced techniques like manual focus precision, Live View for composition, and HDR bracketing to enhance creative control and image quality;
Mastering Manual Focus
Mastering manual focus on the Nikon D700 allows for precise control over your shots, especially in situations where autofocus may struggle․ The manual provides detailed guidance on using the focus ring effectively and understanding focus peaking in Live View․ It also explains how to optimize focus accuracy for macro, portrait, and low-light photography․ Techniques such as using the DOF preview button and fine-tuning focus are covered, ensuring sharp results․ The manual emphasizes the importance of practice and understanding lens behavior to achieve professional-quality images consistently․
Using Live View Effectively
Using Live View on the Nikon D700 enhances your shooting experience by allowing precise composition and focus control․ The manual details how to activate Live View and adjust settings like ISO and white balance in real-time․ It also explains how to use the histogram for optimal exposure preview․ The OK button enables zooming in for focus accuracy, perfect for macro or portrait photography․ Tips on minimizing camera shake and utilizing the Virtual Horizon for leveling are also provided․ Mastering these techniques ensures sharper images and improved creative control during your shooting sessions․
Bracketing for HDR Photography
Bracketing for HDR photography on the Nikon D700 allows capturing multiple exposures of a scene to combine into a single image with enhanced dynamic range․ The manual guides setting up bracketing via the menu system, enabling 2-9 shots with adjustable exposure intervals․ It explains how to use the camera’s built-in functionality for automatic bracketing and offers tips for tripod use to ensure alignment․ The D700 also supports AE bracketing for up to 3 frames, ideal for creating HDR images in post-processing․ This feature is especially useful for high-contrast scenes, ensuring detail retention in both shadows and highlights for professional results․
Resources for Further Learning
Nikon’s official website offers detailed guides, tutorials, and workshops․ Online forums and communities provide valuable insights and tips․ Experimentation and practice enhance mastery of the D700․
Online Tutorials and Guides
Online tutorials and guides provide in-depth insights into mastering the Nikon D700․ Nikon’s official website offers comprehensive video guides and PDF resources․ YouTube channels dedicated to photography feature step-by-step D700 tutorials․ Websites like Udemy and Skillshare host courses on DSLR photography, with modules tailored to the D700; These resources cover topics such as autofocus customization, exposure control, and RAW image processing․ They cater to both beginners and advanced photographers, ensuring a smooth learning curve․ By leveraging these online tools, users can enhance their technical skills and unlock the full potential of their camera․
Community Forums and Discussions
Community forums and discussions are invaluable resources for Nikon D700 users, offering a platform to share experiences, ask questions, and learn from fellow photographers․ Websites like Nikonians, DPReview, and Reddit’s r/Nikon host active communities where users discuss gear, techniques, and troubleshooting tips․ These forums often include detailed threads on specific features of the D700, such as custom settings or autofocus optimization; Engaging with these communities provides opportunities for peer-to-peer learning, staying updated on best practices, and gaining insights into lesser-known features of the camera․ They also foster collaboration and inspiration among photographers of all skill levels․
Recommended Reading and Workshops
To deepen your understanding of the Nikon D700, consider enrolling in workshops or photography courses that focus on DSLR cameras․ Nikon often hosts official workshops, providing hands-on experience with advanced features․ Additionally, books like “Understanding Exposure” by Bryan Peterson offer insights into mastering lighting and composition․ Online platforms like Udemy and Coursera feature courses tailored to Nikon cameras․ Joining photography communities or forums can also connect you with experts and enthusiasts who share tips and techniques․ These resources complement the manual, helping you unlock the full potential of your Nikon D700․
Best Practices for Using the Manual
Navigating the Manual Effectively
Use the table of contents or index to quickly locate specific sections, ensuring efficient access to the information you need for the Nikon D700․
Understanding Feature Interactions
Experiment with settings to understand how different features interact, as this helps in optimizing camera performance for various photography scenarios and personal preferences․
Regularly Updating Your Knowledge
Stay informed about firmware updates and new techniques by periodically reviewing the manual and official Nikon resources to maximize your D700’s capabilities․
The Nikon D700 manual is designed to be user-friendly, with a clear structure that helps photographers of all skill levels․ Start by familiarizing yourself with the table of contents and index, which provide quick access to specific topics․ Digital versions often include a search function, allowing you to instantly locate terms or features․ Use bookmarks or tabs to mark important sections for easy reference․ For beginners, focus on the basics before diving into advanced settings․ By systematically exploring each section, you’ll gain a deeper understanding of the camera’s capabilities and improve your photography skills over time․
Understanding how features interact in the Nikon D700 is crucial for optimizing its performance․ The manual explains how settings like ISO, autofocus, and metering modes influence each other․ For instance, increasing ISO can affect noise levels, while autofocus settings may impact metering accuracy․ By grasping these relationships, photographers can make informed decisions to achieve desired results․ The manual provides detailed insights and diagrams to help users visualize these interactions, ensuring they can leverage the camera’s capabilities effectively․ This knowledge enhances creativity and technical precision, allowing photographers to capture images with greater control and consistency․
Staying informed about the latest techniques and updates is crucial for maximizing the Nikon D700’s potential․ Nikon frequently releases firmware updates that improve functionality and fix issues․ Visit Nikon’s official website periodically to check for updates and download the latest manual versions․ Additionally, explore online forums, workshops, and tutorials that focus on the D700․ Engaging with photography communities can provide insights and tips from experienced users․ Regular learning ensures you stay up-to-date with best practices and new features, helping you refine your skills and capture exceptional images consistently․
Mastery of the Nikon D700 begins with understanding its manual, unlocking creative potential and technical precision․ Continuous exploration of its features ensures photographers can fully harness its capabilities․
Summarizing Key Takeaways
The Nikon D700 manual is an essential resource for unlocking the camera’s full potential, offering detailed insights into its features and operation․ It provides a comprehensive guide to shooting modes, autofocus settings, and customization options, enabling photographers to tailor the camera to their needs․ The manual also covers technical specifications, such as the image sensor, processor, and ISO range, ensuring users understand the camera’s capabilities․ By mastering the manual, photographers can enhance their skills, troubleshoot common issues, and explore advanced techniques for capturing stunning images․ Regular review and practice with the manual are key to continuous improvement․
Encouraging Continuous Exploration
Encouraging continuous exploration is key to mastering the Nikon D700․ The camera’s vast features and customizable options invite photographers to experiment and discover new techniques․ By regularly revisiting the manual and exploring lesser-known functions, users can unlock creative potential and enhance their photography skills․ Continuous learning fosters adaptability, allowing photographers to tackle diverse shooting scenarios with confidence․ Each exploration session can reveal new insights, whether it’s refining autofocus accuracy or optimizing custom settings․ Embrace curiosity and make exploration a habit to fully harness the D700’s capabilities and elevate your artistic expression․
Final Thoughts on Mastering the D700
Mastery of the Nikon D700 requires patience, practice, and a deep understanding of its capabilities․ By thoroughly exploring the manual and experimenting with its features, photographers can unlock the camera’s full potential․ The D700’s robust build, excellent image quality, and versatile controls make it a powerful tool for capturing stunning images․ Remember, mastery is a journey, not a destination․ Continuously explore, experiment, and refine your techniques to get the most out of this exceptional camera․ The manual is your guide, but your creativity and dedication will truly bring your photography to life․