Your Hunter fan manual is a comprehensive guide covering installation, operation, troubleshooting, and maintenance. It ensures optimal performance and helps you maximize your fan’s features effectively.
1.1 Importance of Reading the Manual
Reading the Hunter fan manual is crucial for understanding features, installation steps, and maintenance tips. It ensures safe operation, optimal performance, and helps troubleshoot common issues. The manual also provides warranty details and enhances your overall user experience with clear, step-by-step guidance tailored to your specific fan model.
1.2 Overview of Hunter Fan Models
Hunter offers a wide range of ceiling fan models, including the Original, Westover Four Seasons Heater Fan, and Brookline. These models feature various finishes, energy-efficient designs, and smart home integration options. Each model is tailored to meet different needs, ensuring comfort and style for any space, with durable construction and innovative features.
Installation Instructions
Begin by reading the manual thoroughly for safety and success. Unpack and inventory all components. Follow step-by-step guides tailored for Hunter fan models, ensuring proper installation and optimal performance. Always adhere to safety precautions to avoid injury or damage.
2.1 Pre-Installation Checks
Before starting, read the manual carefully to ensure safety and success. Unpack and verify all components are complete and undamaged. Check compatibility with your ceiling type and height. Ensure voltage matches your fan’s requirements. Turn off power at the breaker before beginning installation to prevent electrical hazards.
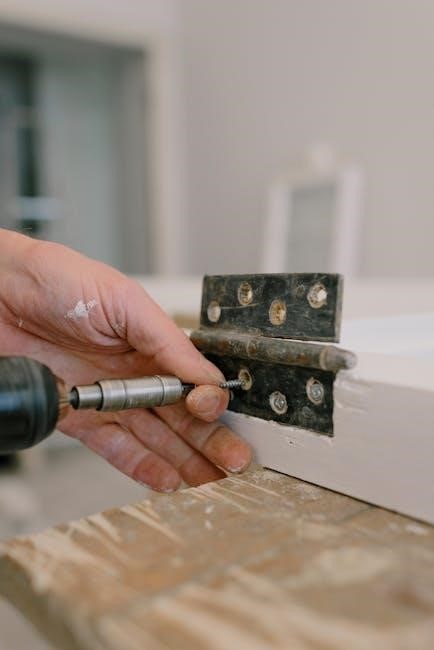
2.2 Step-by-Step Installation Guide
Begin by unpacking and identifying all components. Mount the fan to the ceiling bracket securely. Connect the wires carefully, ensuring proper alignment of black, white, and copper wires. Attach the fan blades and light kit if applicable. Tighten all screws firmly. Finally, test the fan to ensure smooth operation and refer to the manual for troubleshooting.
2.3 Post-Installation Testing
After installation, turn on the fan and test all modes (COOL, DRY, FAN, HEAT) to ensure proper function. Check for adequate airflow and smooth operation. Verify that all accessories, like the remote control, are working correctly. Ensure the fan is balanced and free of wobbling. Proper testing confirms everything operates as intended for optimal performance.
Operating Your Hunter Fan
3.1 Understanding Fan Modes (COOL, DRY, FAN, HEAT)
The Hunter fan offers four modes: COOL for air circulation, DRY to reduce humidity, FAN for ventilation, and HEAT for warmth. Use the remote to switch modes and adjust speeds for customized comfort. Each mode is designed to optimize your space’s climate efficiently, ensuring year-round comfort with ease.
The Hunter fan features four modes: COOL for circulating air, DRY to reduce humidity, FAN for ventilation, and HEAT for warming spaces. Use the remote to select modes and adjust speeds, ensuring comfort year-round. Each mode is designed to optimize your space’s climate efficiently, offering tailored solutions for every season. Customize your experience with ease.
- COOL: Enhances air circulation for a refreshing environment.
- DRY: Reduces moisture to prevent humidity buildup.
- FAN: Provides consistent ventilation for airflow.
- HEAT: Warms your space for cozy comfort during colder months.
3.2 Adjusting Fan Speed Settings
Use the remote control to adjust fan speed settings, optimizing airflow for your comfort. Choose from low, medium, or high speeds. The remote allows seamless control, ensuring the perfect setting for any room condition. Adjusting speed enhances energy efficiency and personalizes your experience. Start with lower speeds and increase as needed for optimal comfort.
- Low Speed: Gentle airflow for quiet operation.
- Medium Speed: Balanced air circulation for everyday use.
- High Speed: Maximum airflow for cooling or ventilation.
3.3 Using the Remote Control
The remote control allows easy operation of your Hunter fan. Press the MODE button to cycle through COOL, DRY, FAN, or HEAT modes. Adjust fan speed using the FAN button, which toggles between low, medium, and high settings. The remote ensures convenient control, enhancing your comfort without leaving your seat. Replace batteries annually for optimal performance.
- MODE Button: Switches between operation modes.
- FAN Button: Adjusts speed settings.
3.4 Troubleshooting Common Issues
Common issues include the fan not turning on or improper mode functioning. Ensure the fan is properly powered and the remote batteries are fresh. Check if the fan is in the correct mode (COOL, DRY, FAN, or HEAT). For blade imbalance, adjust screws or replace worn parts. Clean dust from blades to improve airflow efficiency.
- Premium Support: Visit Hunter’s official website for detailed troubleshooting guides and FAQs.
Maintenance and Cleaning
Regularly clean fan blades with a soft cloth and avoid harsh chemicals. Dust buildup can reduce airflow efficiency. Ensure blades are balanced for smooth operation and to prevent noise. Always turn off power before cleaning or performing maintenance tasks to ensure safety and effectiveness.
- Use a damp cloth for deeper cleaning.
- Avoid using abrasive materials that may damage finishes.
4.1 Regular Cleaning Tips
Regular cleaning ensures your Hunter fan operates efficiently. Use a soft, dry cloth to wipe fan blades and housing. For deeper cleaning, dampen the cloth slightly but avoid harsh chemicals. Always turn off power before cleaning. This prevents dust buildup and maintains airflow efficiency, ensuring optimal performance and longevity of your fan.
- Avoid using abrasive materials that may damage finishes.
- Inspect for dust accumulation regularly, especially in high-usage areas.
- Clean light kits gently to maintain their appearance and functionality.
4.2 Balancing the Fan Blades
To ensure smooth operation, balance your Hunter fan blades using Hunter’s Balance Clip or Kit. Tighten all screws securely and check for wobble. If imbalance persists, adjust the blade positions or replace worn parts. Regular balancing prevents noise and extends motor life, ensuring quiet and efficient performance year-round.
- Use Hunter’s balancing kit for precise adjustment.
- Inspect blades for dust or debris that may cause imbalance.
- Recheck balance after cleaning or relocating the fan.
4.3 Replacing Parts
Replace worn or damaged components with genuine Hunter parts for optimal performance. Ensure power is off before starting. Use a screwdriver to remove screws and gently take out the faulty part. Install the new part securely, tightening all screws evenly. Dispose of old parts responsibly. Refer to the manual for specific instructions and warranty guidelines.
- Always use genuine Hunter replacement parts.
- Turn off power at the circuit breaker before starting.
- Follow manual instructions for precise replacement steps.
Safety Guidelines
Always turn off power at the circuit breaker before installing or servicing your fan. Avoid overloading circuits and ensure all electrical connections are secure. Keep fans out of reach of children and avoid operating them near water or in humid environments without proper protection.
5.1 General Safety Precautions
Always turn off power at the circuit breaker before installation or servicing. Ensure all electrical connections are secure and avoid overloading circuits. Keep fans out of reach of children and operate them only in well-ventilated areas. Never use a fan near water or in humid environments without proper protection. Follow all instructions carefully to prevent serious injury or property damage.
5.2 Handling Electrical Components
Always disconnect power at the circuit breaker before handling electrical components. Verify voltage matches the fan’s specifications. Use insulated tools to prevent electrical shock; Secure all connections tightly to ensure safe operation. Avoid exposing electrical parts to water or moisture, as this can cause damage or safety hazards. Follow all instructions carefully to maintain safety and functionality.

Technical Specifications
Motor types vary between DC and AC for energy efficiency. Power consumption is optimized for performance. Compatible accessories enhance functionality, ensuring your fan meets specific needs and preferences.
6.1 Motor Types and Power Consumption
Hunter fans feature both DC and AC motors, designed for energy efficiency. DC motors offer higher efficiency with lower power consumption, while AC motors provide reliable performance. Both options ensure optimal airflow while minimizing energy use, making them suitable for various settings and preferences.
6.2 Compatible Accessories
Hunter fans support various accessories, such as light kits, extended downrods, and smart home integration modules. These additions enhance functionality, allowing for customizable lighting, improved airflow, and seamless smart home system compatibility, ensuring your fan meets your specific needs and preferences for enhanced performance and aesthetic appeal.

Accessories and Customization
Hunter fans offer a range of accessories and customization options, including light kits, extended downrods, and smart home integration, to enhance functionality and personalize your fan’s appearance.
7.1 Adding Light Kits
Adding light kits to your Hunter fan enhances both functionality and aesthetics. Follow the manual’s step-by-step guide to install compatible light kits safely. Ensure all electrical connections are secure and test the lighting after installation to confirm proper operation. This feature adds ambiance and improves the overall performance of your ceiling fan.
7.2 Extending Downrod Length
Extending the downrod length enhances airflow and aesthetic appeal, especially for high or angled ceilings. Use Hunter-approved extensions for compatibility and safety. Follow the manual’s assembly instructions carefully, ensuring all connections are secure. After installation, check the fan’s balance and operation to maintain optimal performance and stability.
7.3 Smart Home Integration
Hunter fans can seamlessly integrate with smart home systems like Samsung SmartThings or Apple HomeKit. Use compatible smart hubs or Wi-Fi modules for voice control and automation. Ensure your fan model supports smart features and follow manual instructions for setup. This enhances convenience and modernizes your home’s comfort experience.
Understanding Fan Features
Hunter fans offer advanced features like multi-speed settings, reversible operation, and energy-saving modes. Explore COOL, DRY, FAN, and HEAT modes for tailored comfort and efficiency year-round.
8.1 Airflow Efficiency
Hunter fans are designed for superior airflow efficiency, ensuring optimal air circulation. With multi-speed settings and reversible operation, they provide consistent comfort. Advanced blade designs maximize air movement while minimizing energy consumption, making them a reliable choice for year-round performance and energy savings.
8.2 Energy-Saving Modes
Hunter fans feature energy-saving modes like COOL, DRY, and FAN, optimizing power usage. Sleep mode automatically turns off after the AC stops, while Turbo mode boosts airflow efficiency. These modes reduce energy consumption without compromising performance, ensuring eco-friendly operation and lower utility bills.
8.3 Design and Aesthetic Options
Hunter fans offer stylish designs with finishes like Brass and Walnut, blending seamlessly into home decor. They feature sleek profiles and customizable accessories, allowing you to match your fan to any interior style while maintaining functionality and performance.
Warranty and Support
Register your Hunter fan to activate warranty coverage. Contact customer support for troubleshooting or replacement parts. Dedicated assistance ensures your fan operates efficiently and resolves issues promptly.
9.1 Warranty Registration
Registering your Hunter fan warranty ensures coverage and protection. Visit the official website to complete the registration form with your product details. This process activates your warranty, providing extended coverage and dedicated support for repairs or replacements. Proper registration guarantees seamless service and maintains your fan’s performance and longevity.

9.2 Contacting Customer Support
For assistance, visit the official Hunter Fan website and navigate to the support section. Use the provided contact form, phone number, or email to reach their team. Customer support is available to address installation queries, troubleshooting, and repair requests, ensuring your fan operates efficiently and resolving any issues promptly and effectively.

Environmental Benefits
Hunter fans promote energy efficiency and eco-friendly operation. Energy-saving modes and eco-conscious materials reduce environmental impact, making them a sustainable choice for home comfort and air circulation needs.
10.1 Energy Efficiency
Hunter fans are designed with energy efficiency in mind, featuring modes like COOL and FAN that minimize power consumption. Advanced motor technology ensures optimal airflow while reducing energy use, making them eco-friendly and cost-effective solutions for home comfort. Their whisper-quiet operation and energy-saving capabilities contribute to a sustainable and efficient cooling experience year-round.
10.2 Eco-Friendly Materials
Hunter fans utilize eco-friendly materials and sustainable manufacturing practices to minimize environmental impact. Energy-efficient designs and recyclable components reduce waste. Many models are ENERGY STAR certified, ensuring they meet rigorous environmental standards. These practices reflect Hunter’s commitment to creating environmentally responsible products that promote sustainability while delivering exceptional performance and durability for years to come.
11.1 Final Tips for Optimal Performance
Regularly clean your fan blades and balance them for smooth operation. Check for loose parts and ensure proper installation. Refer to your manual for specific maintenance tips. Adjust fan modes seasonally for energy efficiency. Replace worn-out components promptly to maintain performance. By following these guidelines, you’ll enjoy consistent comfort and extend your fan’s lifespan effectively.